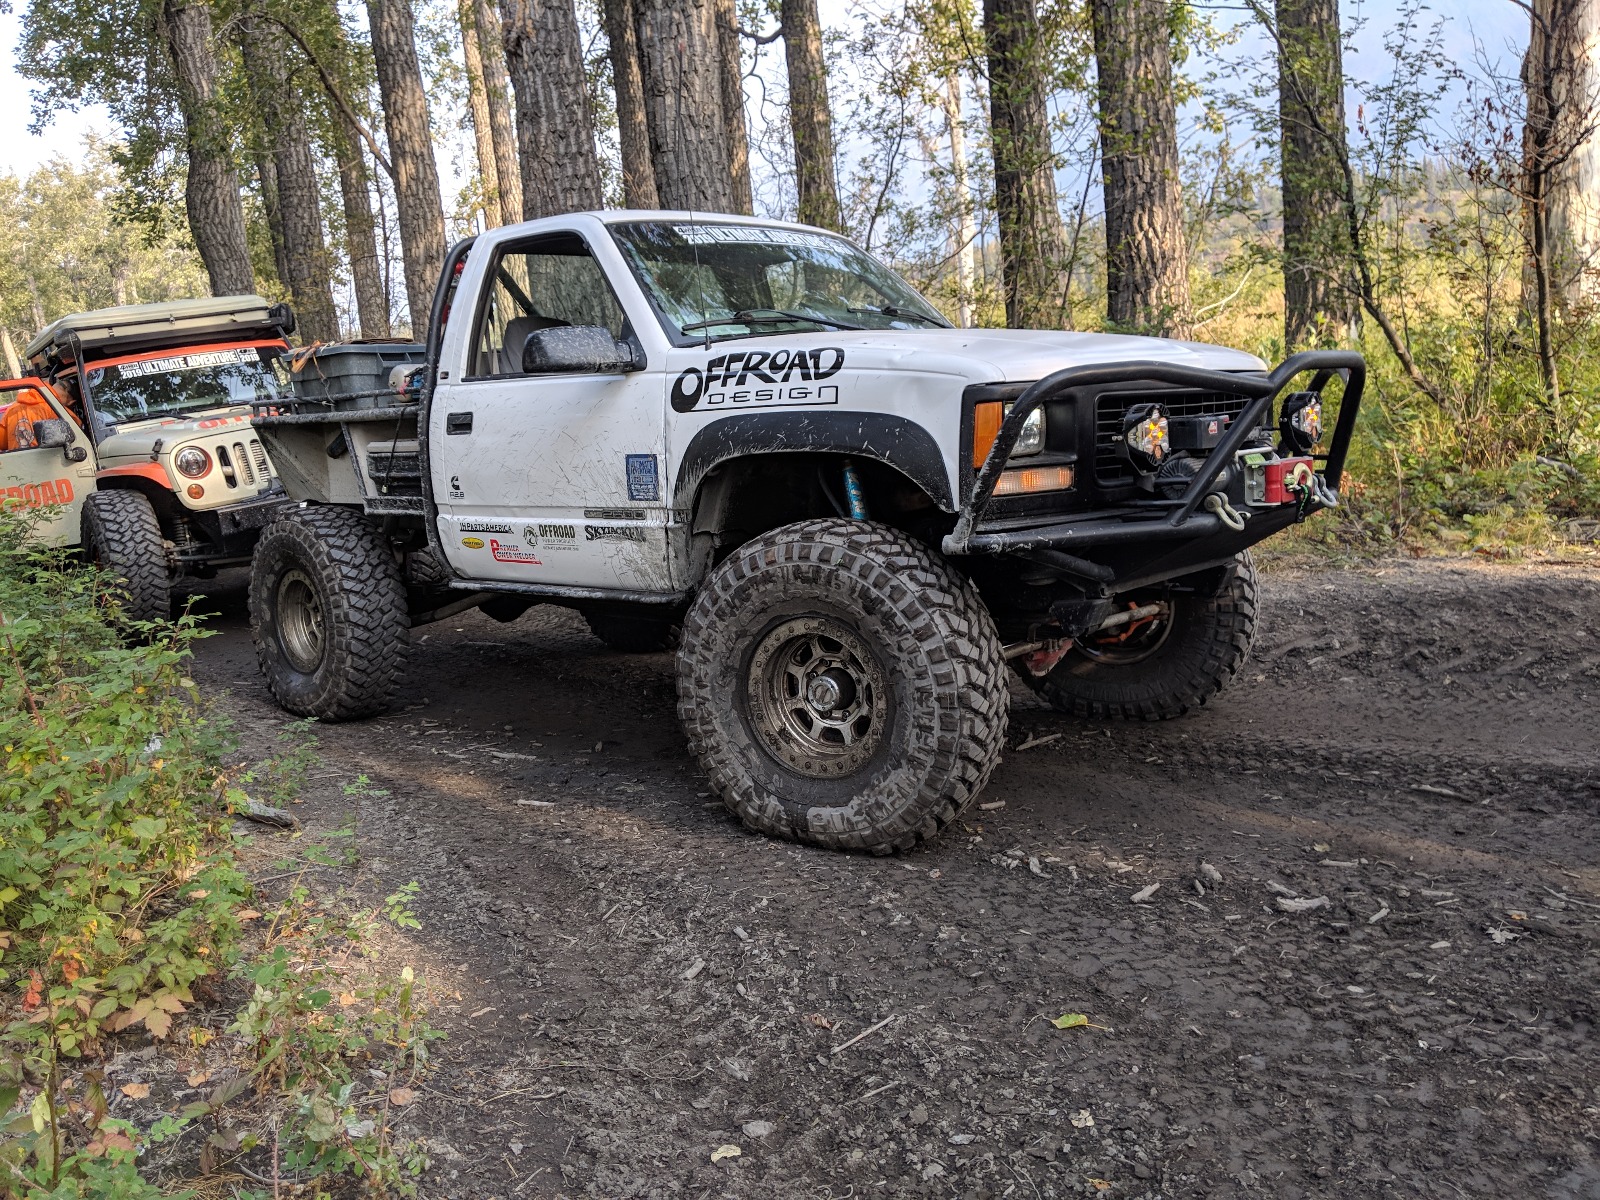
Throw back build thread of the UA2500 from the old Pirate4x4 days
Below is the original text from the build thread copy and pasted here. Some of the text might not make much sense since some of the conversation is missing. To find the whole thread check out HERE
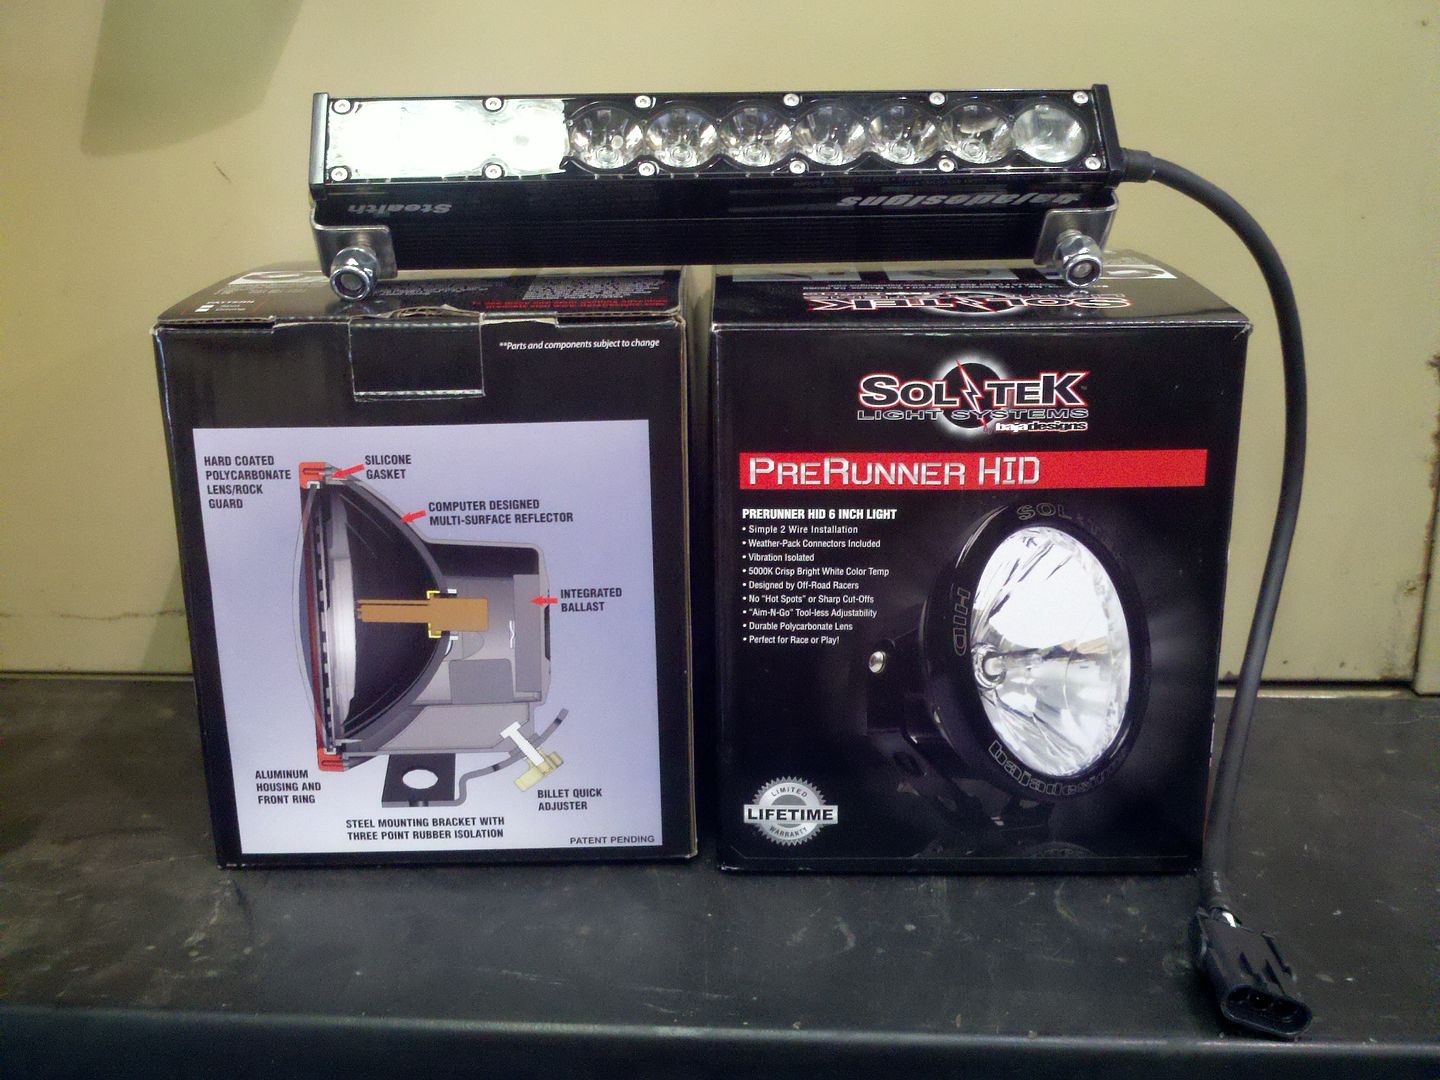
Also you can find the parts we used HERE
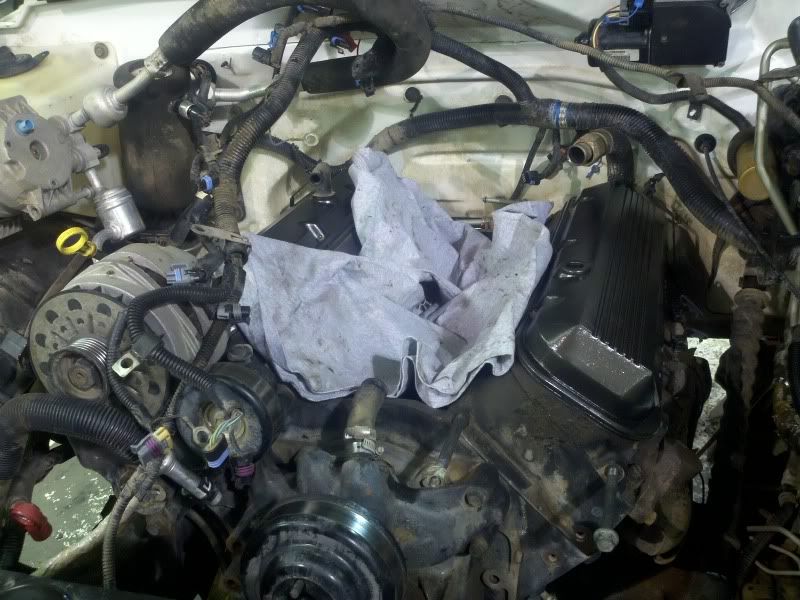
Now the only thing left in the truck is the long block.:shaking:
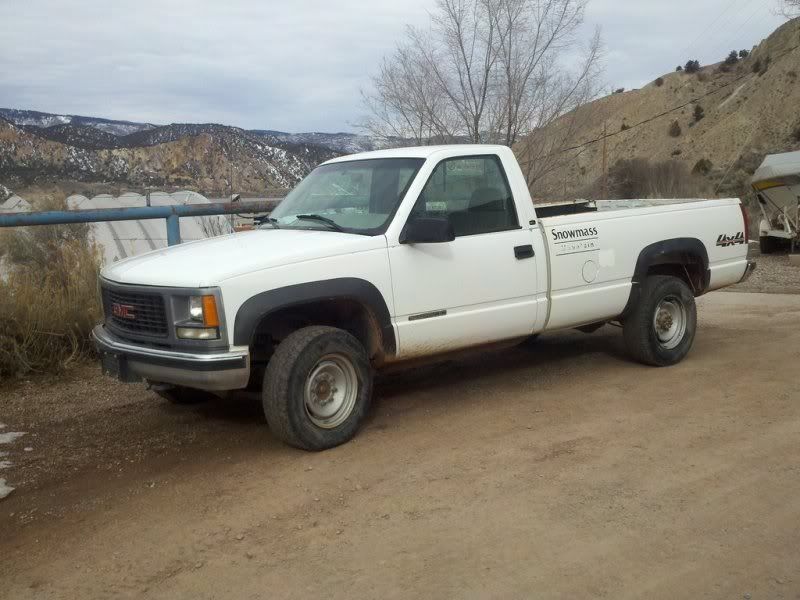
We actually shopped a little for this truck, we wanted the 88-98 type body style with the big block and after our recent headaches with 4L80's we really wanted the NV4500. Plus I've never wheeled a properly set up truck (low geared) with a manual so it'll be fun driving something different. We wanted a running driving truck so that we wouldn't be building an engine and transmission and we kind of achieved that.
Turns out the 454 had the standard manifold leaks and some exhaust leaks so we're fixing that. At least it's easy to just fix stuff and put it back where we found it rather than building from scratch. We are resisting the urge to add a cam, headers and custom exhaust since we have about 3 weeks to put this thing back on the road.
The trans and clutch were OK but it's hard to not put in new stuff when the trans is held in with a few bolts. Seems the throwout bearing/slave system is a problem on these trucks too so we'll just put a new one in with the new clutch.
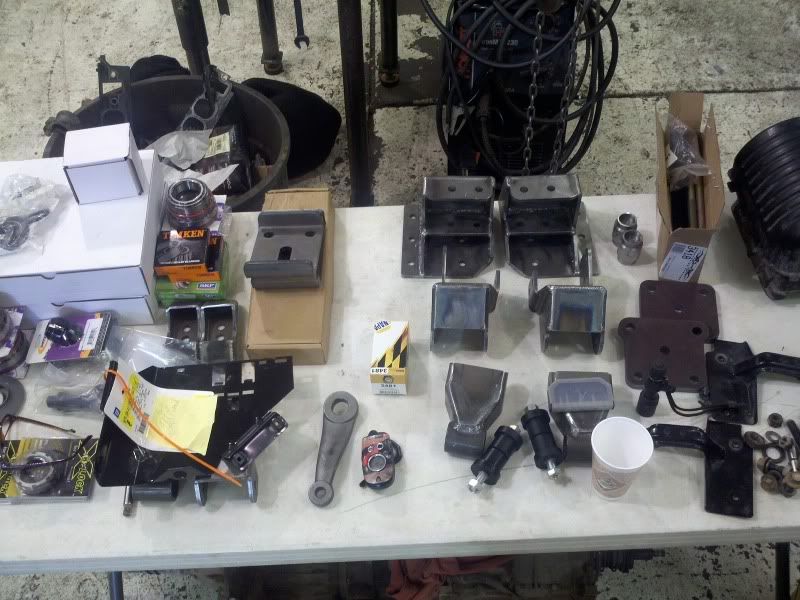
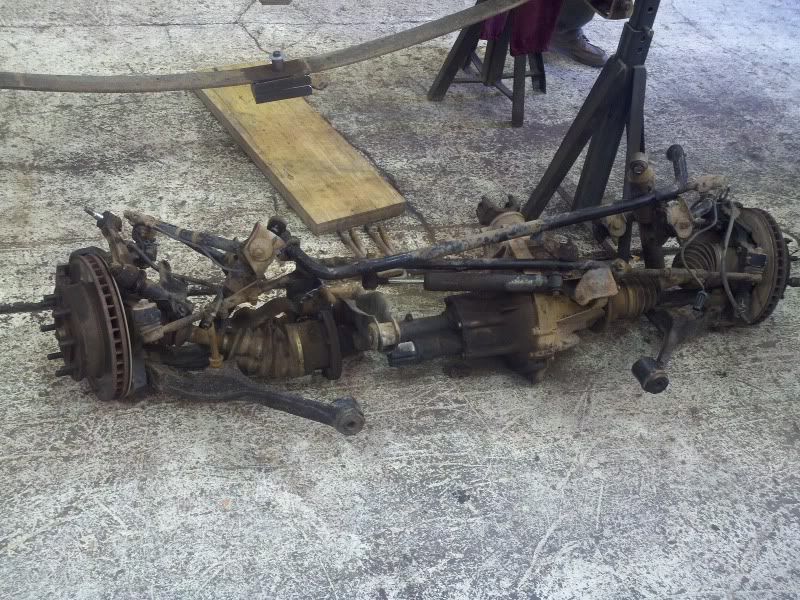
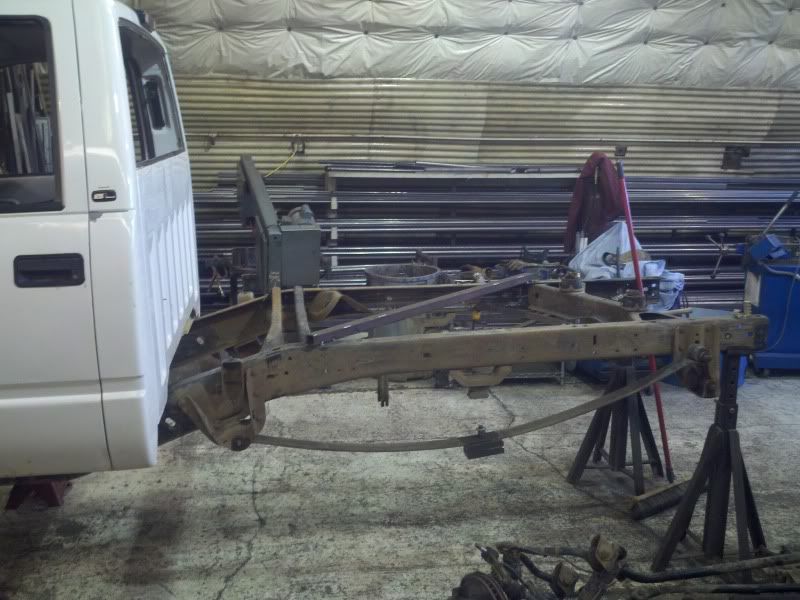
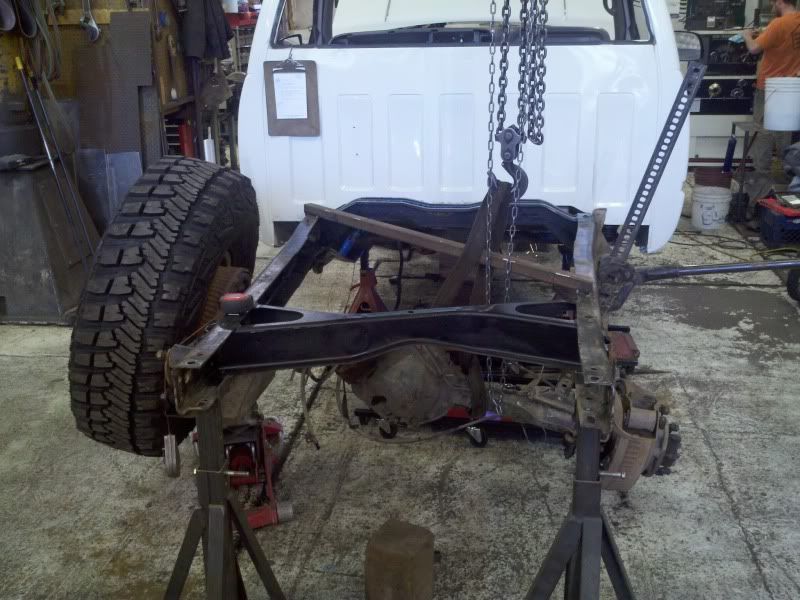
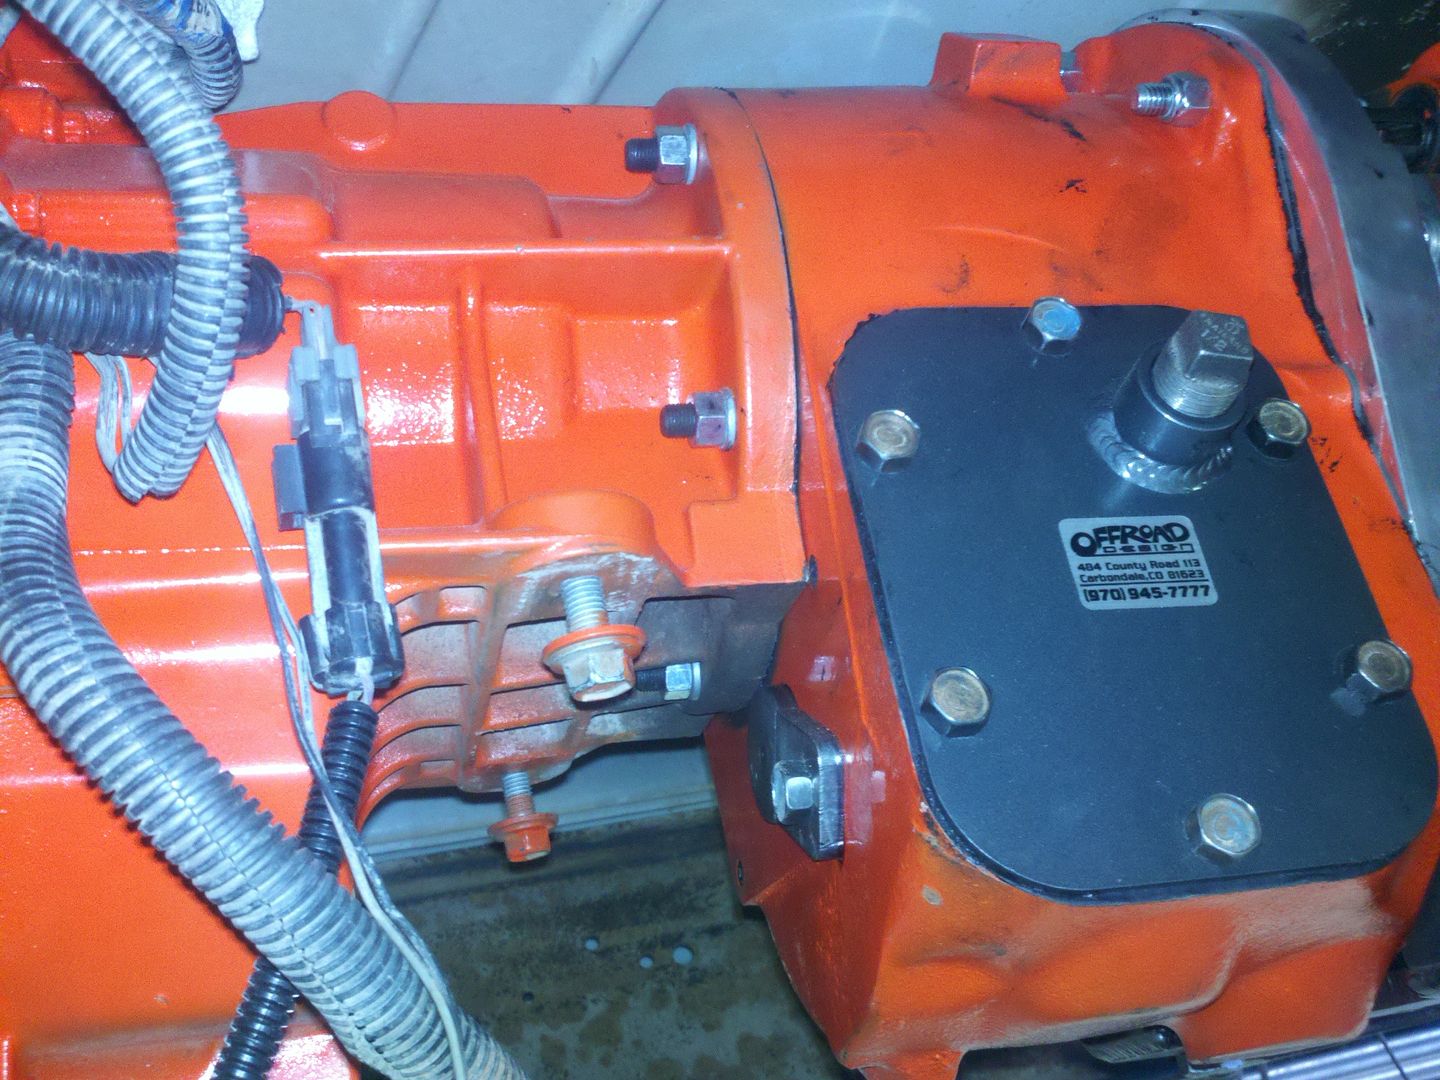
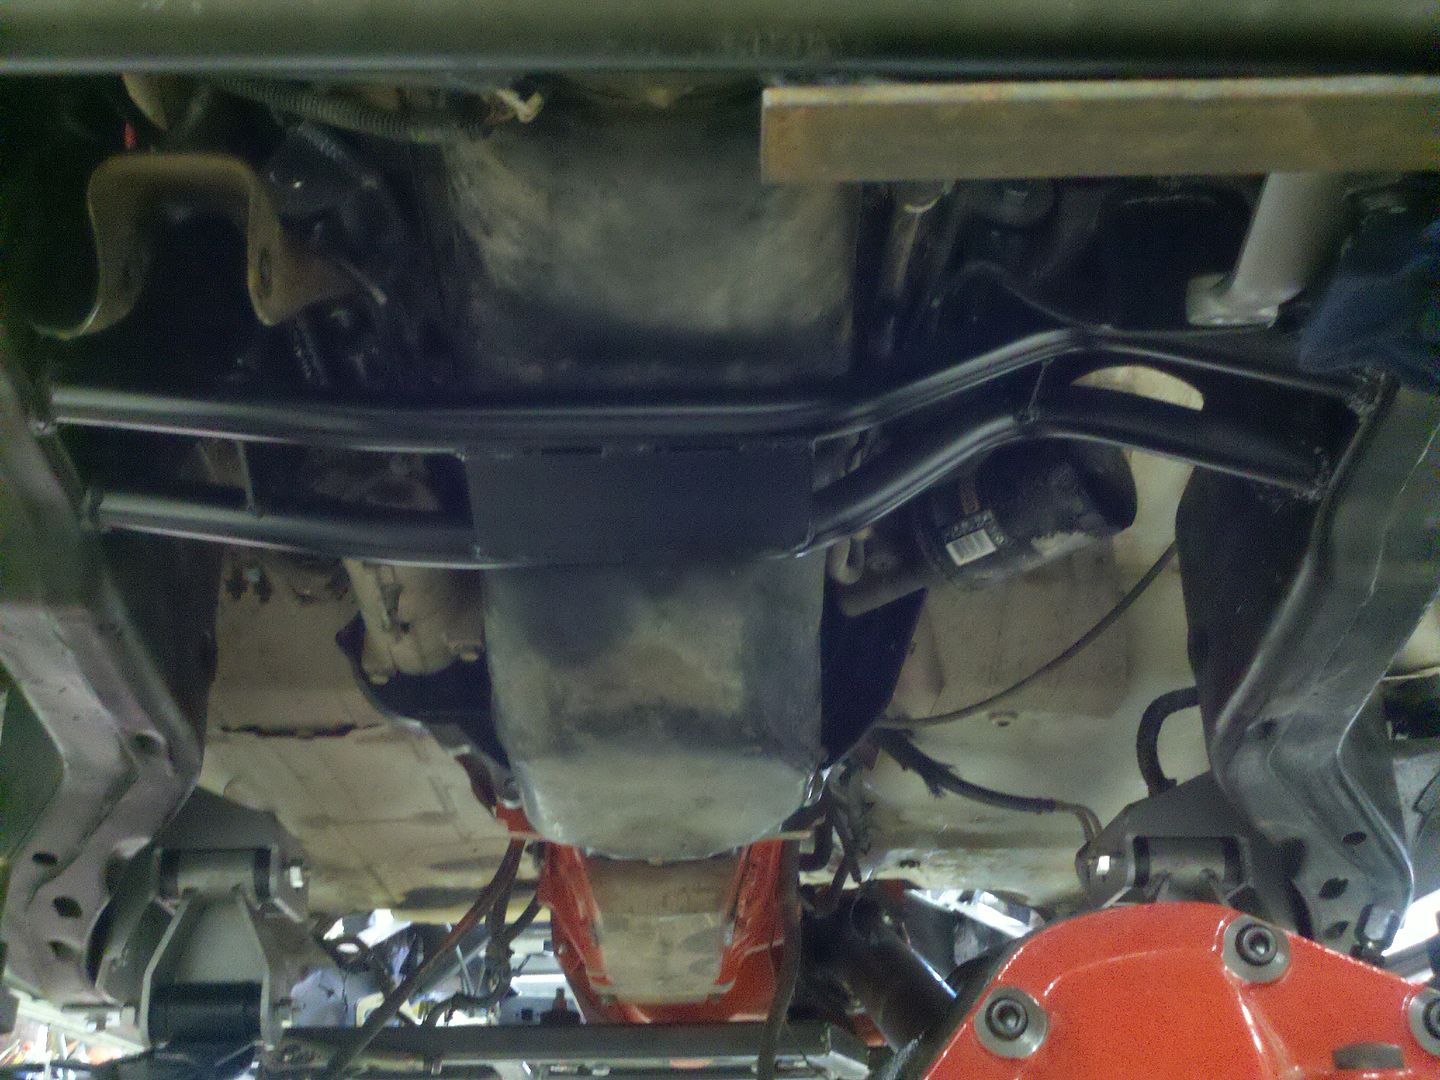
That's about the end of the stock mechanical stuff. The 241 is hitting the road and we have our GM203/Ford205 Doubler ready to bolt to the trans. Front axle is a 79 ford D60 and rear will be the stock 14 bolt housing. They're now empty housings waiting on the ARBs and Reid knuckles to assemble. We have the rest of the goodies:
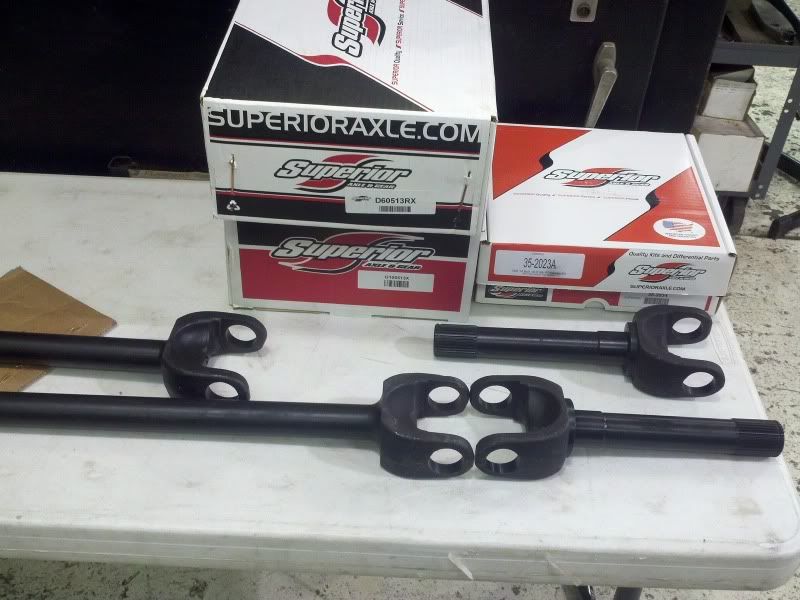
They're 5.13's and we'll put some CTMs in shafts so it'll be pretty tough.
There's a spy shot of the ORD SAS kit we just got into production which we'll need since this pile of poo is laying on the ground now:
We happen to have a spare ECM here that we might take with us. Anybody with ideas on spare motor parts to carry should feel free to post them up, I've never played with the Vortec motor other than driving this one around for a while.
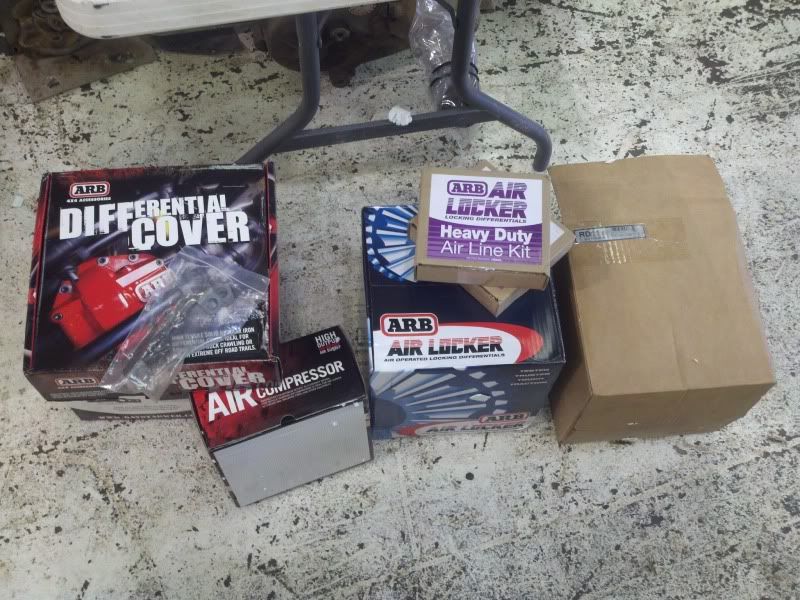
Don't need to wait on the ARBs anymore:
That just added to the workload a little bit.
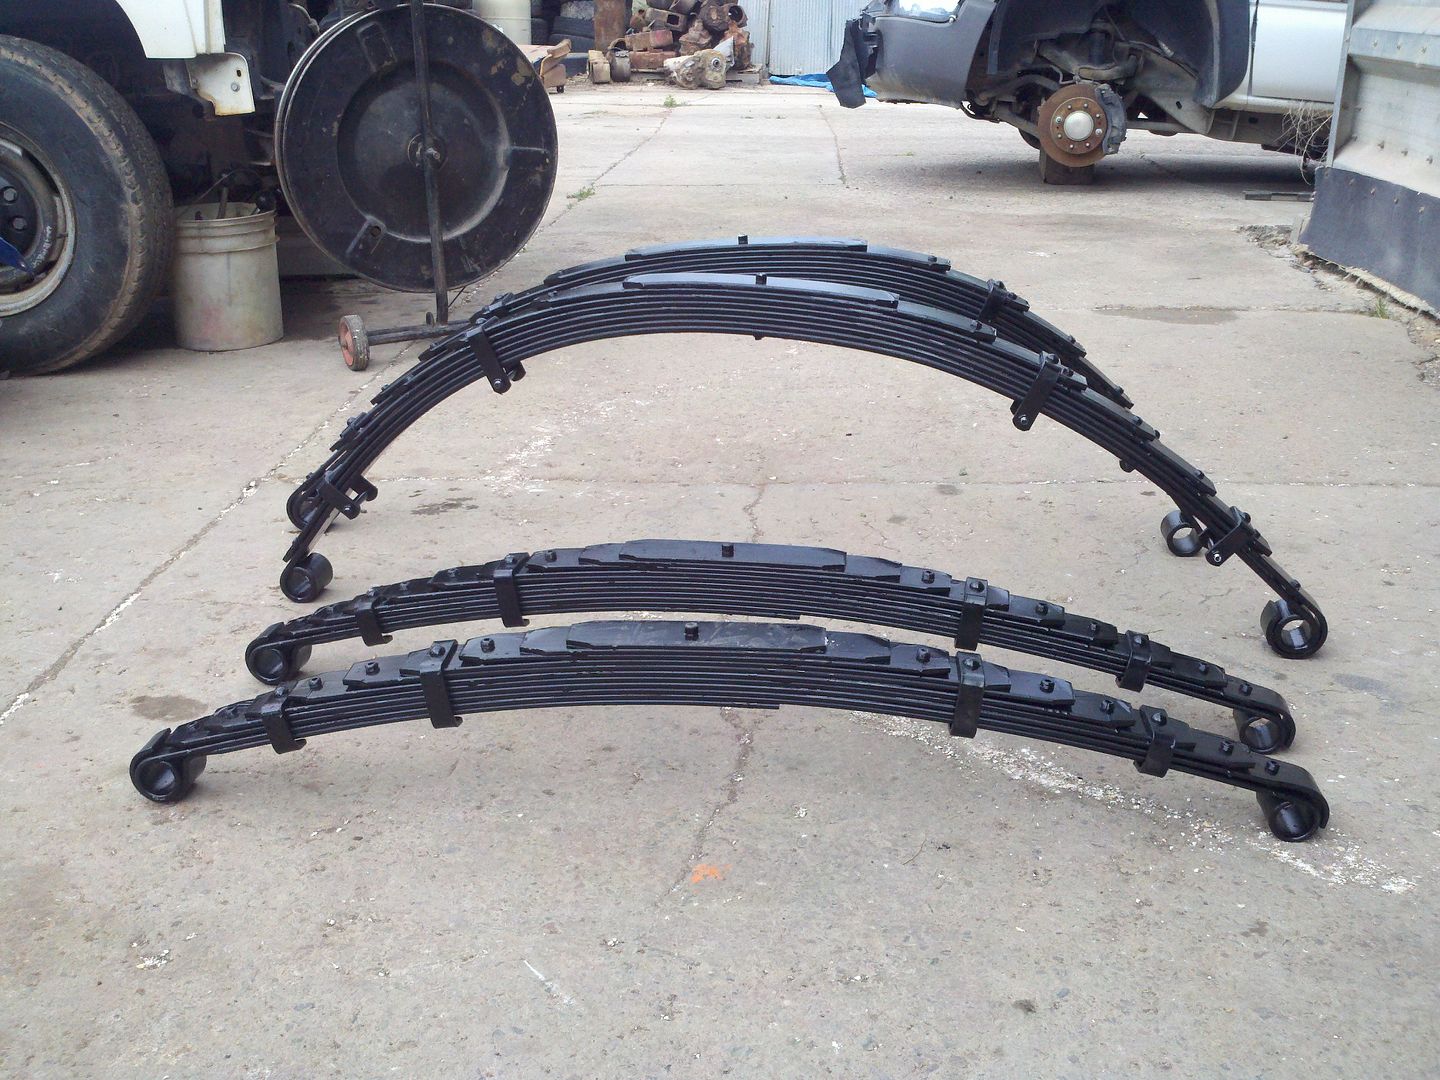
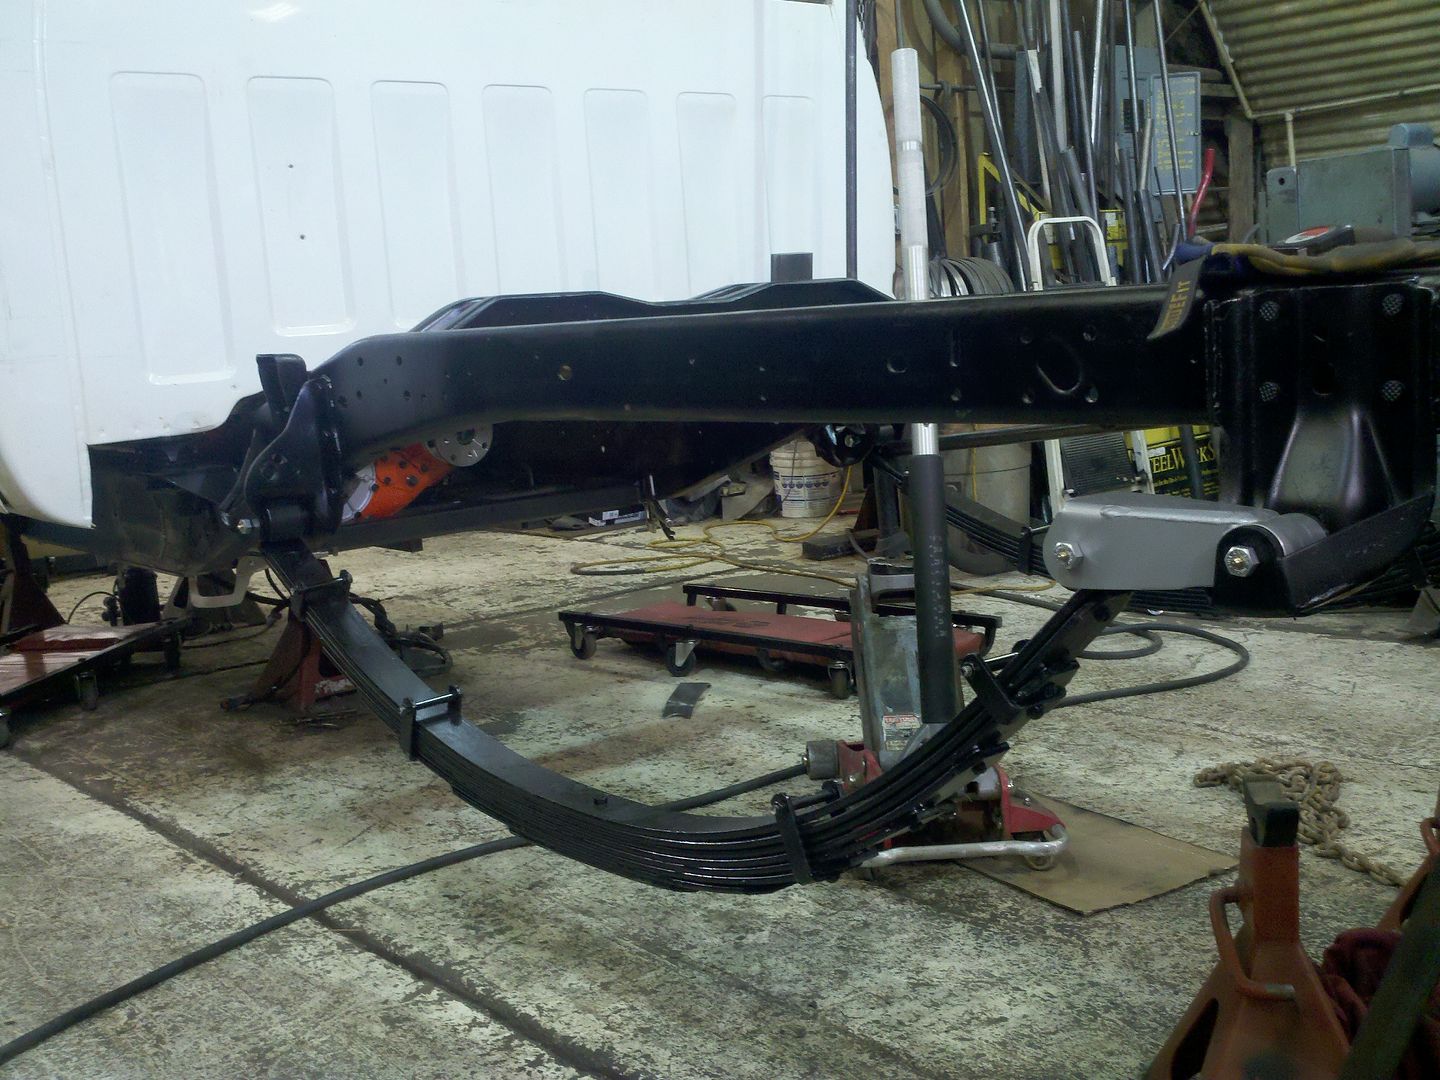
Suspension is going to be leaves front and rear using our ORD custom packs. Fronts are a 3"-ish lift for a heavier 73-87 truck and the rear is a 65" long custom pack. We're leaving the tension shackle setup in the rear to pick up a little more travel and so the tail of the spring isn't the bumper. Fronts could have used our brackets for a 52" spring but I don't like losing the approach angle and I think the 48.5" will flex plenty. We generally use up all of a 14" travel shock in articulation so it'll be fine.
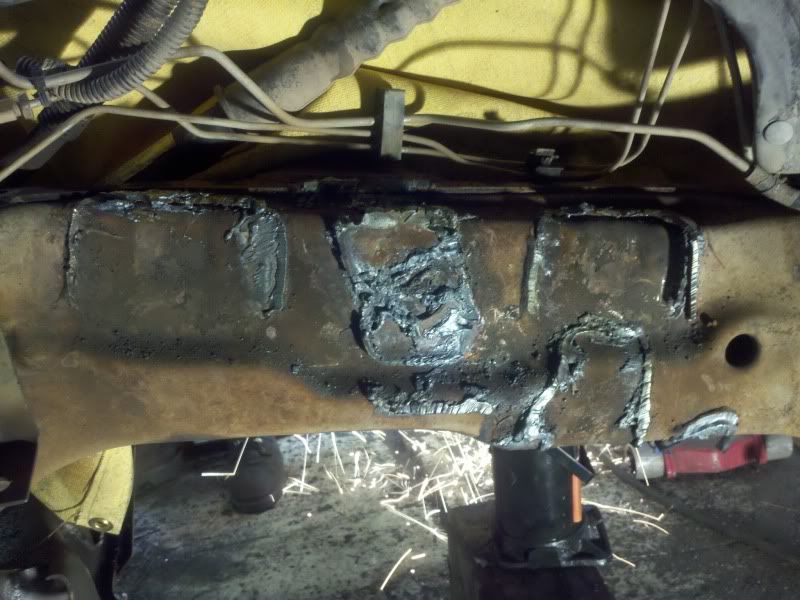
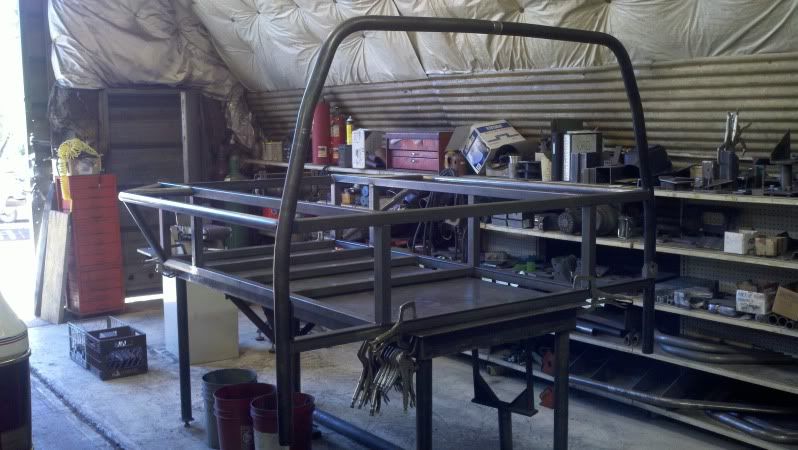
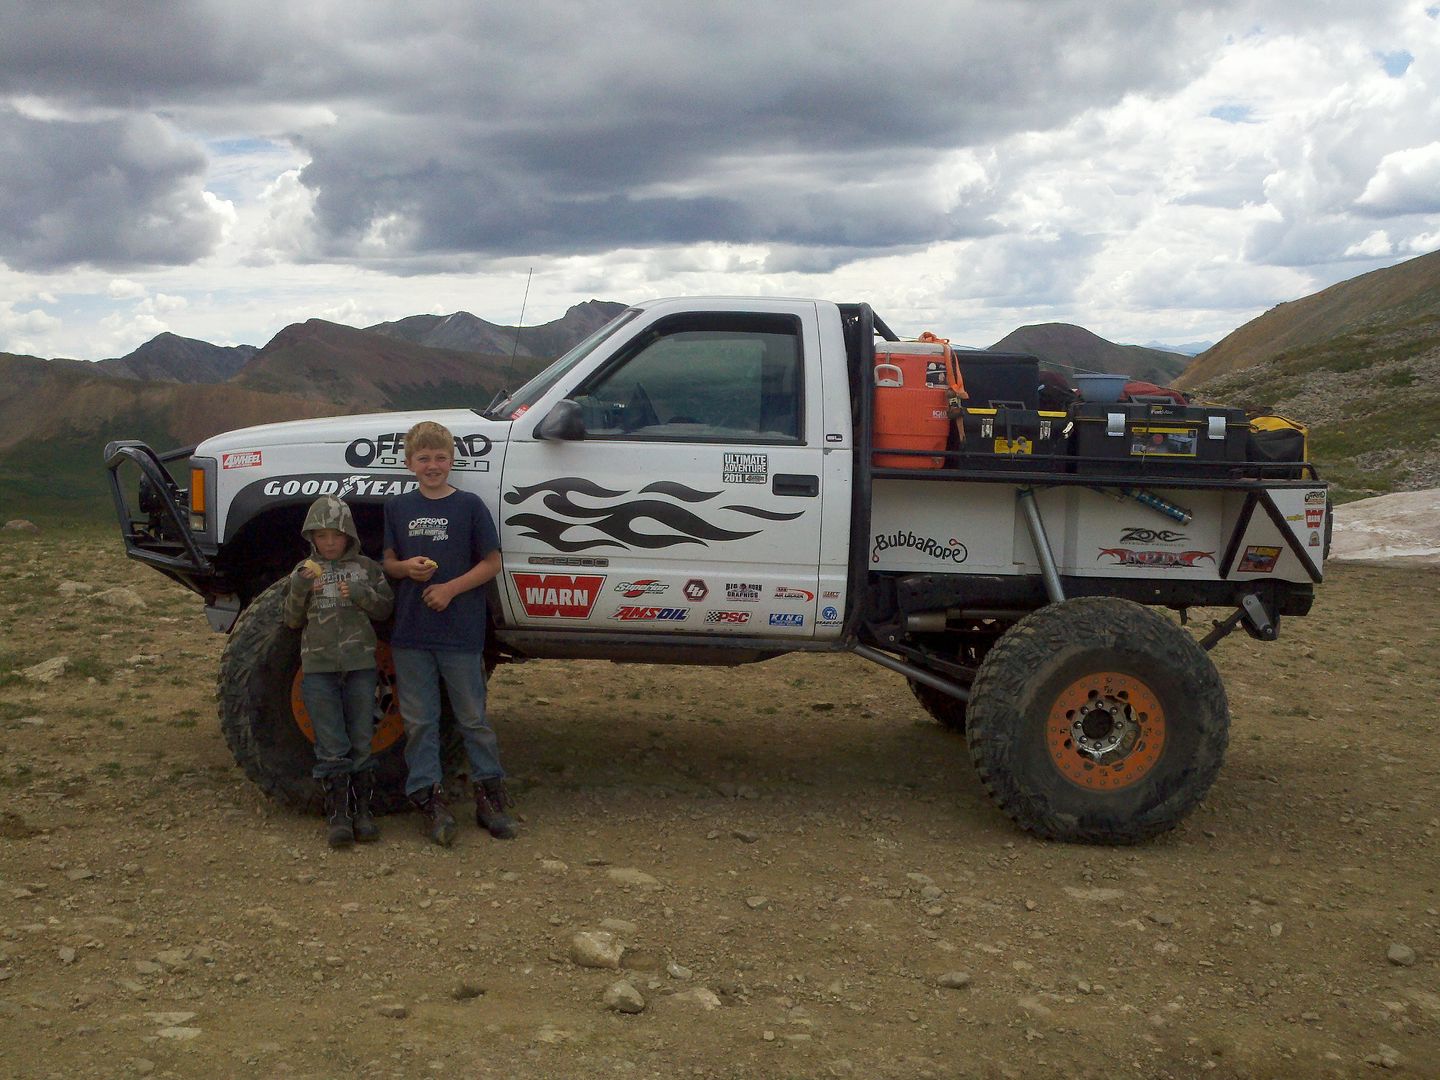
Sooner or later someone is going to wonder about the "shortbed" part:
Here's what it looked like before, at least the frame part:
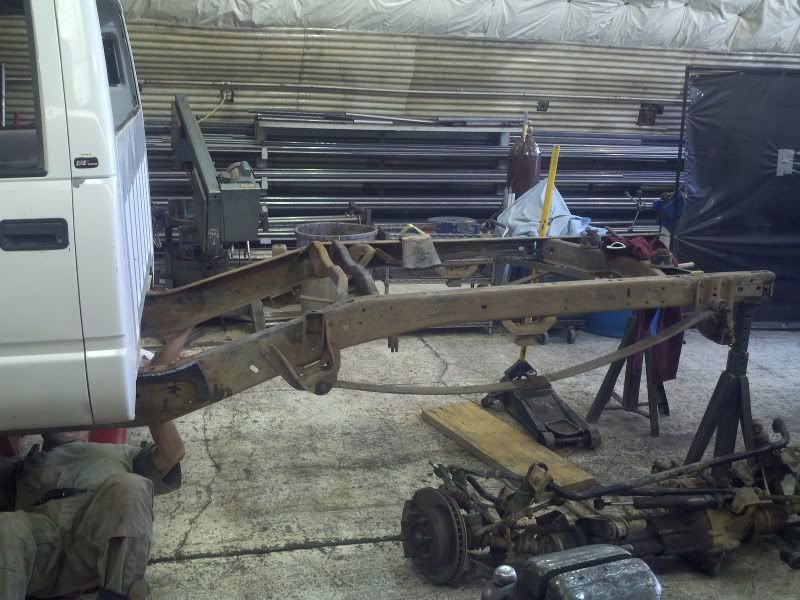
Here's what it looks like after yesterday's fun:
It's missing 15" now, which should put the wheelbase in the 117" range. Maybe a bit more since our SAS brackets will move the axle forward a bit.
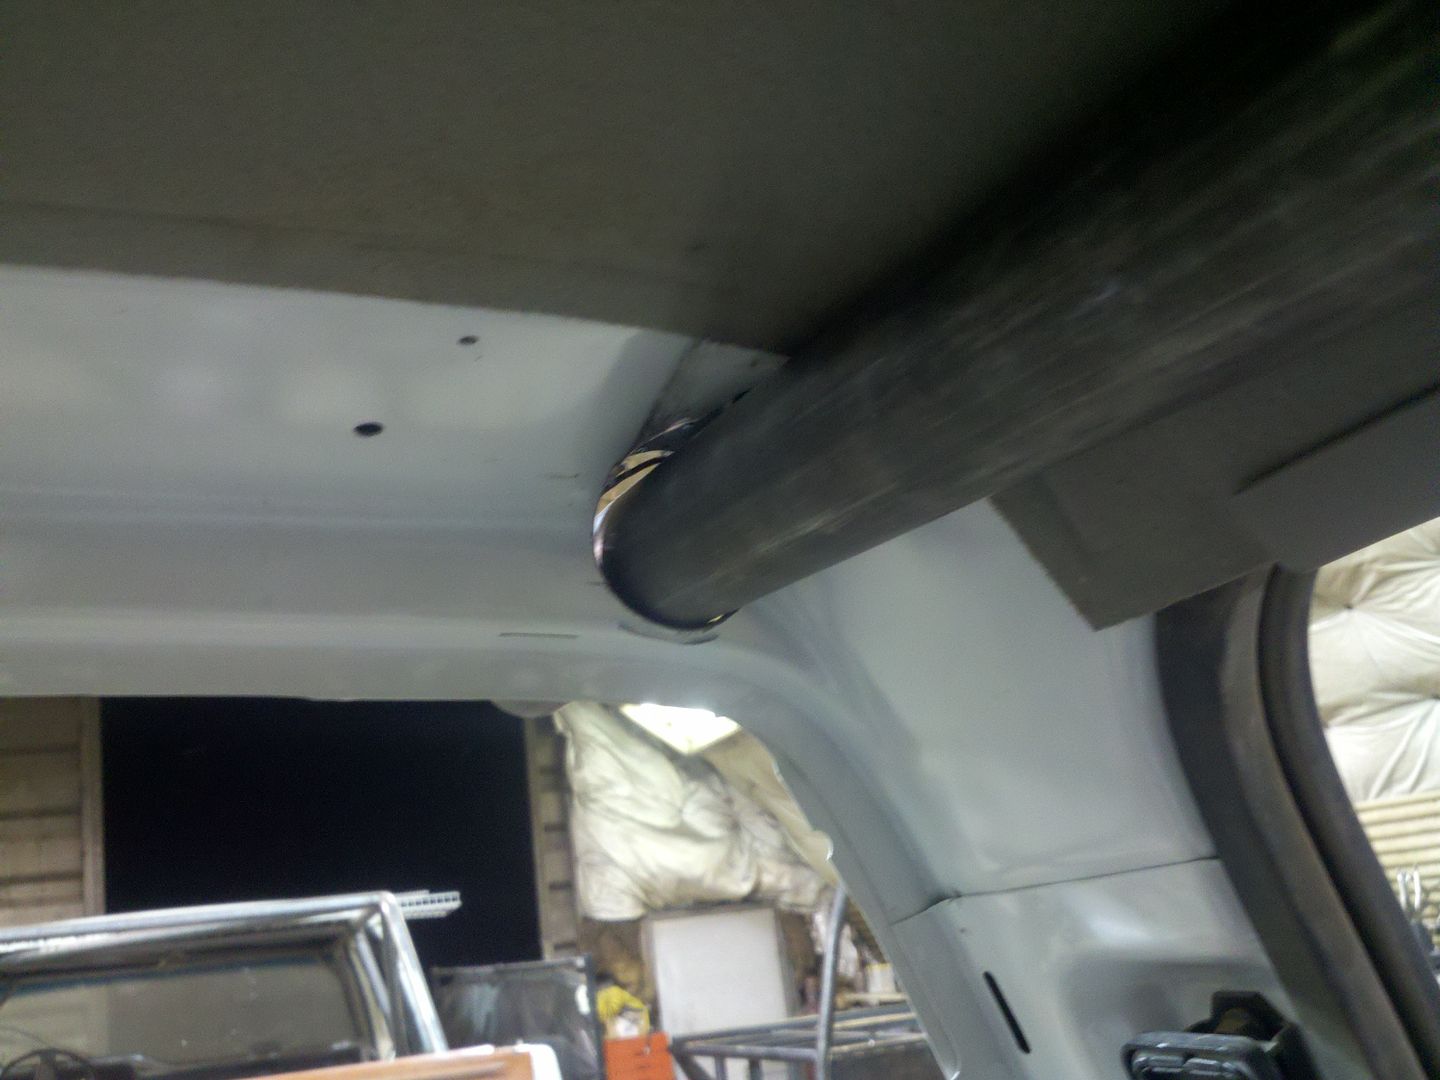
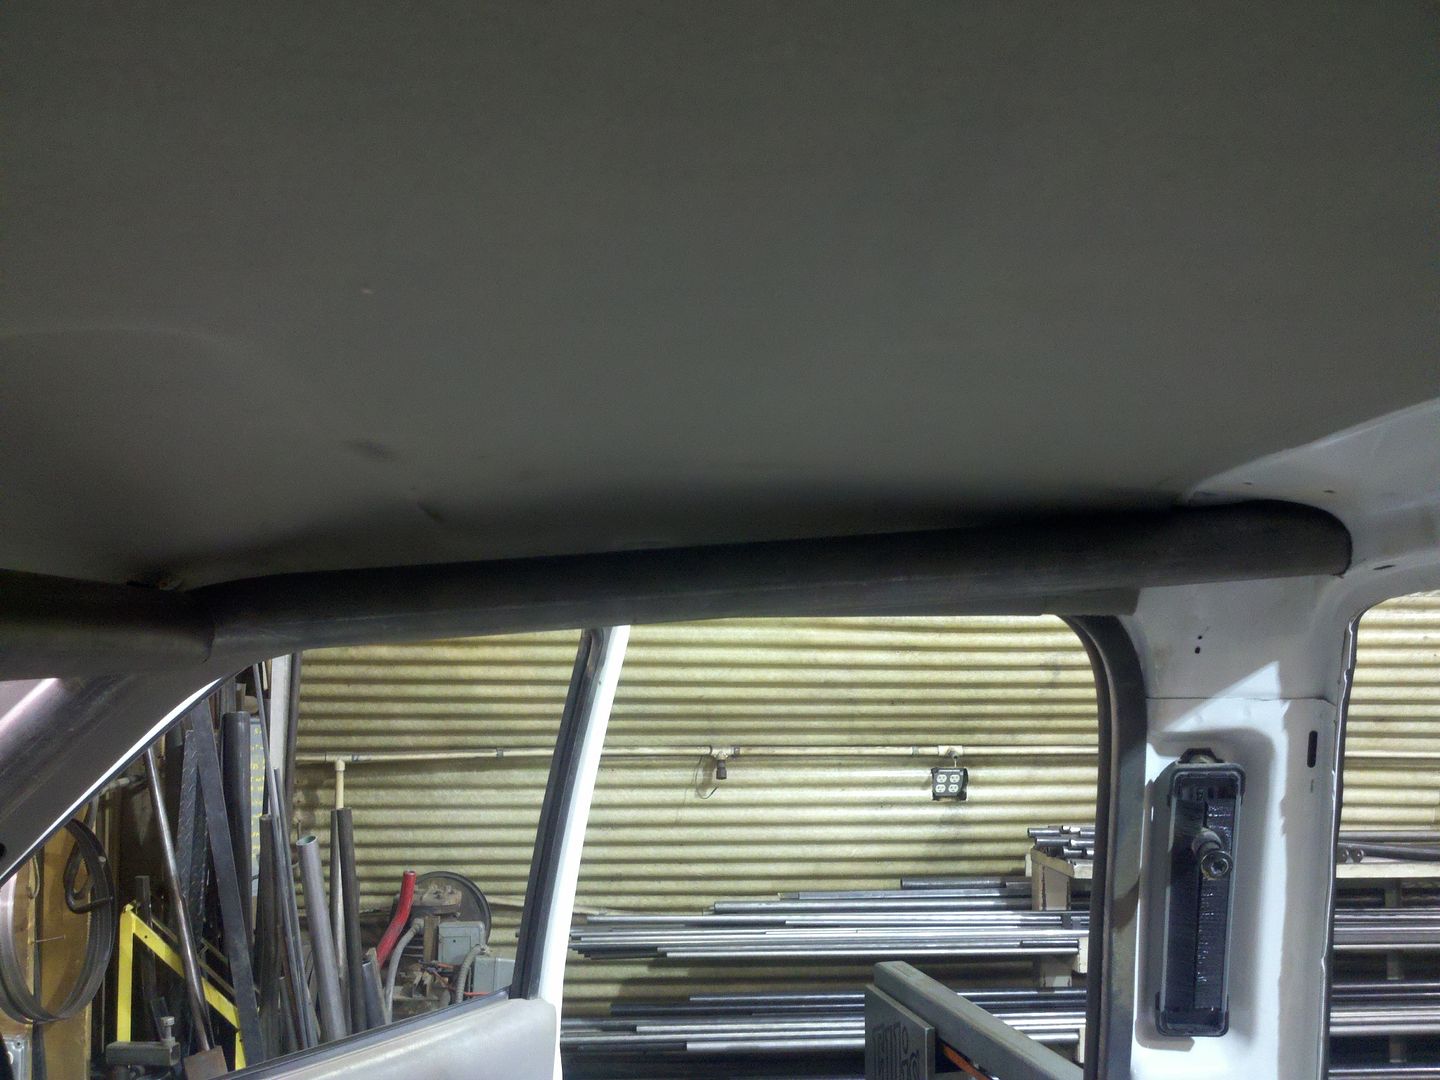
Here's the splice under the cab, it'll have a diamond shaped reinforcing patch when it's finished.
Little weird huh? Dad's old dually had 4.56's with a 465/205 and only ran 32" tires so I guess technically it had pretty deep gears. But we never really wheeled it. Our cheap truck now has a 465/205 with 4.10's and 37's and it did great on the hole in the rock trail but that's not really very technical. I ran my wife's stock '97 tacoma on hole in the rock with a 5 speed and it brought some suck in a few places, similar trips with the family '84 S-10 did the same. This will be fun.
I like your main eye idea norby, it might even work out to run a heavy wall sleeve all the way through the frame for the bolt. We didn't think that much about it. I think it's a marine corp motto, "a good plan now is better than a perfect plan later", or something like that. We're using some of that ideology now.
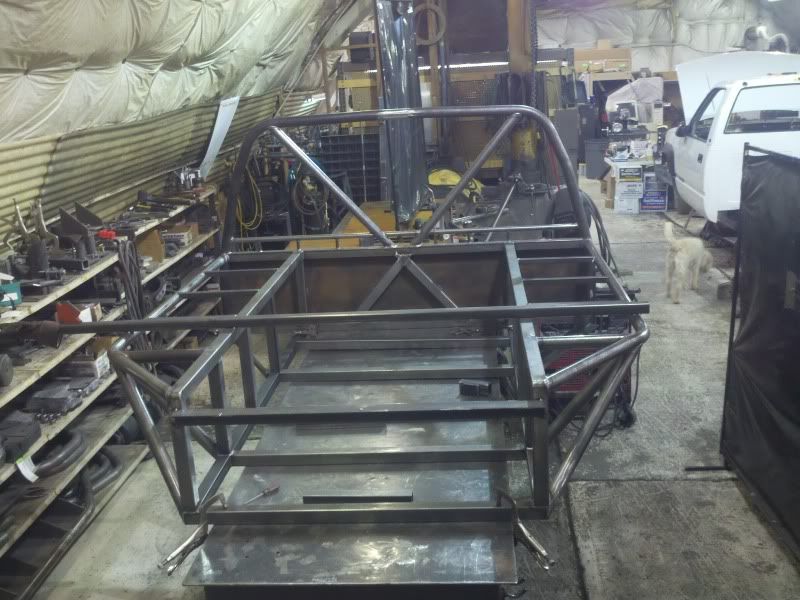
Today we started with the rough cut frame looking like this:
And ended with it looking like this:
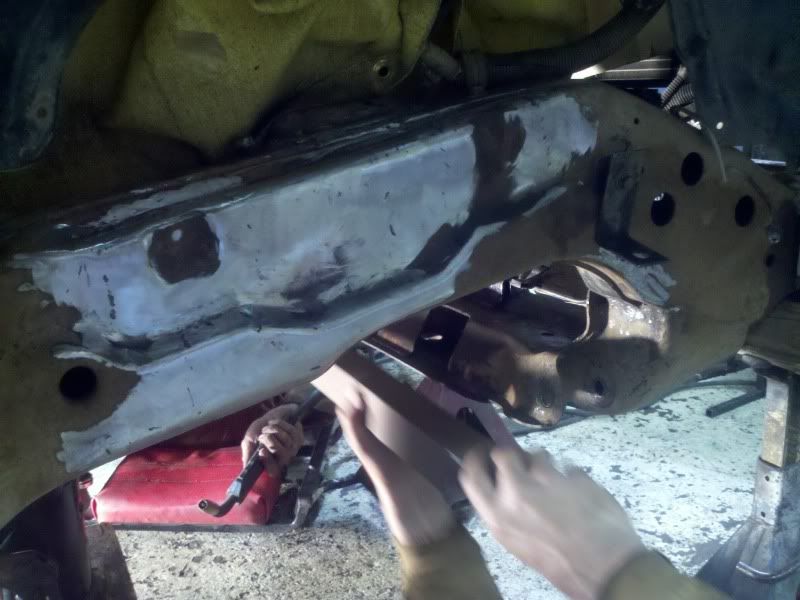
There is a LOT of cleanup involved with this process, holy cow. We went a little far with it maybe, the front crossmember looks like this now:

In other news today, the ARB is in the front housing, then we realized we didn't add plug welds to it like we usually do so we have that problem to address. The dash is loose in the truck so we can run the cage through the front of it and I think that's about it. We have the new PSC box in there now so we can place some new crossmember parts and we might call it a night a bit early.
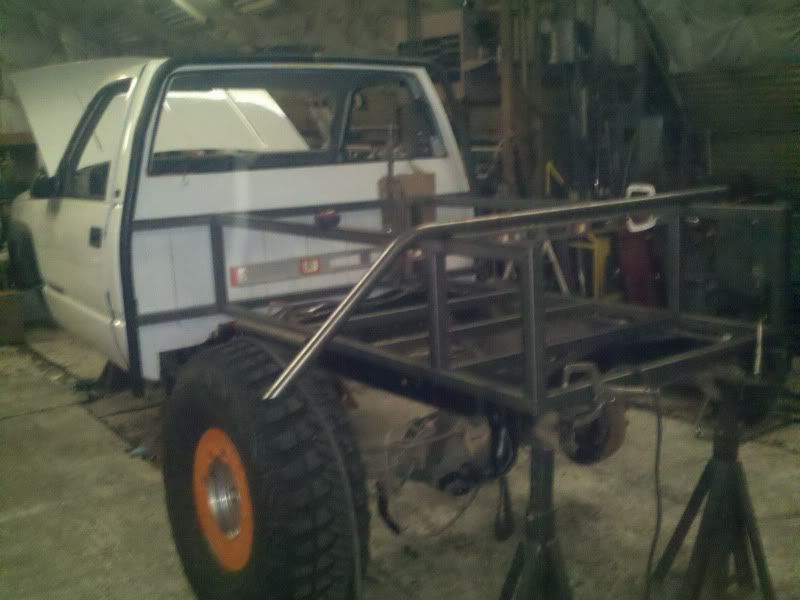
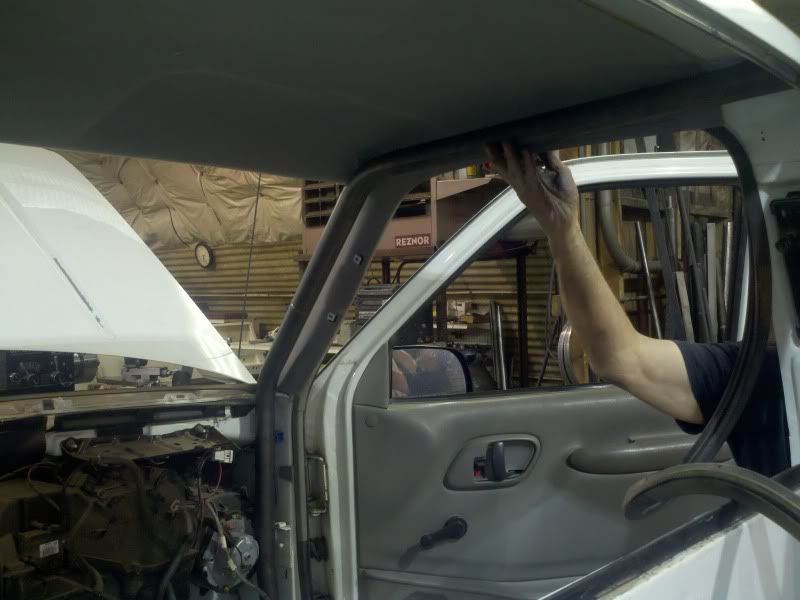
Now that the heavy grinding is done we can start bolting brackets on and finish assembling the front of the motor and move back with the drivetrain. Material for the bed showed up today too so it's time to bend the B pillar and start working from there on the bed and the interior cage. Holy cow there's a lot going on!
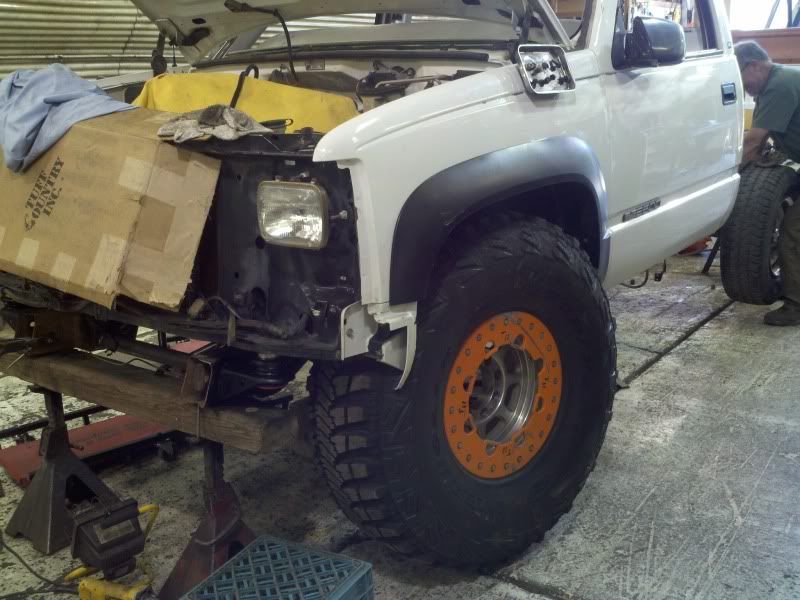
We did some mockup with the 40s to verify some bed dimensions:
And couldn't resist sticking the tire in the front fender to see what it looks like. it looks like it's going to take some work to make it fit.
Thanks guys, quack update since I'm working from my phone...
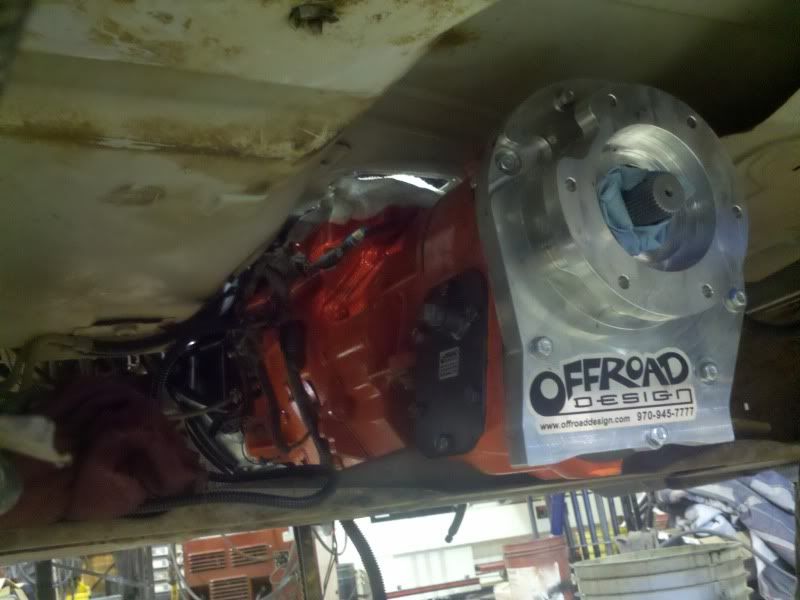
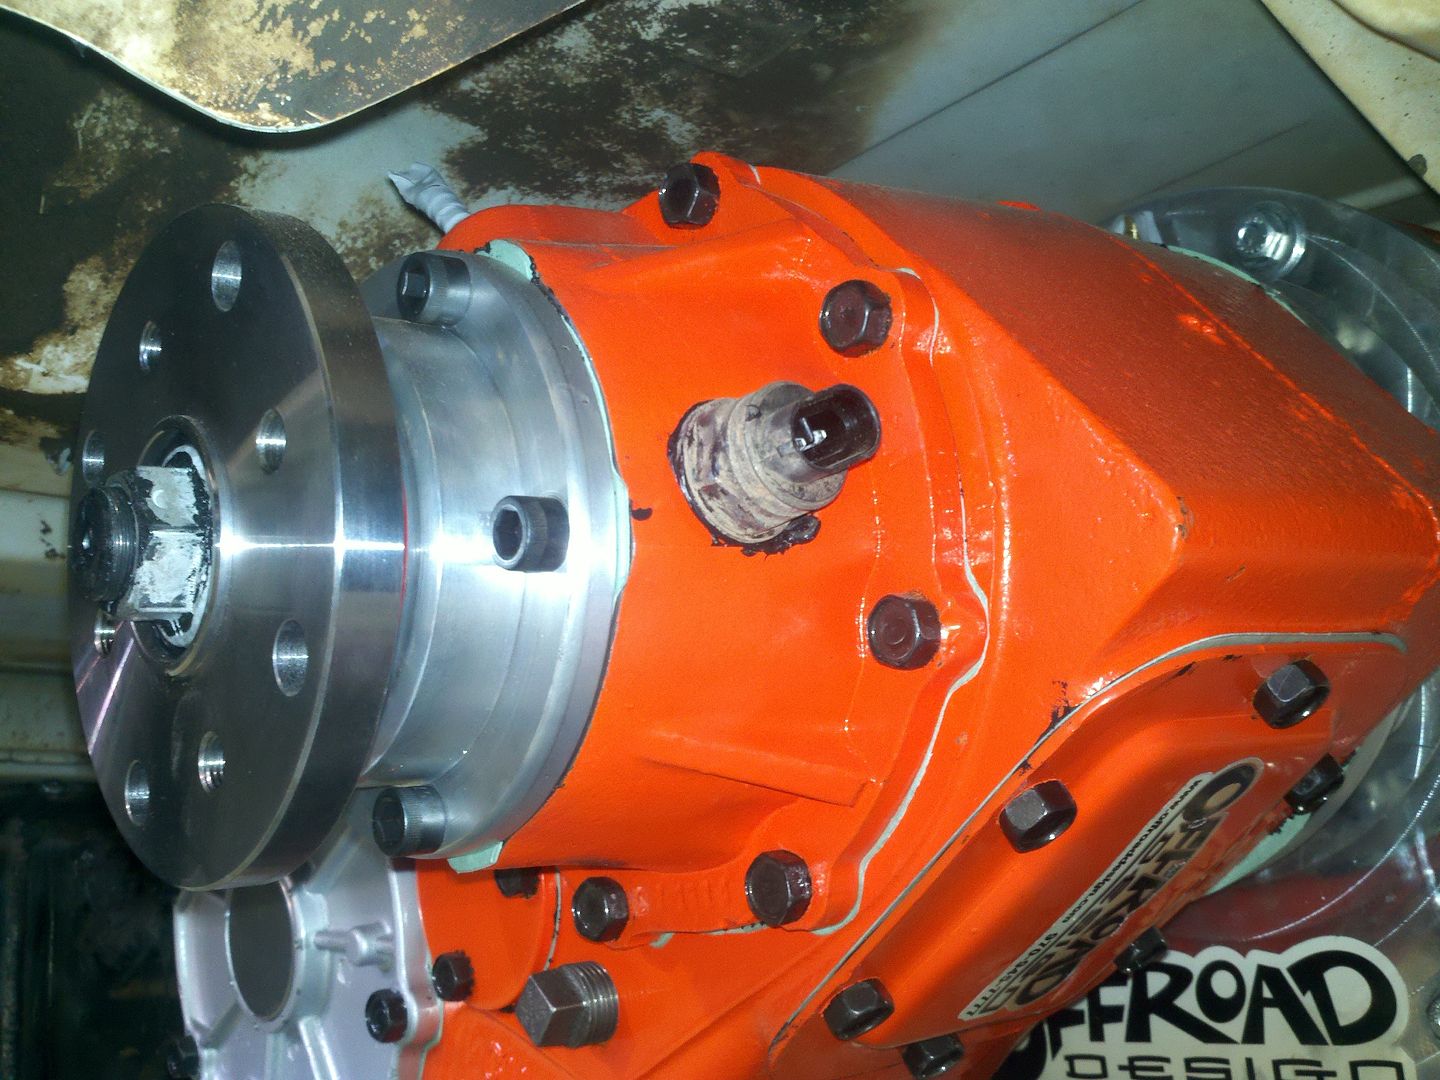
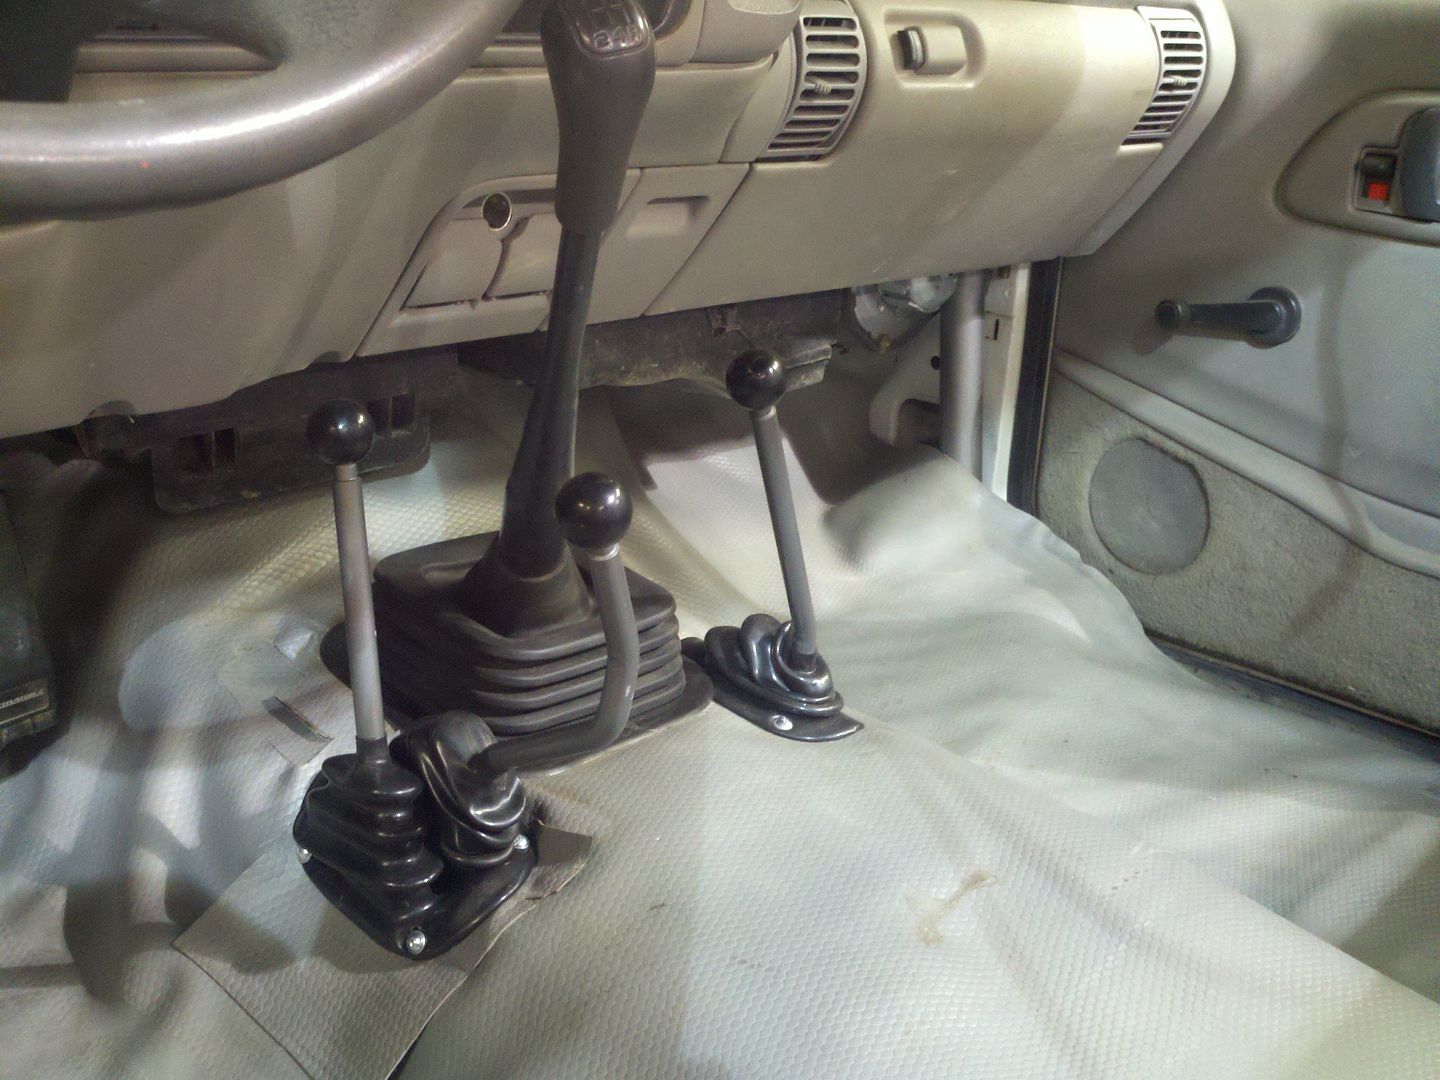
203 on the 4500

05 installed. Bed framework is on the table now, I'll get ashot tomorrow.
the bed is taking shape. We're going to use a 99 suburban gas tank that will sit at the front of the bed and the tire will ride behind it.
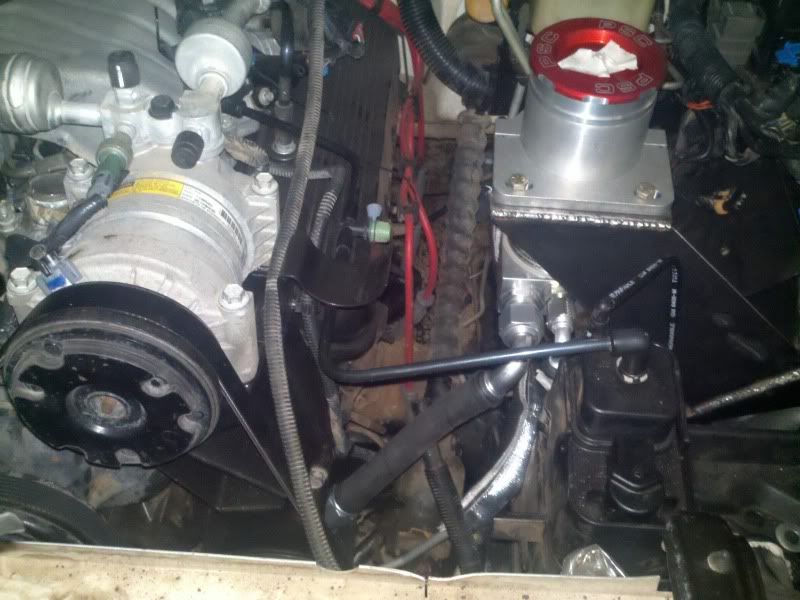
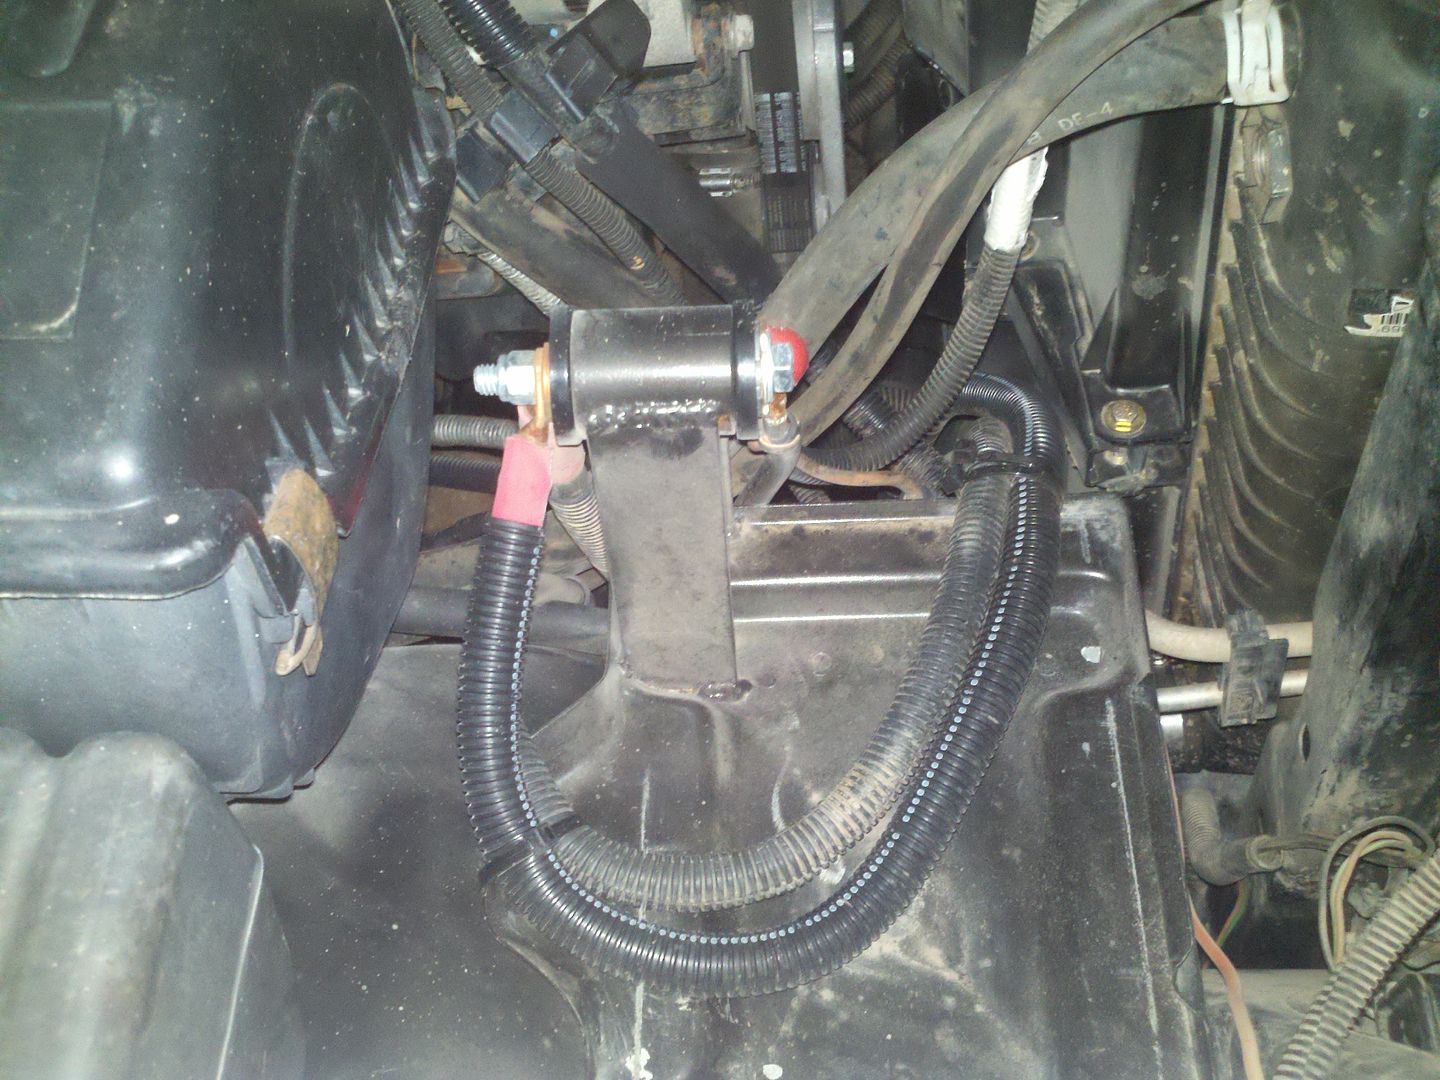
I mounted the res for the power steering today, along with the ARB compressor. Buddy Alex Santiago, came up for the weekend and wired the aux fan override and the clutch safety bypass among a whole bunch of other things.
Ok, I have a keyboard now and can answer some questions.
4L80 problems:
On the original crewcab build (the green year "texas tour", '07) we had trans #1 in the truck through the build process and thought we'd better test it out a week or so before we were supposed to leave. This trans was rebuilt by a local builder who did great work for us, like my 700R4 that's still alive. He installed the trans-go full manual VB kit that involves some tricky work apparently.
Can't remember the specific problem but it either didn't have 2nd gear or locked up in 1st.
Spickler lets us borrow his trans by a different builder with the same kit. My aunt picks it up for us since we're all hands on deck building, then we put it in and it either doesn't have 2nd gear or locks up in 1st. We probe the valvebody and try to troubleshoot it ourselves but give up on it due to time.
Trans #3 was an off the shelf rebuild from a shop in Grand Junction combined with a Compushift kit and I do have to say it was flawless. It bolted in, the harness was total plug and play and it worked great. I had about $1700 figured on the 1st trans and ended up with more than double that by the time we were done. But it was good.
Fast forward to 2010 and I climb widowmaker and 2nd gear is all wonky at the top. Not terribly noisy but definitely not there. I figure it's moving fine in the other 3 so maybe it's a solenoid or something so I drive it home by skipping 2nd with the manual valvebody feature in the Compushift system. Turns out the trans is now full of metal and basically dead. So another new trans later (took till this spring to make that happen) and we're getting it together for Dad to make a trip down Lockhart basin and into Needles. New trans doesn't have 4th gear. So we put his gear in the Cheap Truck and the 465 and carb never let him down on the trip.
We fight pretty hard to get a new trans in it before EJS so we can have it at the show there and as we're getting ready to drive home the convertor seal is leaking so bad we put it on the trailer and I drive Wally home. That's how it sits now.
Given our really good luck with the 700R4 in Wally and the TH350 in Brandon's car, i'm not really down on autos and there was no specific problem with the 4L80 but that trans and truck seem to have gathered all our bad luck in one spot. I've talked to several others that had similar installation problems with the transgo kit, it's tricky to do but awesome when done.
Hence looking for a truck with the NV4500.
Cramer, the stock pile-o-poo does have 4.10s and I might consider parting it. I have a secret IFS fetish though and I'm not sure what to do with it...
As Chris said (77K5) that's the 2" up with a drilled and tapped 203, all pretty standard procedure for us by now. This system would bolt directly into our orange crewcab on the back of the 4L80.
Matzell, what do you want to see? I can get more pics, it's right there easy to do at this point.
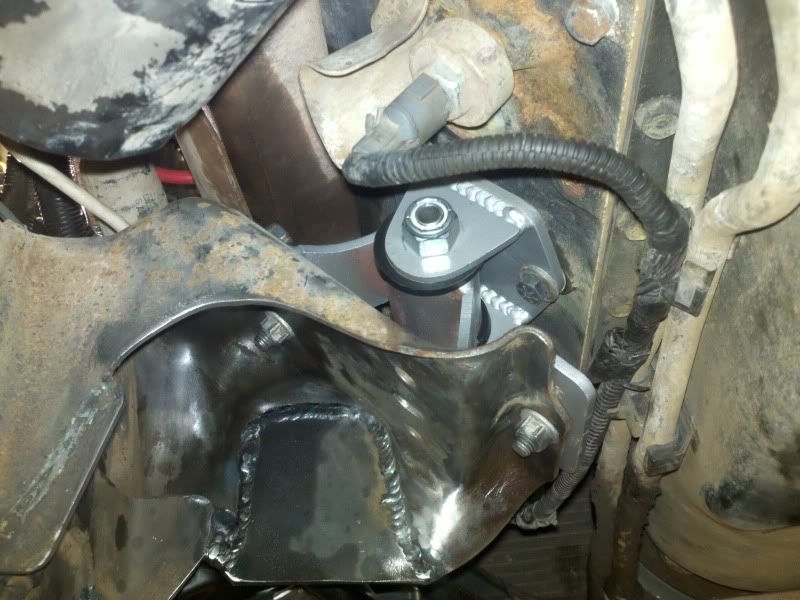
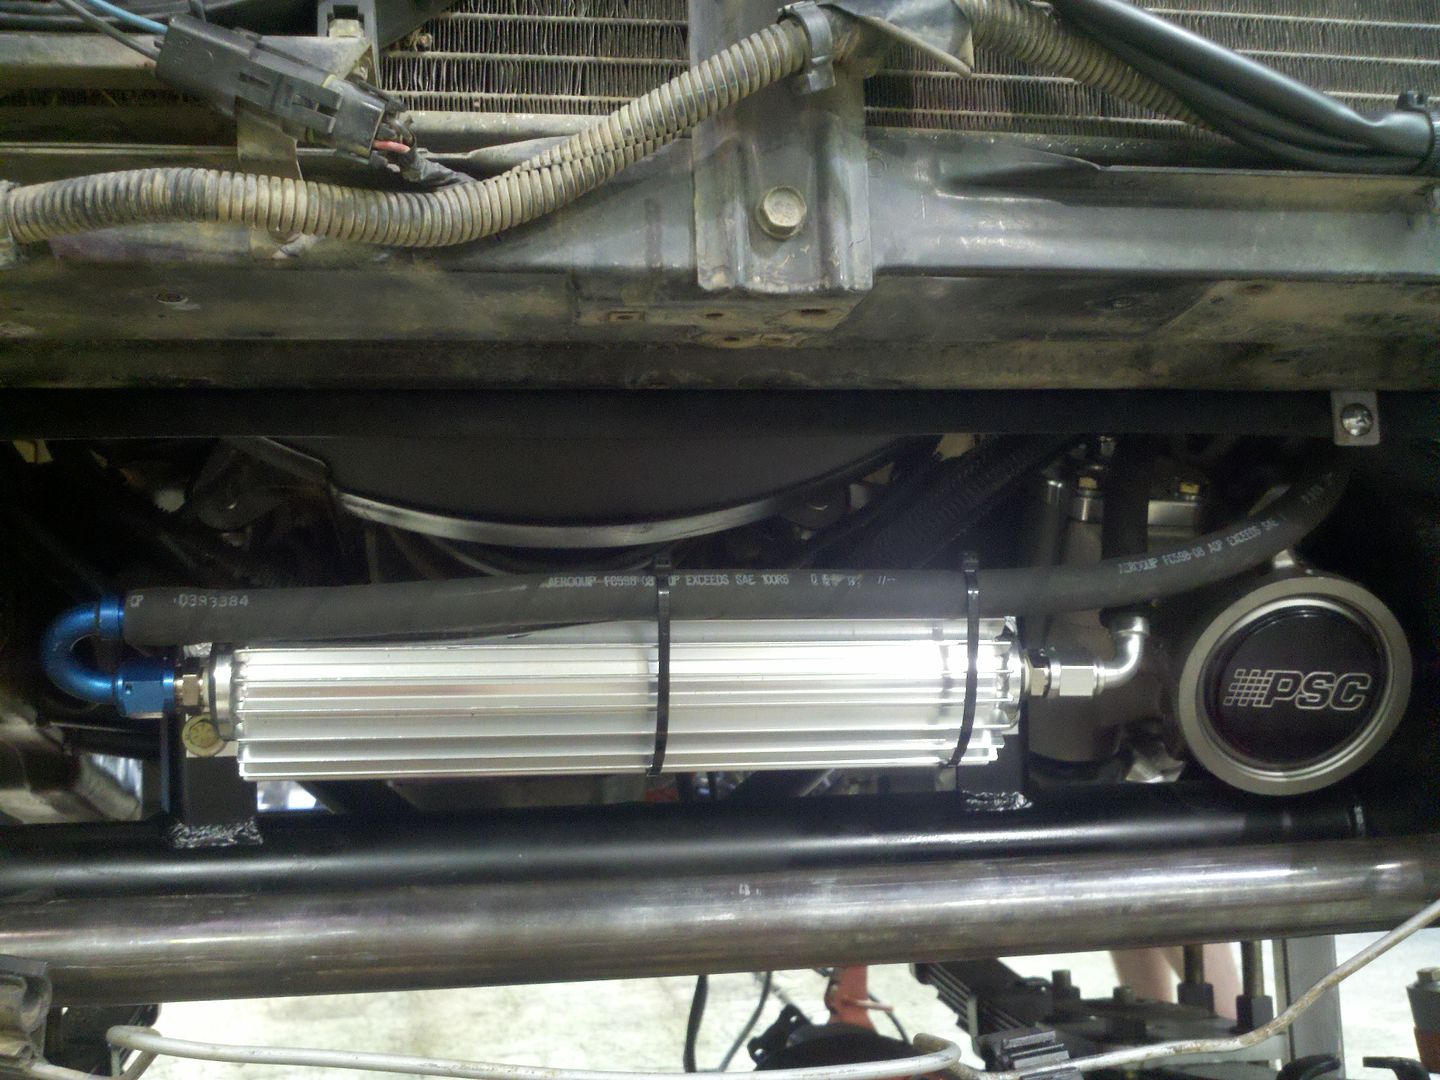
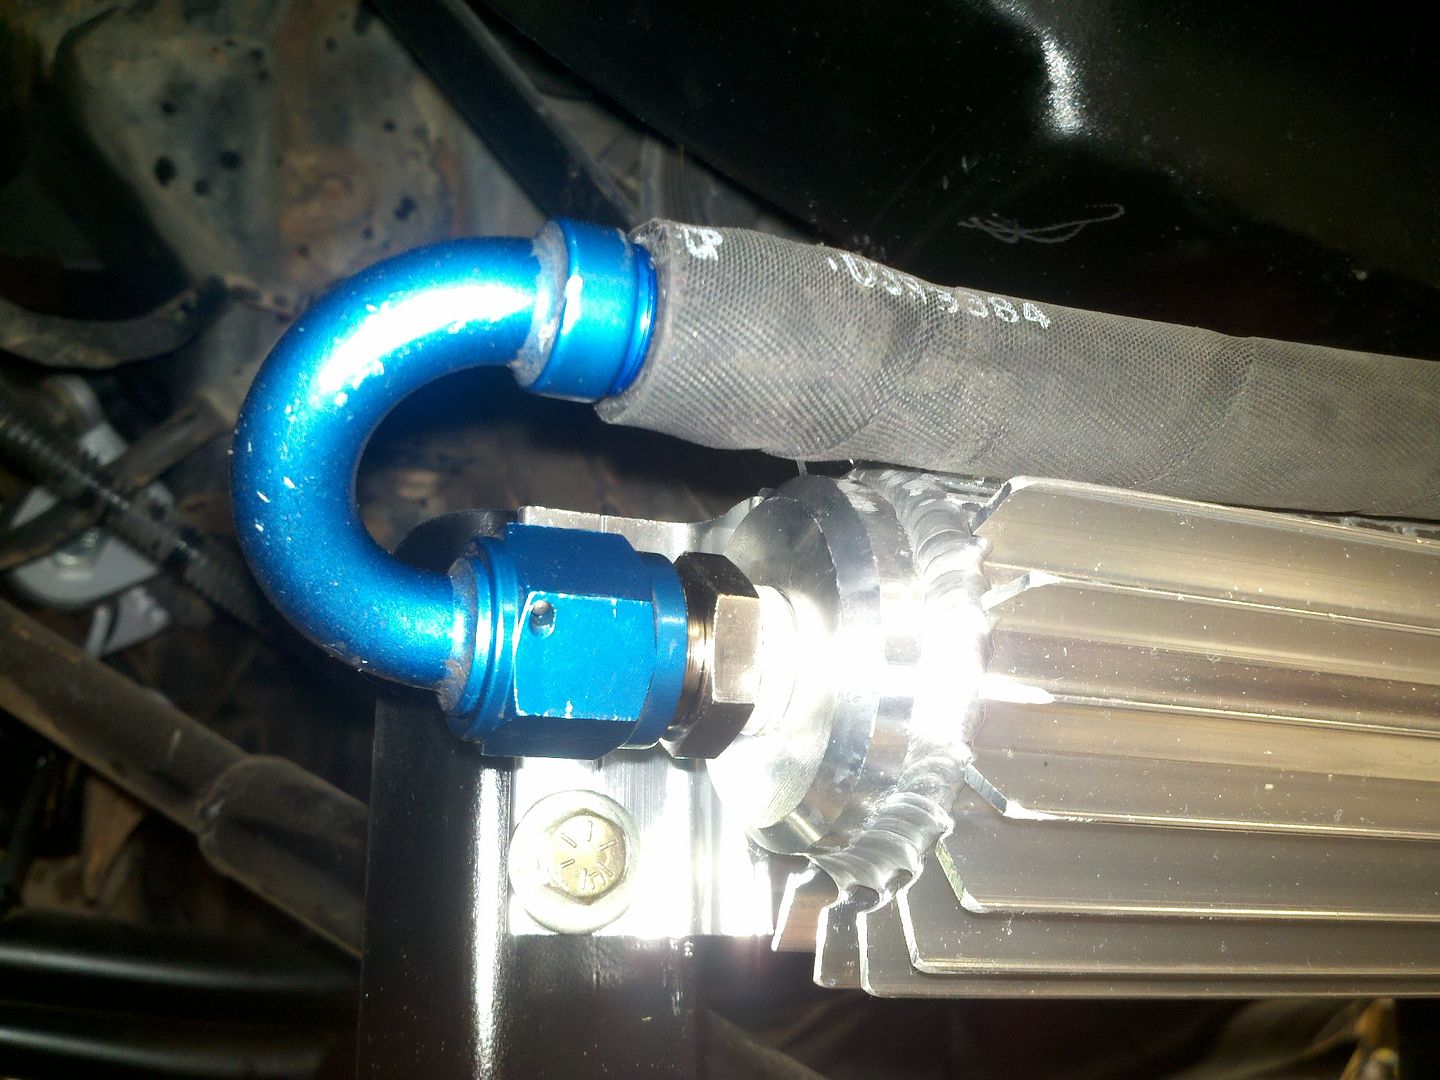
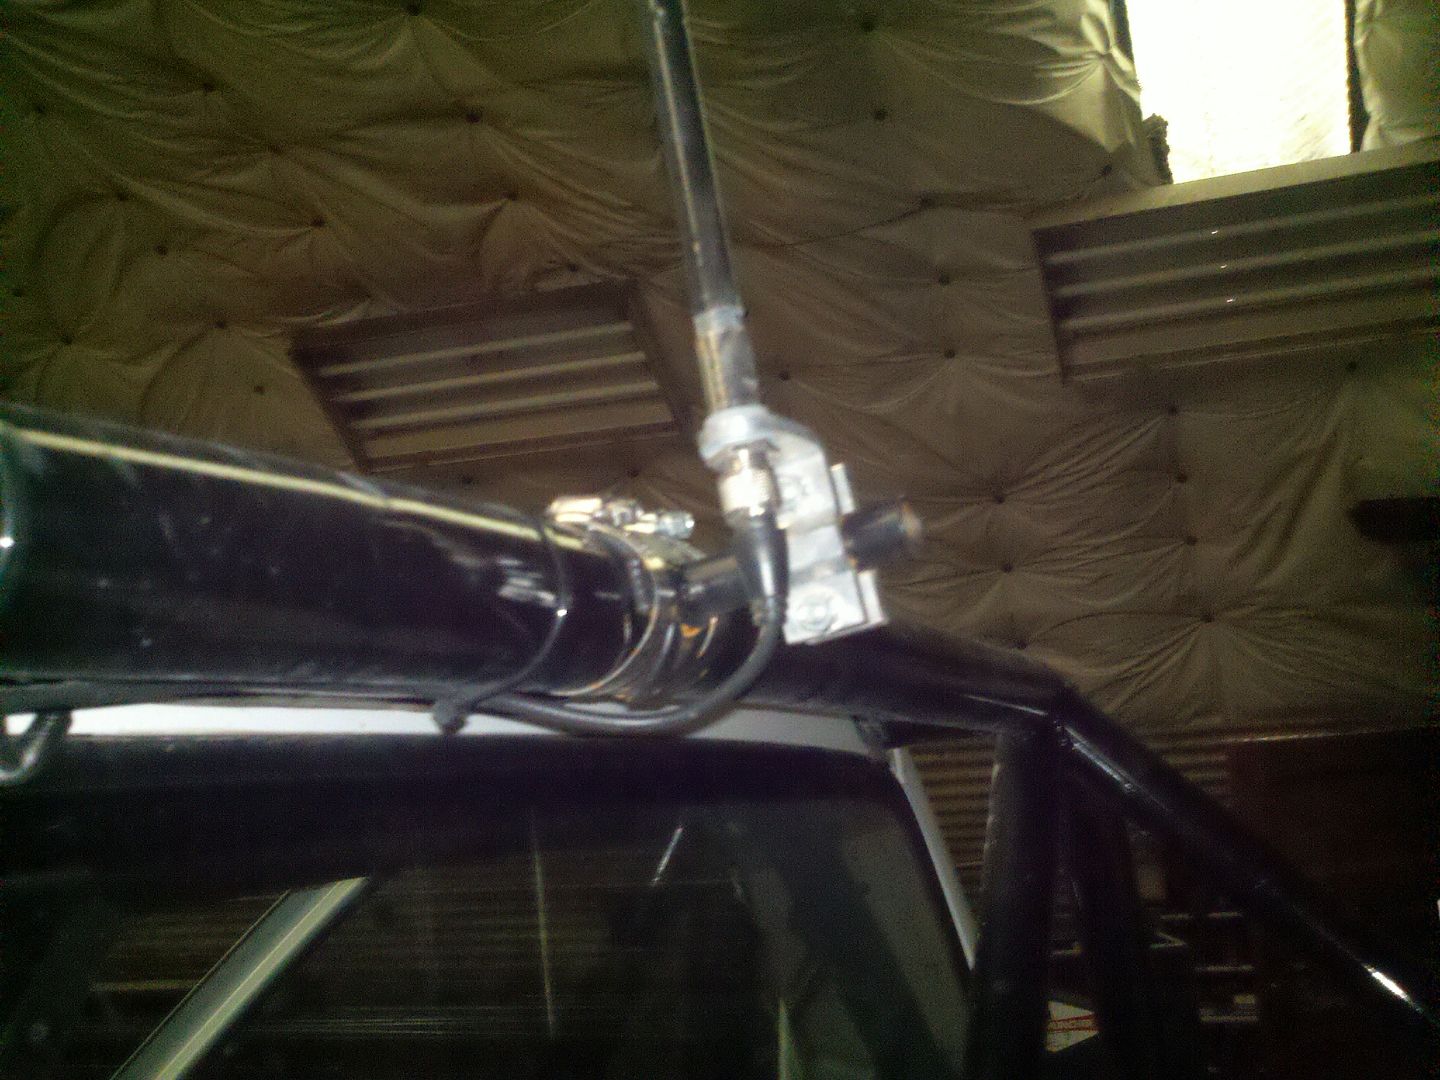
After finishing the bracket to bolt the power steer res and ARB compressor in place of the ABS system, I hooked up the -12 feed hose and realized that any motion between fender end engine is going to cause problems. The direct route with the hose has no way for any flex to be taken up and it's going to kill something in the system so we ditched a few hours worth of carefully laying everything except that detail out and did this: :shaking:
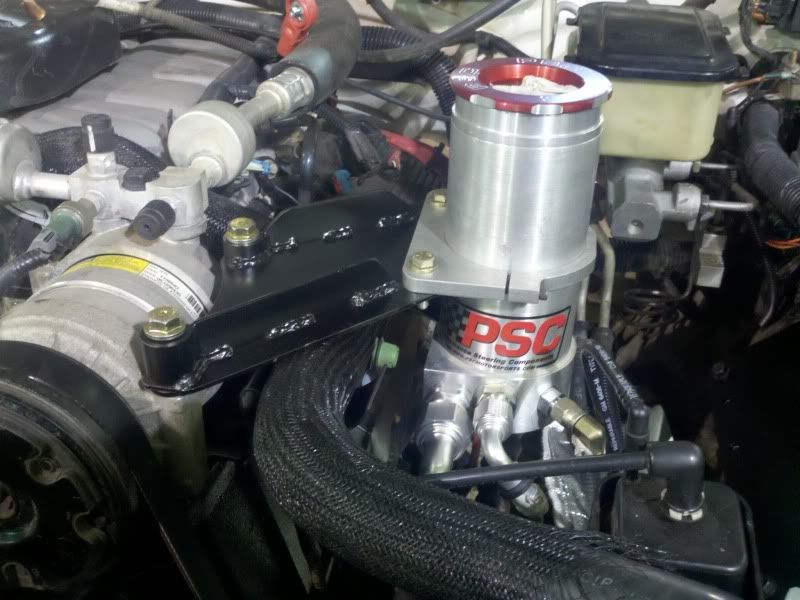
It makes me wonder what the hell I was thinking, except that after you do the wrong stuff, the right way is that much more obvious. Now there's still a short straight shot to the pump but the res and engine move together. We may put a little heat shield over it to keep some exhaust heat away though it's probably not going to be worse than anything else under the hood.
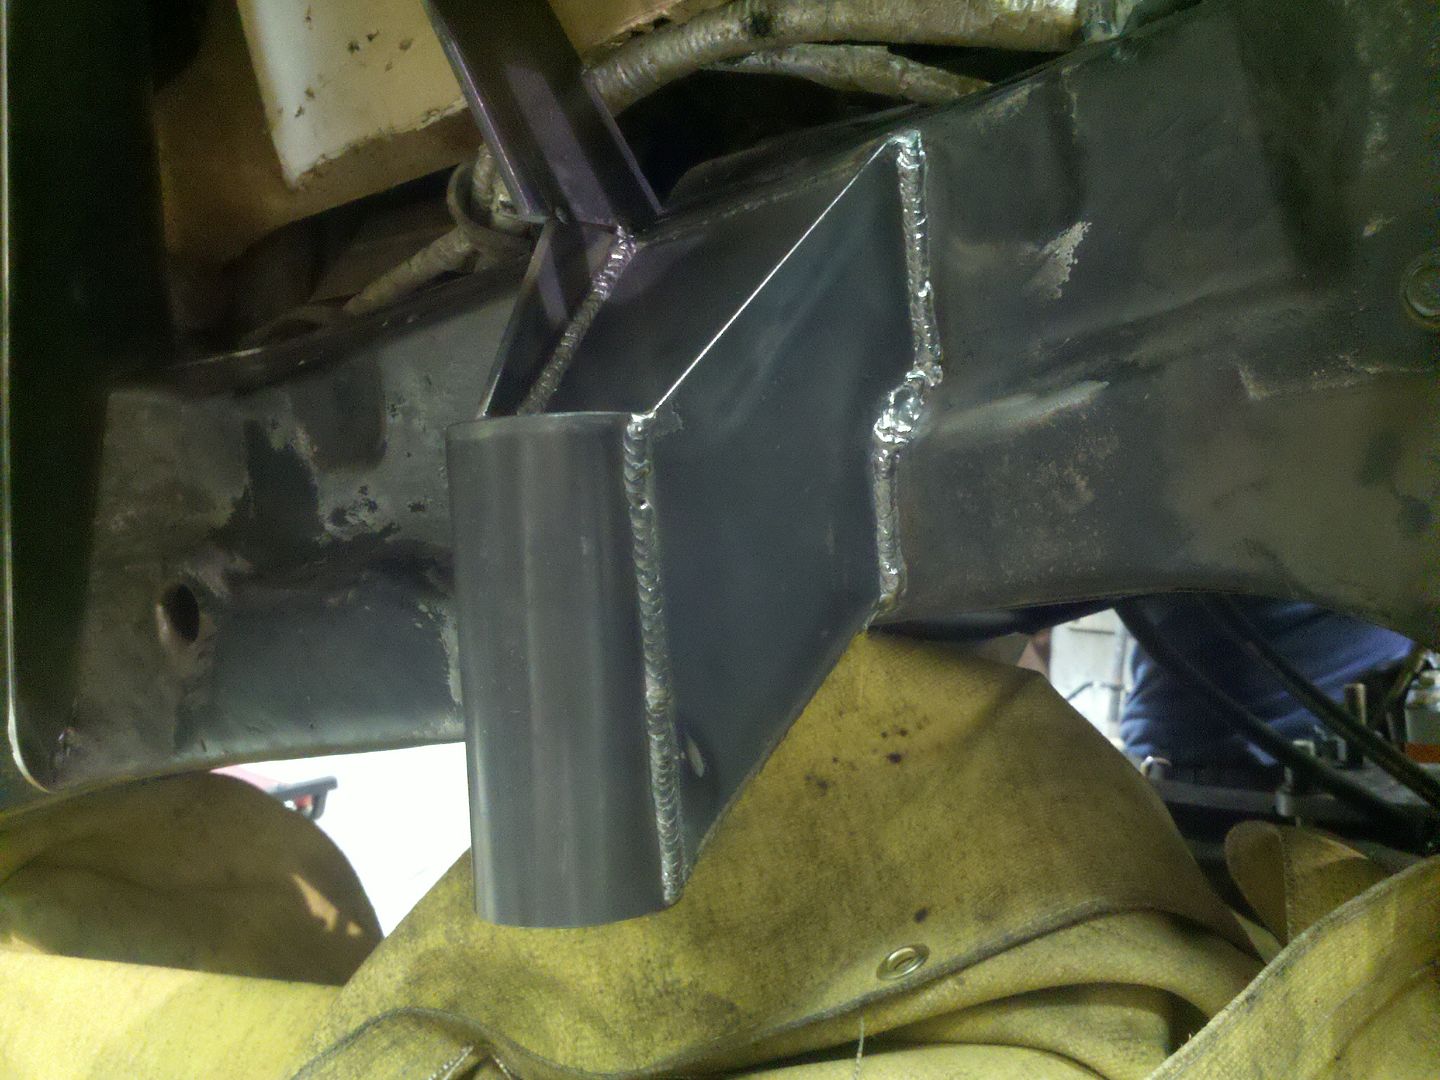
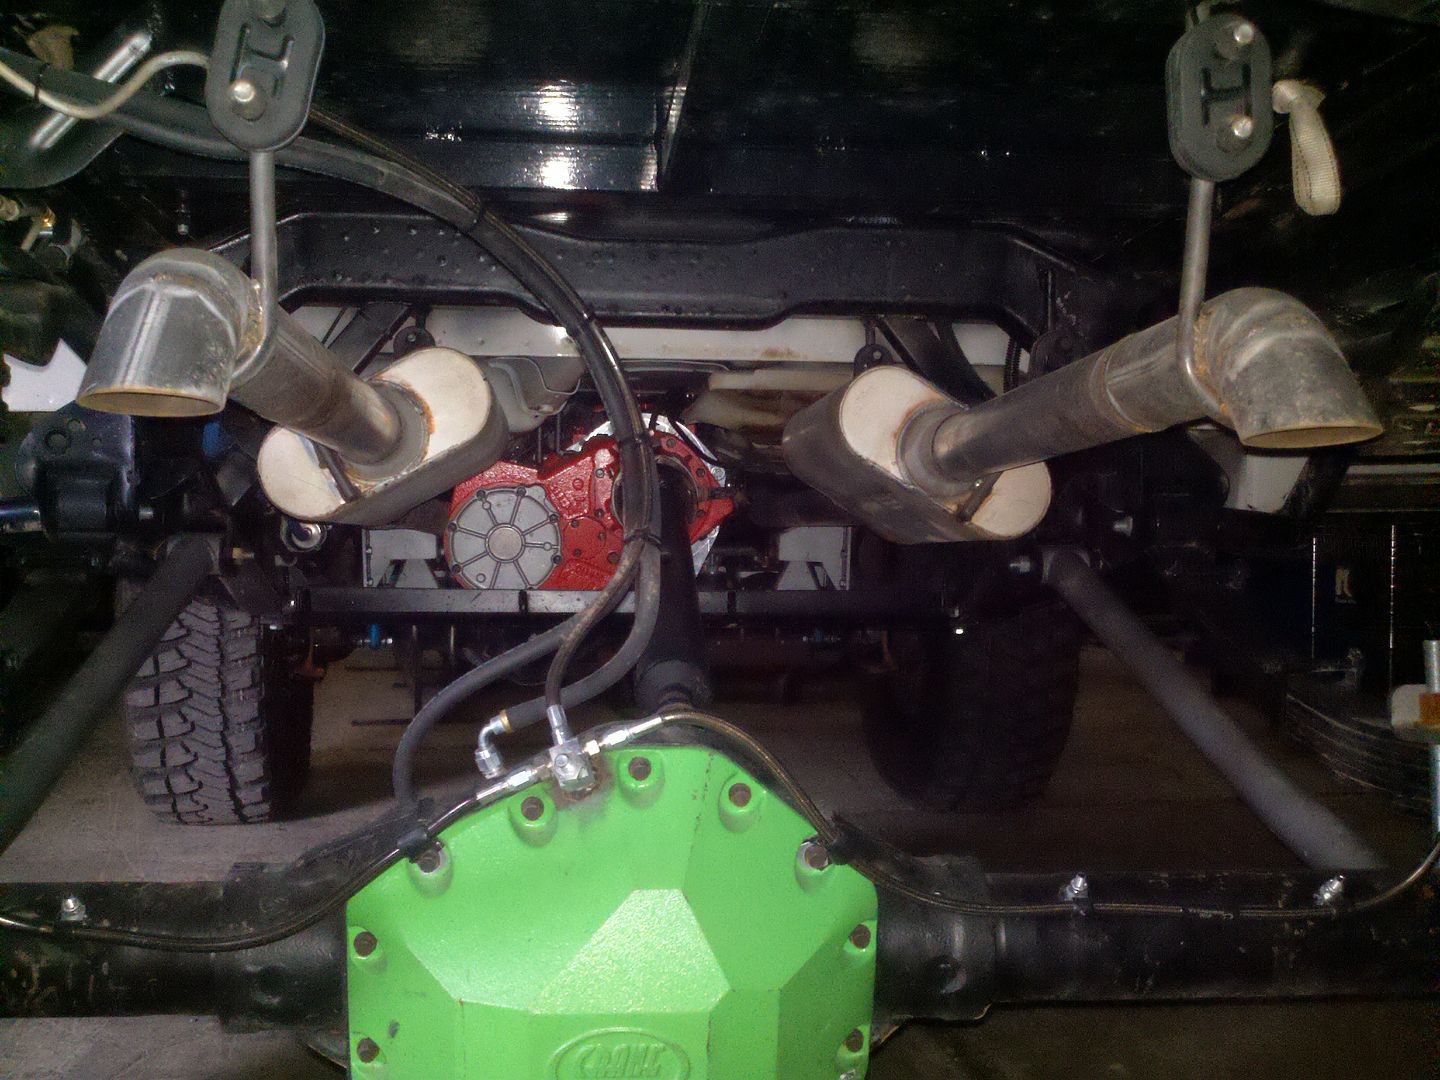
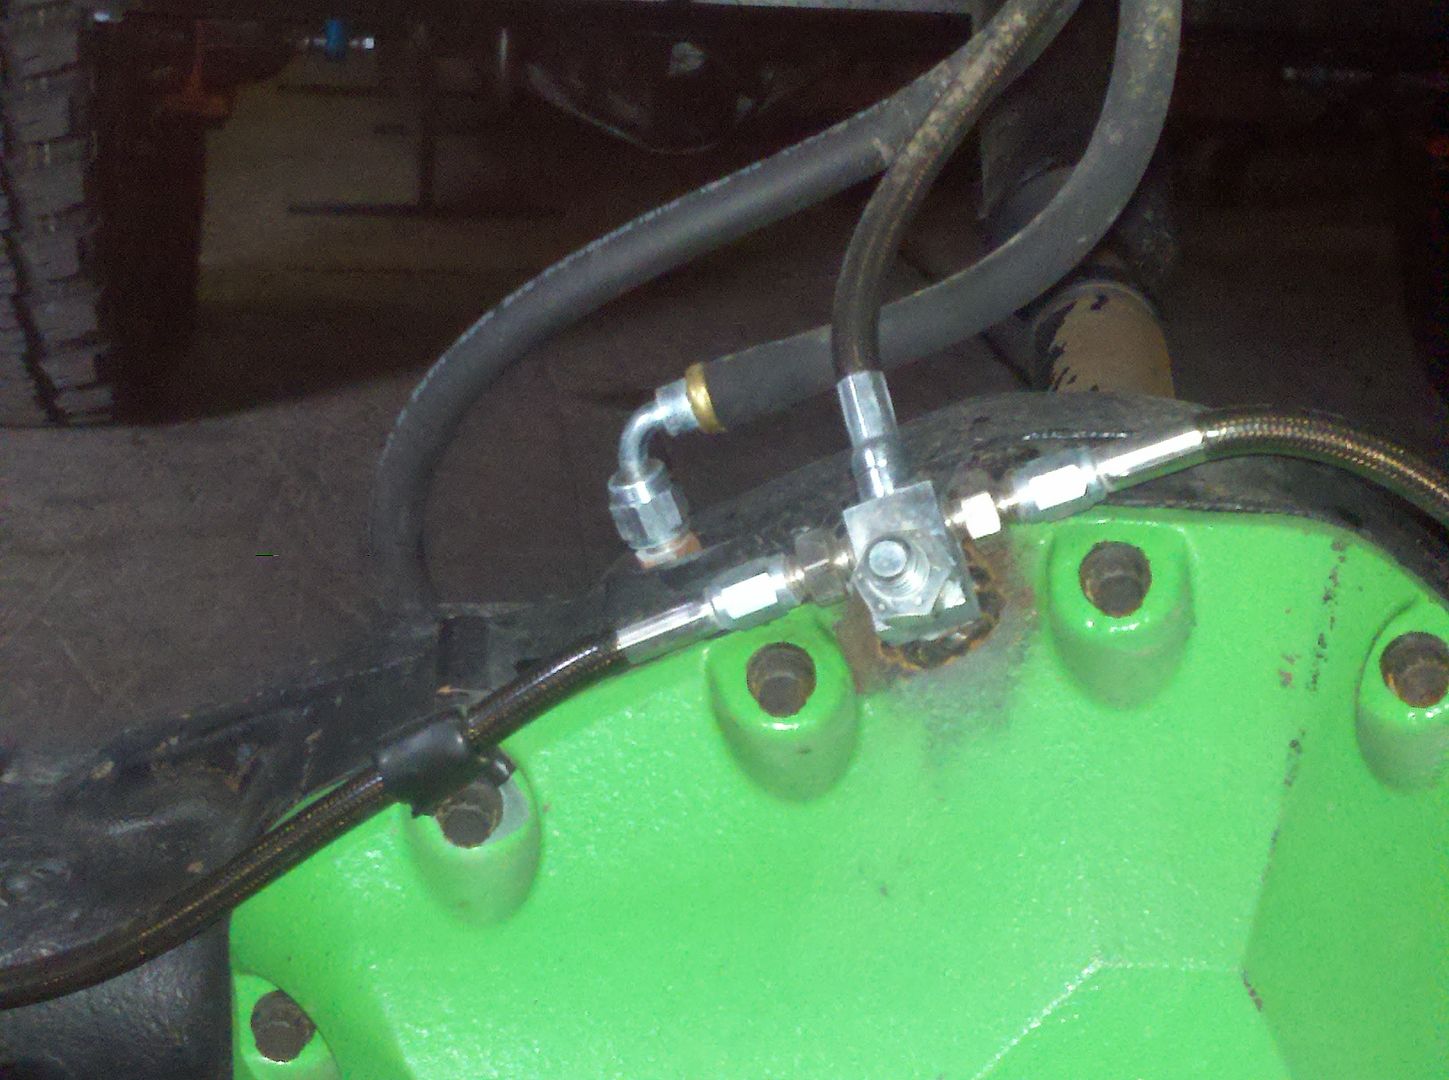
We started work on the 14 bolt too, we pulled an old housing off the rack since we're changing spring perches, shock mounts, diff and brakes. The '99 housing has all the ribs on the bottom that would just add grinding time to smooth it out too. Here's the housing during grinding:
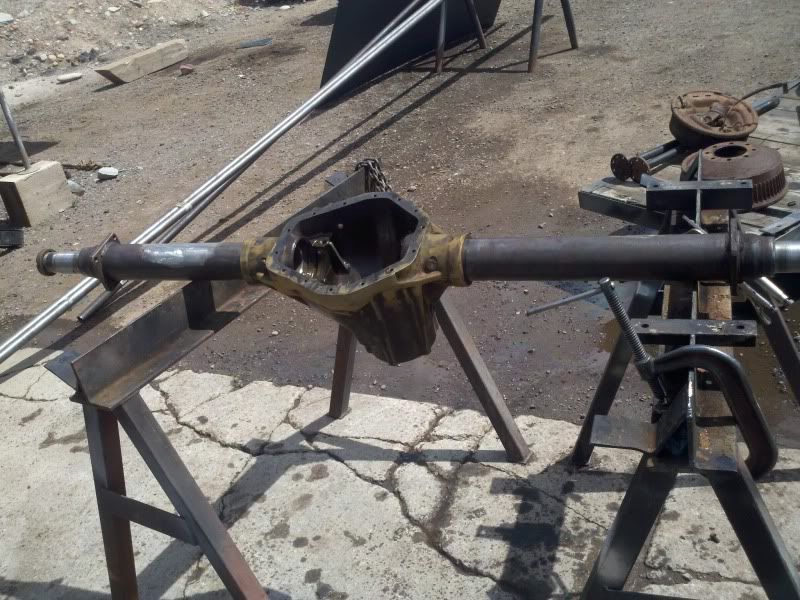
We like to add some plug welds to these while we're working on them since we have spun a couple.

We just drill some holes with a holesaw and burn in some new "pegs", typically 2-3 on each side.
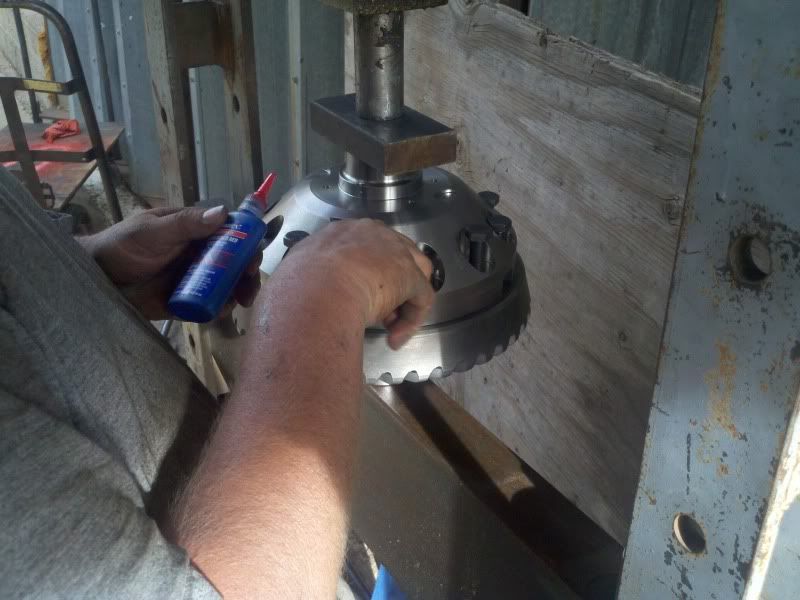
The ARB and ring gear became best friends just before quitting time too:
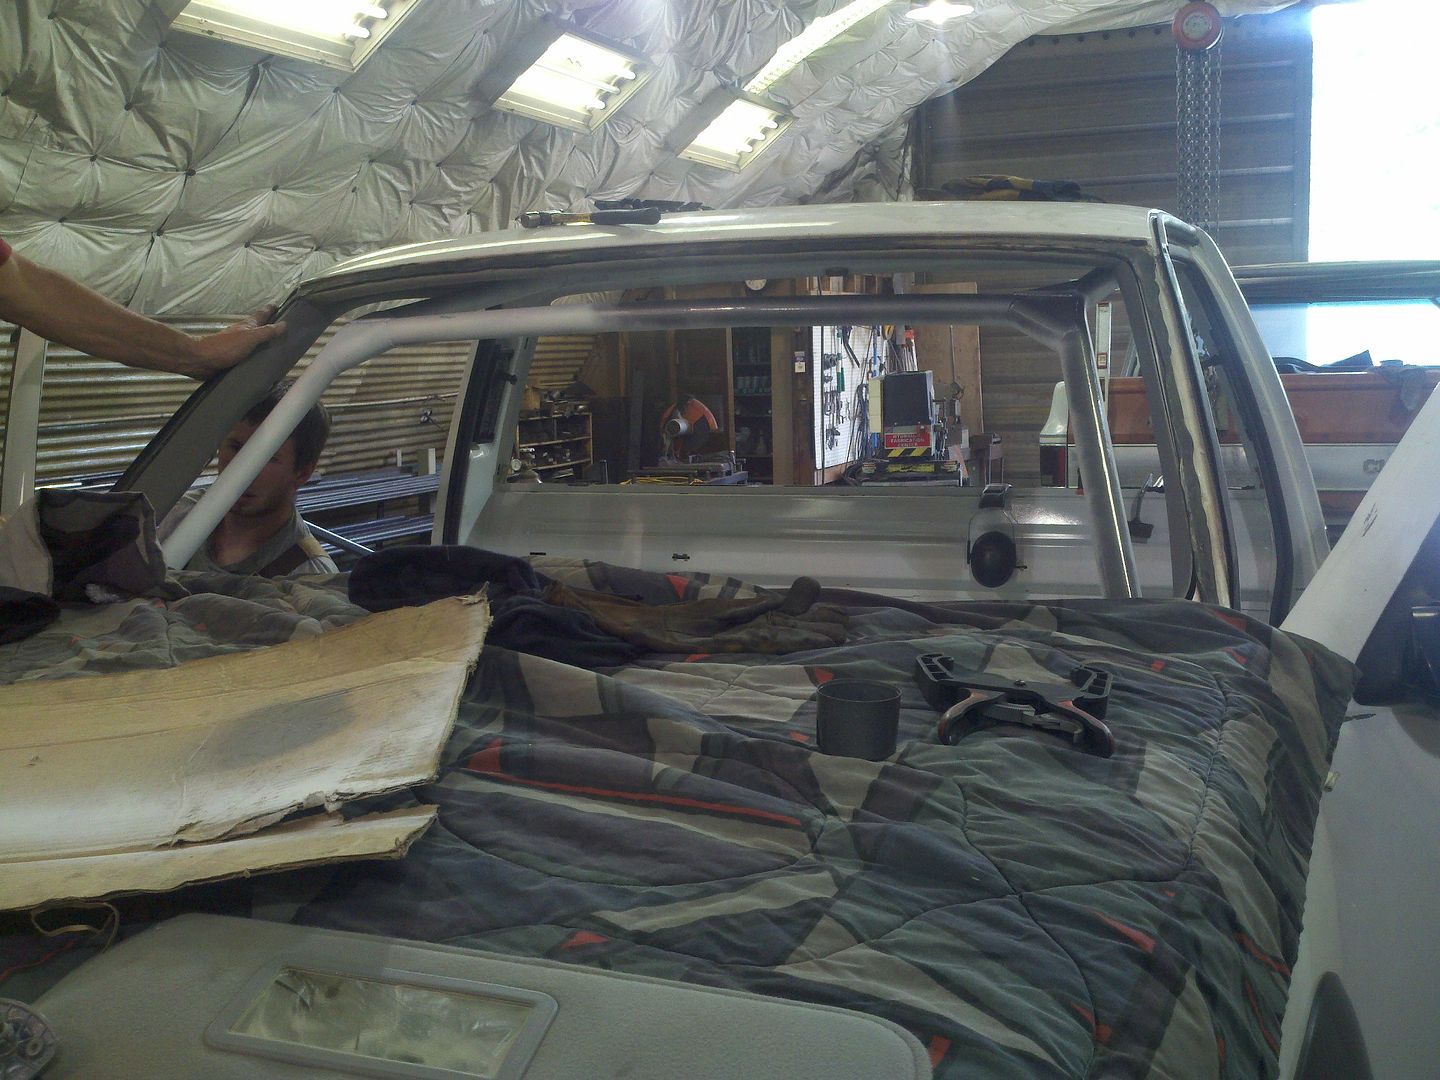
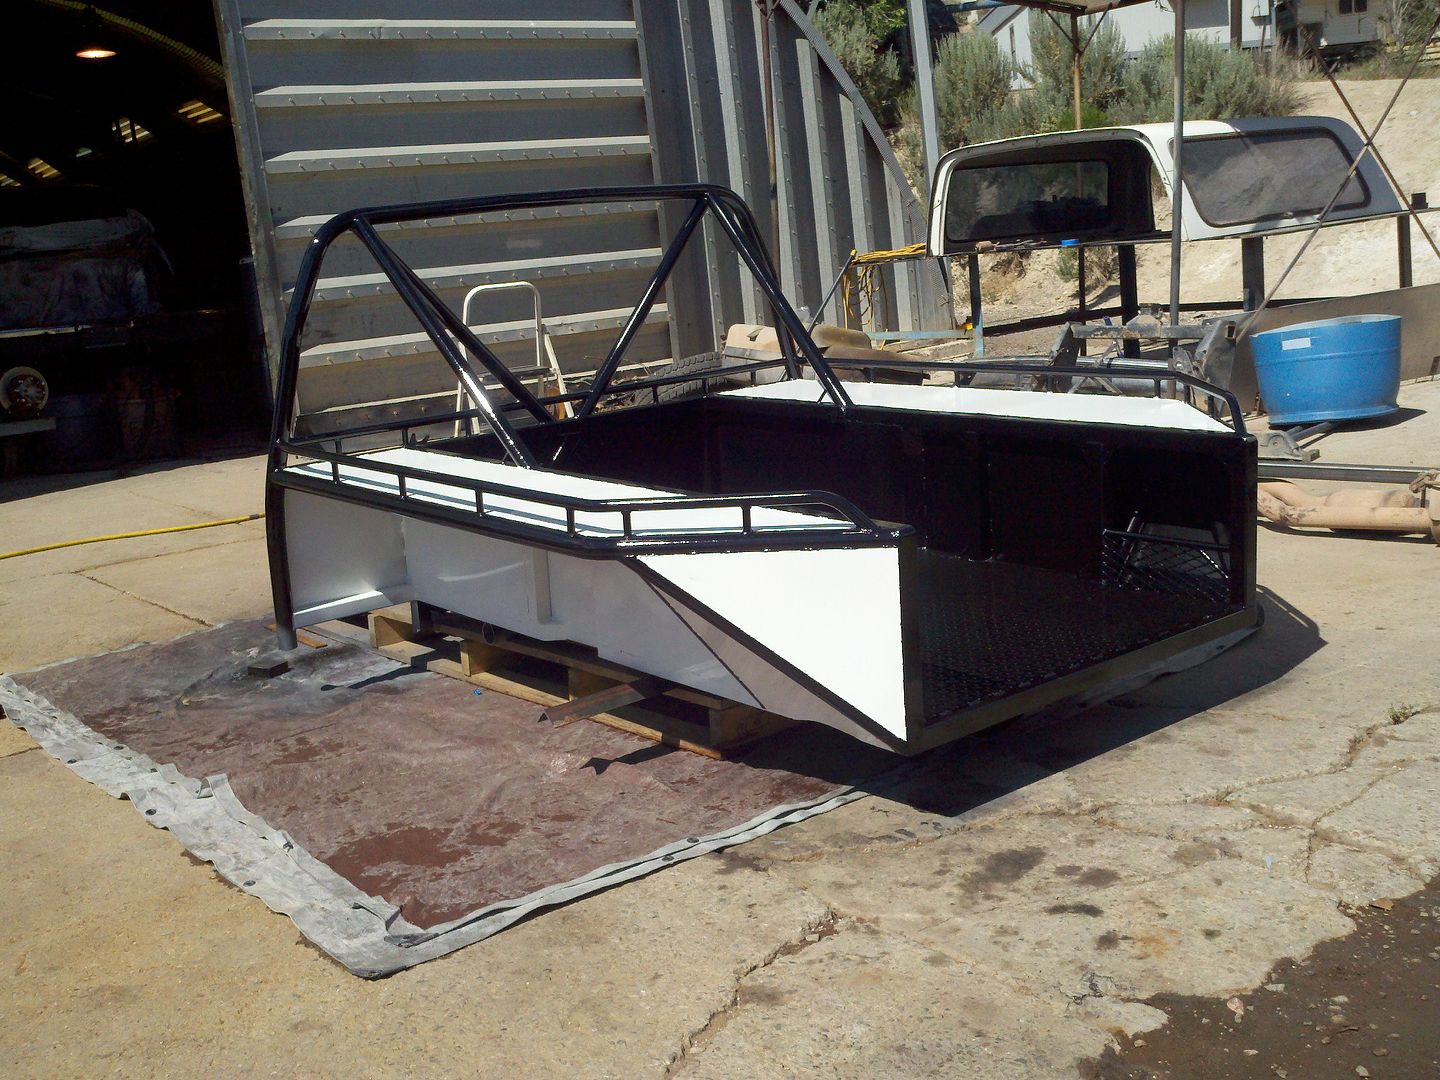
Enough of the bed is framed up that we can take it off and finish on the bench.

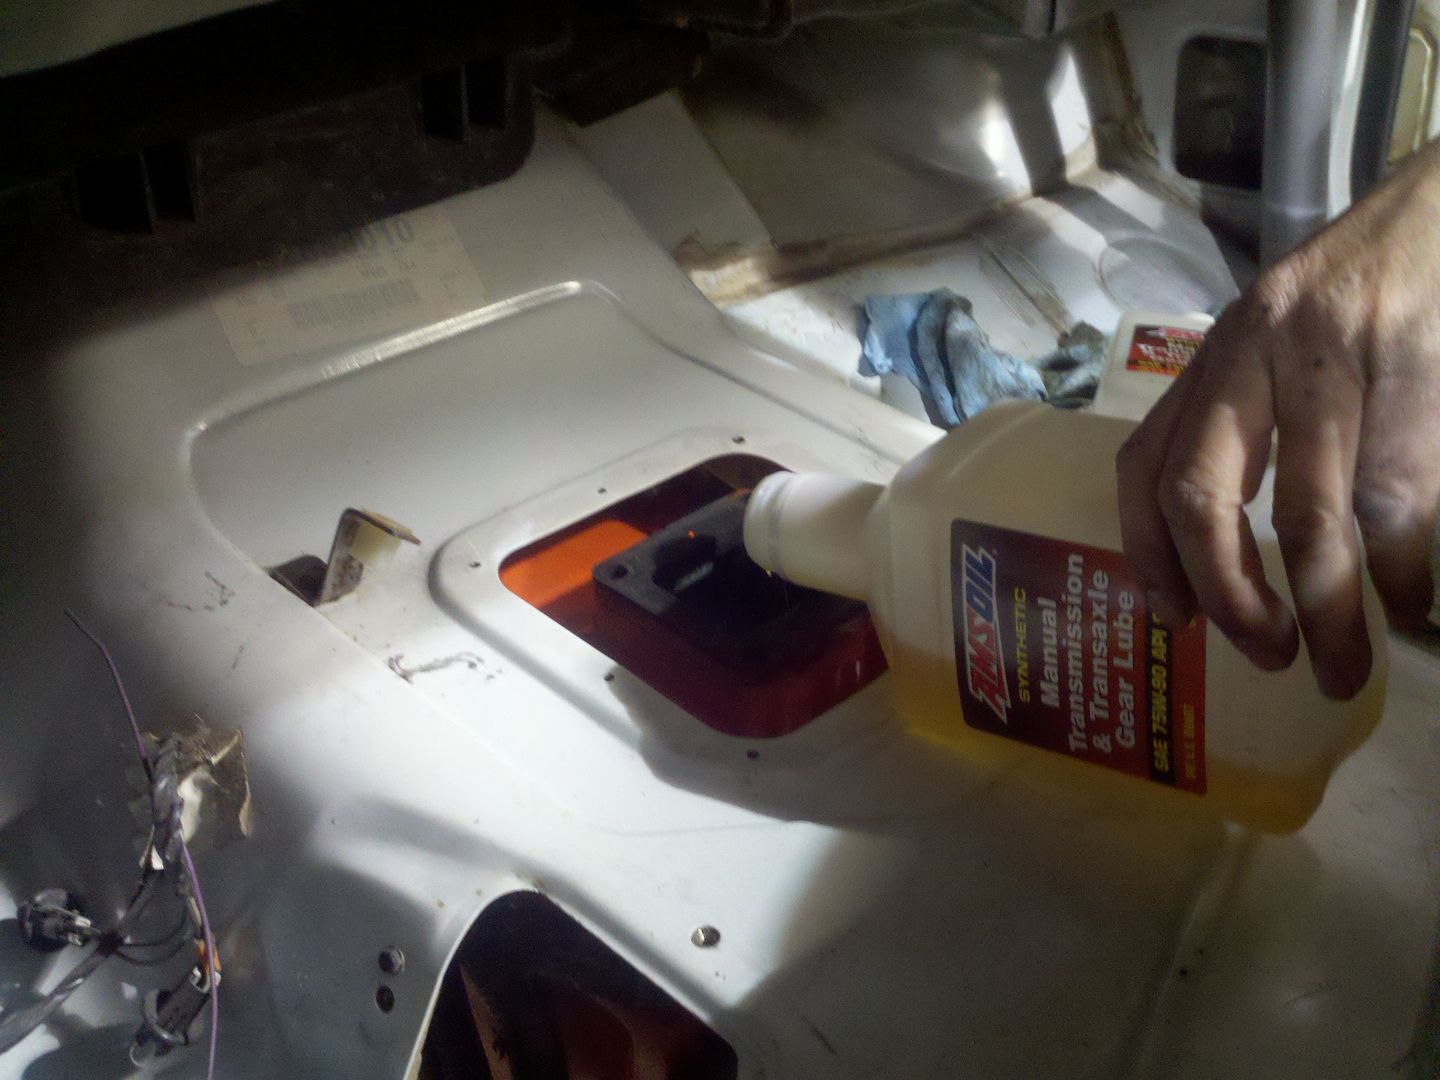
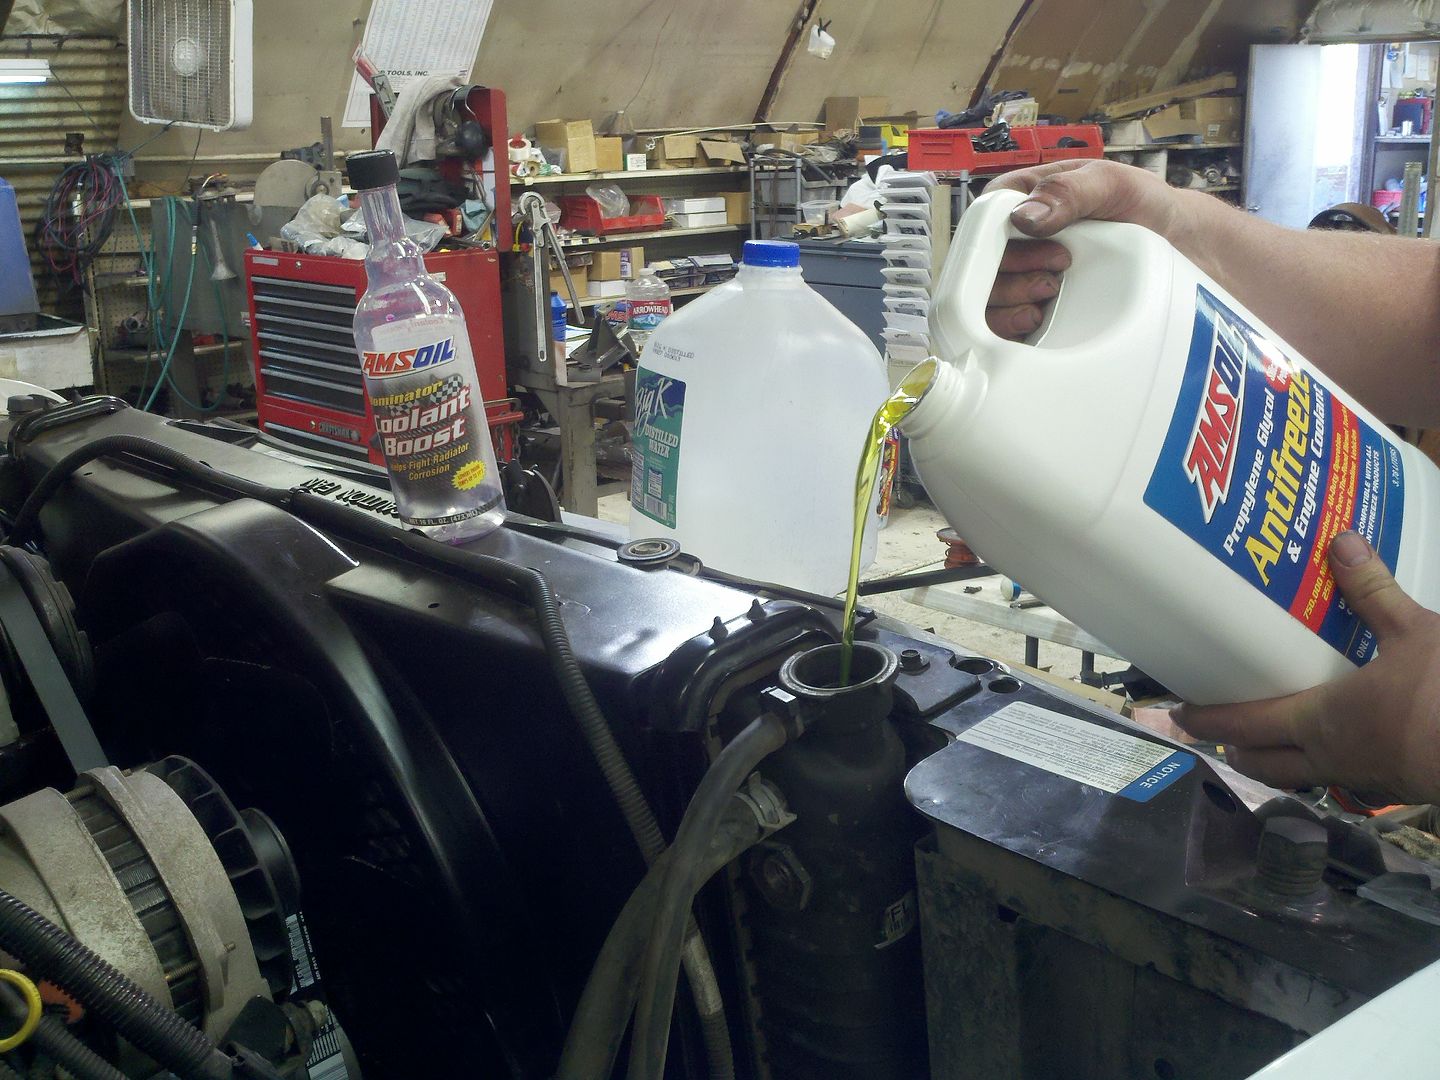
We got the lubrican here today.
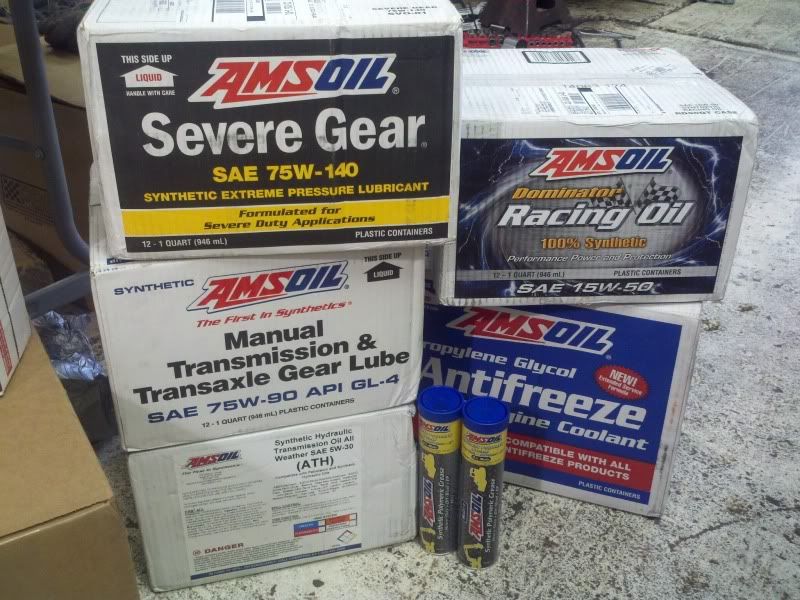
That MTG is listed specifically for the NV4500 so it is the right stuff to keep that guy happy. The rest of the gears should be more than happy with the standard Severe Gear. Probably the best lube this bunch of junkyard drivetrain parts has ever seen. I guess there's not much left from the junkyard inside the axles but the t-case guts are all stock 1970's hotness.
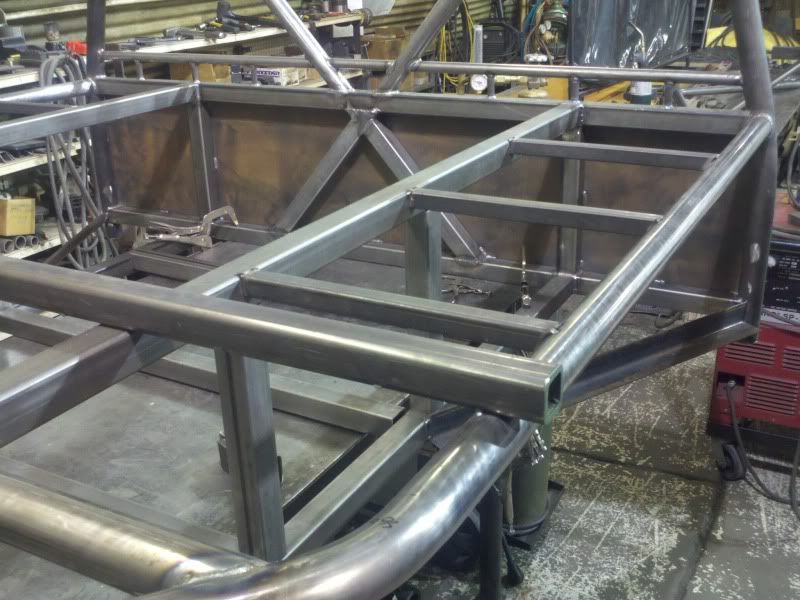
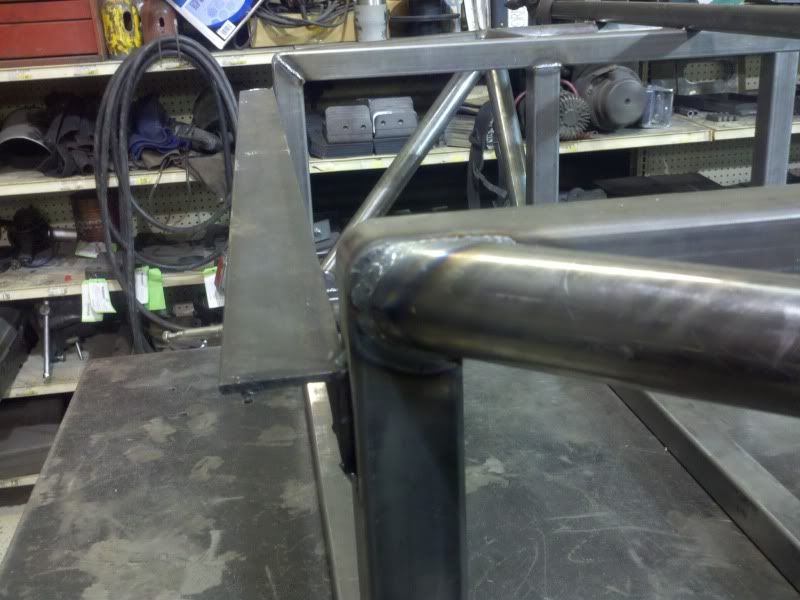

We gusseted the corners both ways with sheet gussets

We also marked mount locations for the traction bars while cycling and they're not going to bind at all, as usual. i didn't take a picture of the apparatus for cycling the leaves since it's a bit ugly but it involves a bar across the frame and a couple of chain hoists to the axle. It gets the job done but it really enforces how nice it is to cycle a linked up suspension compared to leaves.
The rear uses a tension shackle with about a 2" longer shackle and looks like it'll cycle between 13 and 15" of vertical depending on what we do with the shackle.
Here's the rear at full droop:

It all started a couple days ago when the super awesome Dynatrac hubs showed up. (I never thought we'd ever pay that much for a set of hubs but after breaking 2-3 sets in my blazer, it seems OK) The driver's side bolted on just perfect but when we were done the pass. side didn't lock. So I start working out what's wrong and find that the inner gear has to be forced a little to go inside the outer gear. So something's wrong in the alignment of the spindle and wheel hub. Switching parts around between the 2 sides confirms that the hubs are just fine so we clean everything up and find that maybe a race isn't seated all the way. Check it out and that's not it. Try another wheel hub, that's not it. Try another spindle and BINGO, it all works. Just when it seems like it's all done, we tighten up the 3 screws on the cap of the Dynalock and the dial won't spin. So it seems the stub is sticking out to far. Why is the stub sticking out too far? Turns out the "C"s on the stock housing weren't seated onto the tube as far as usual and the inner axle is hitting the "C" and won't let it slide in the little bit it needs. So we clearance some on the shaft and on the housing and I think it's all good now. Nothing like a combo of parts that's supposed to bolt together and just barely won't.
So here's the photobucket album with a lot more pics in it that I'm posting here:
http://s1181.photobucket.com/albums/x439/ORD2/Offroad%20Design%20UAK2500/
Here's an unexciting pic of the fully functional Dynaloc on the end of the housing that just bolted together.

No telling what has to be sliced out to fit a 40" tire in there. Looks like the washer tank will go in the back since it's probably not staying on the core support. AARRGG
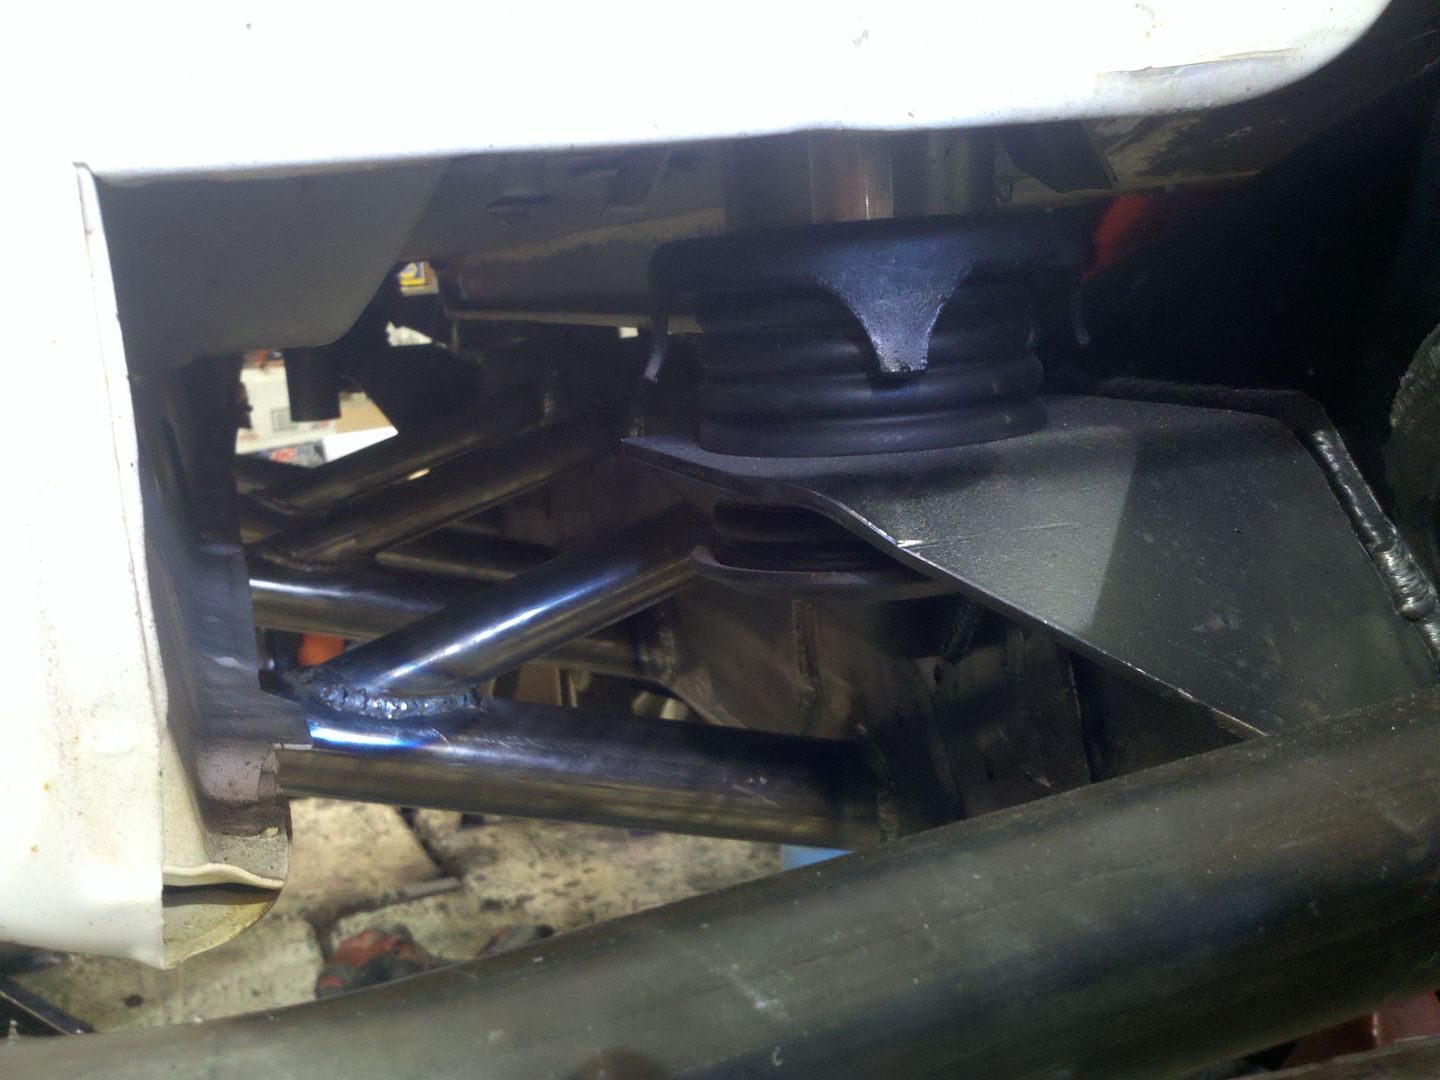
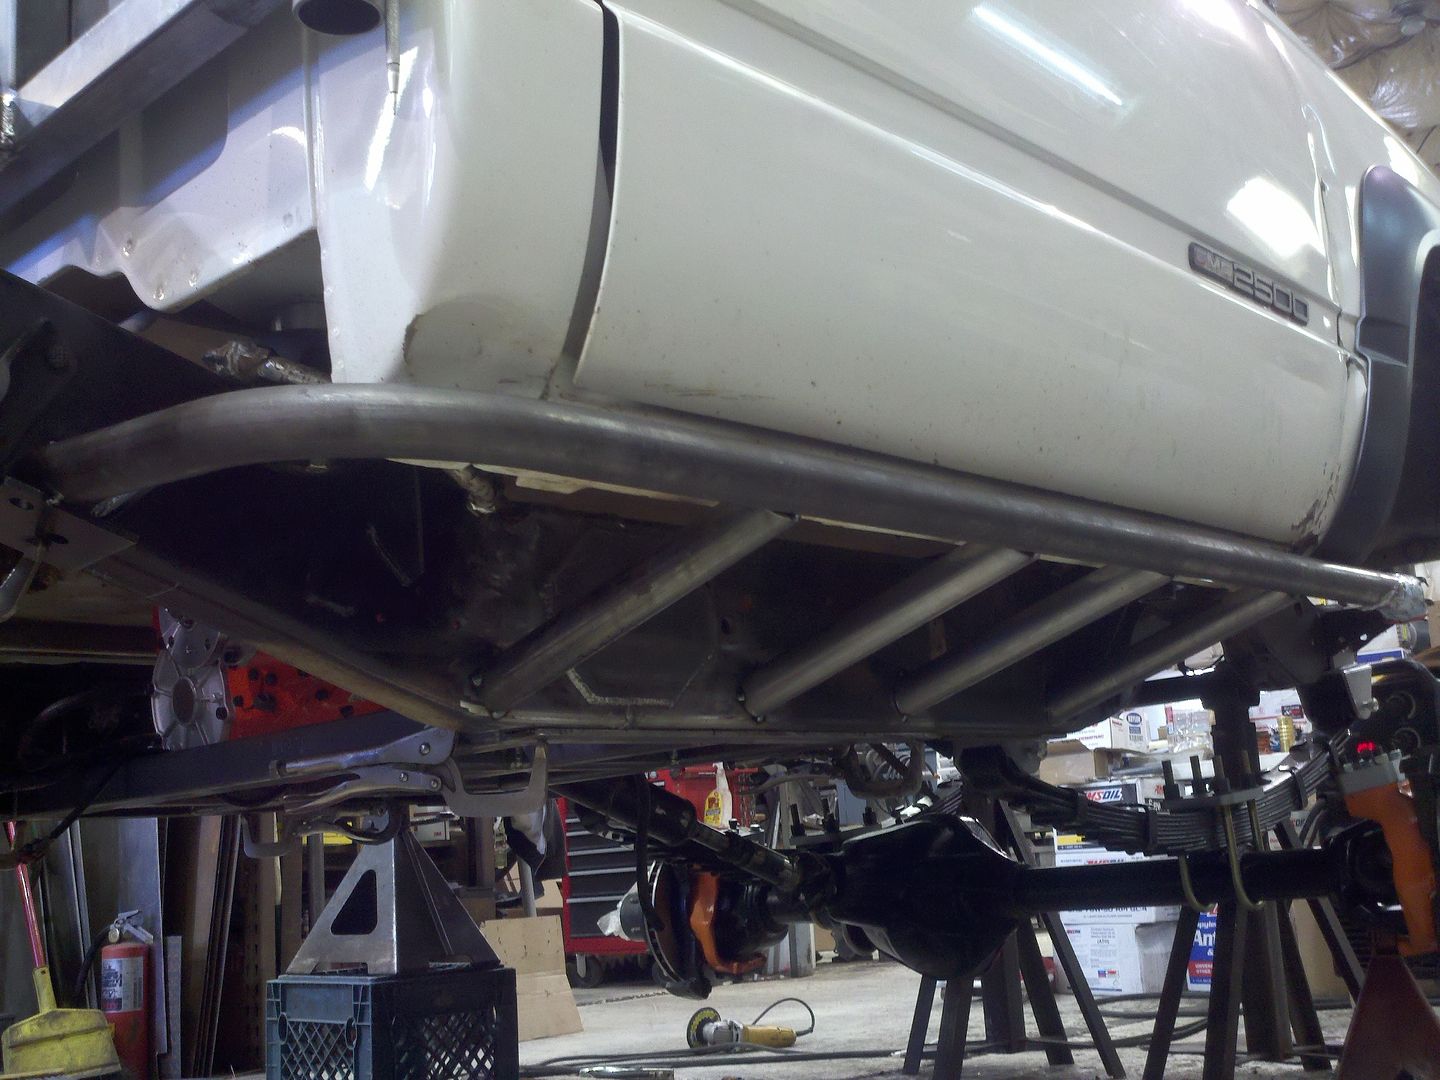

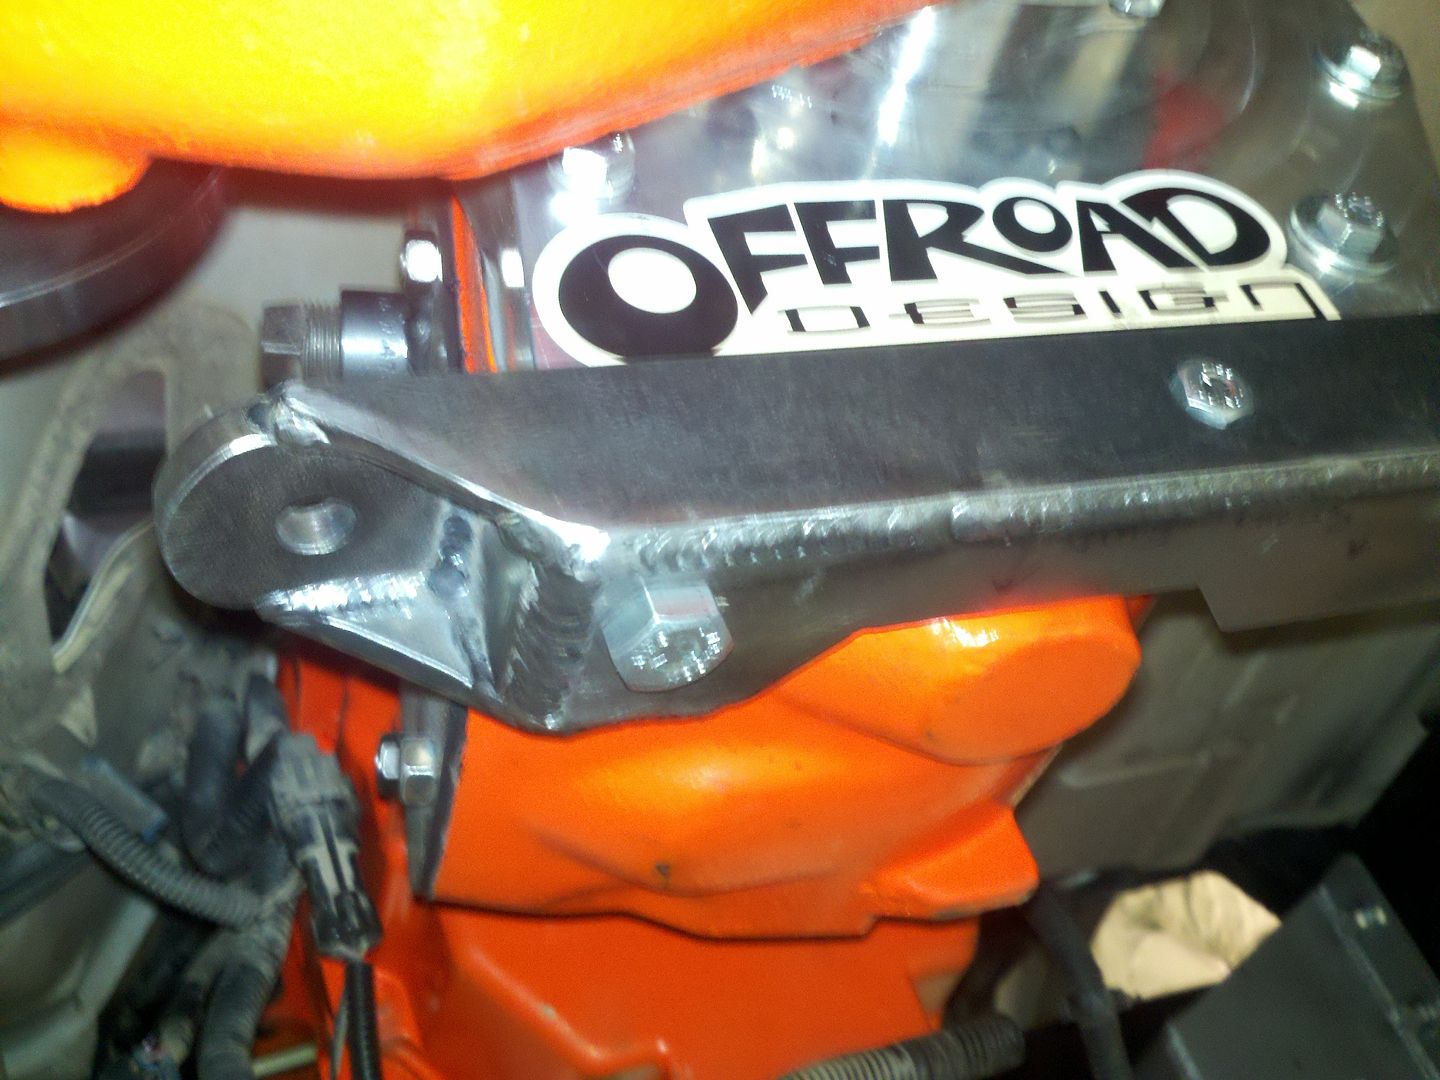
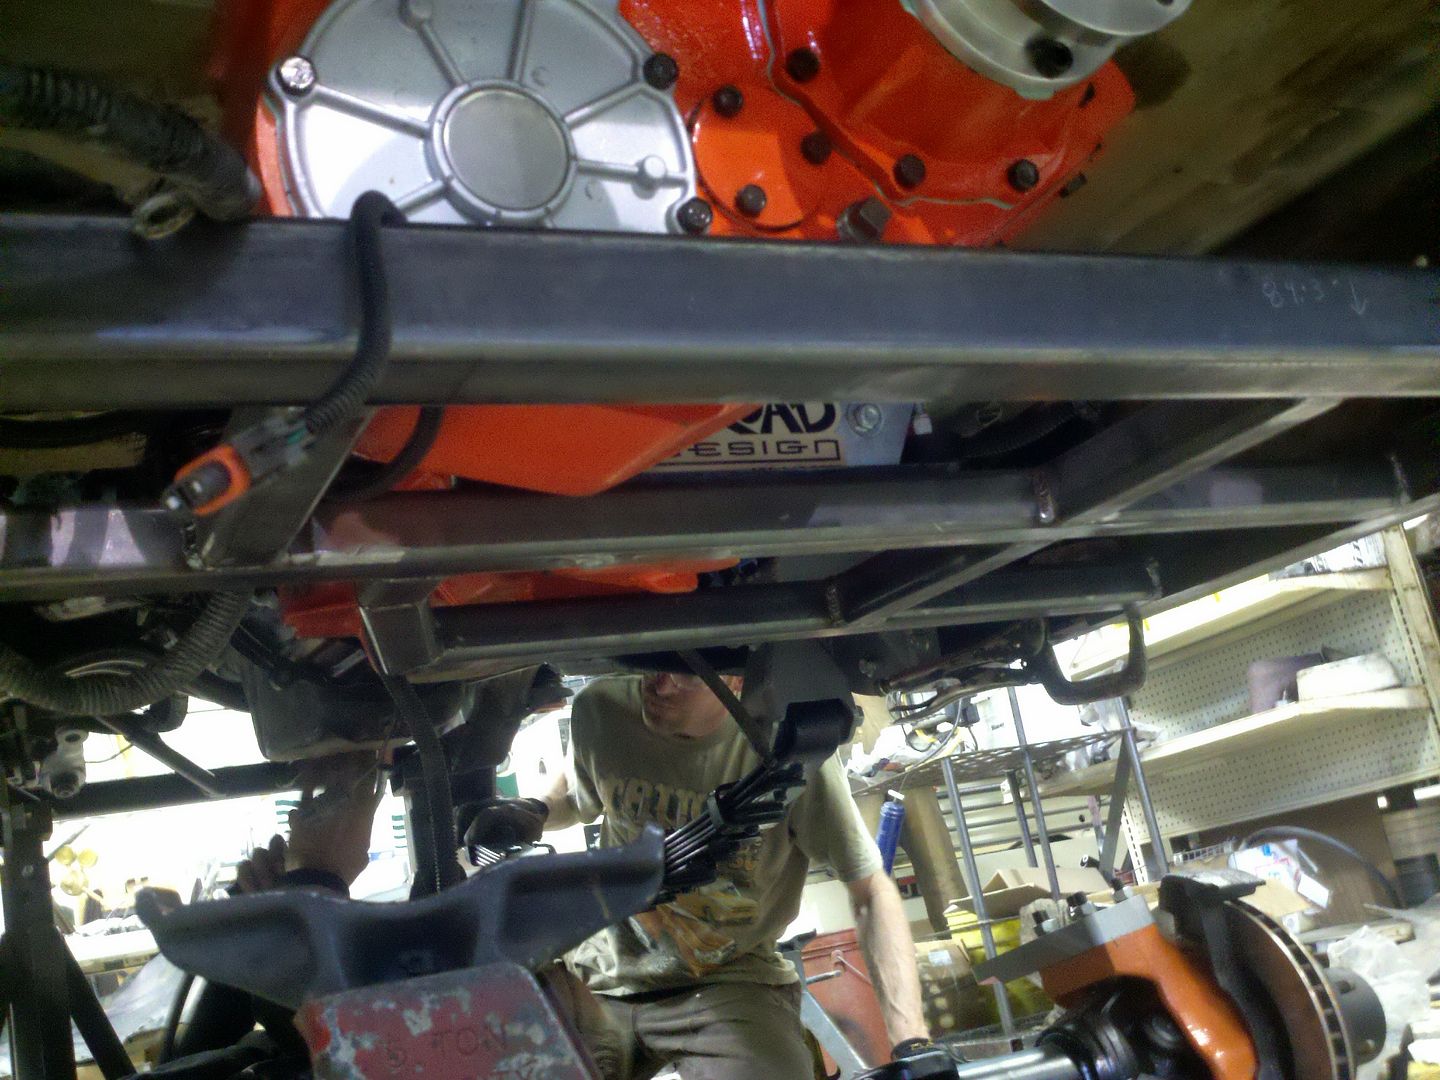
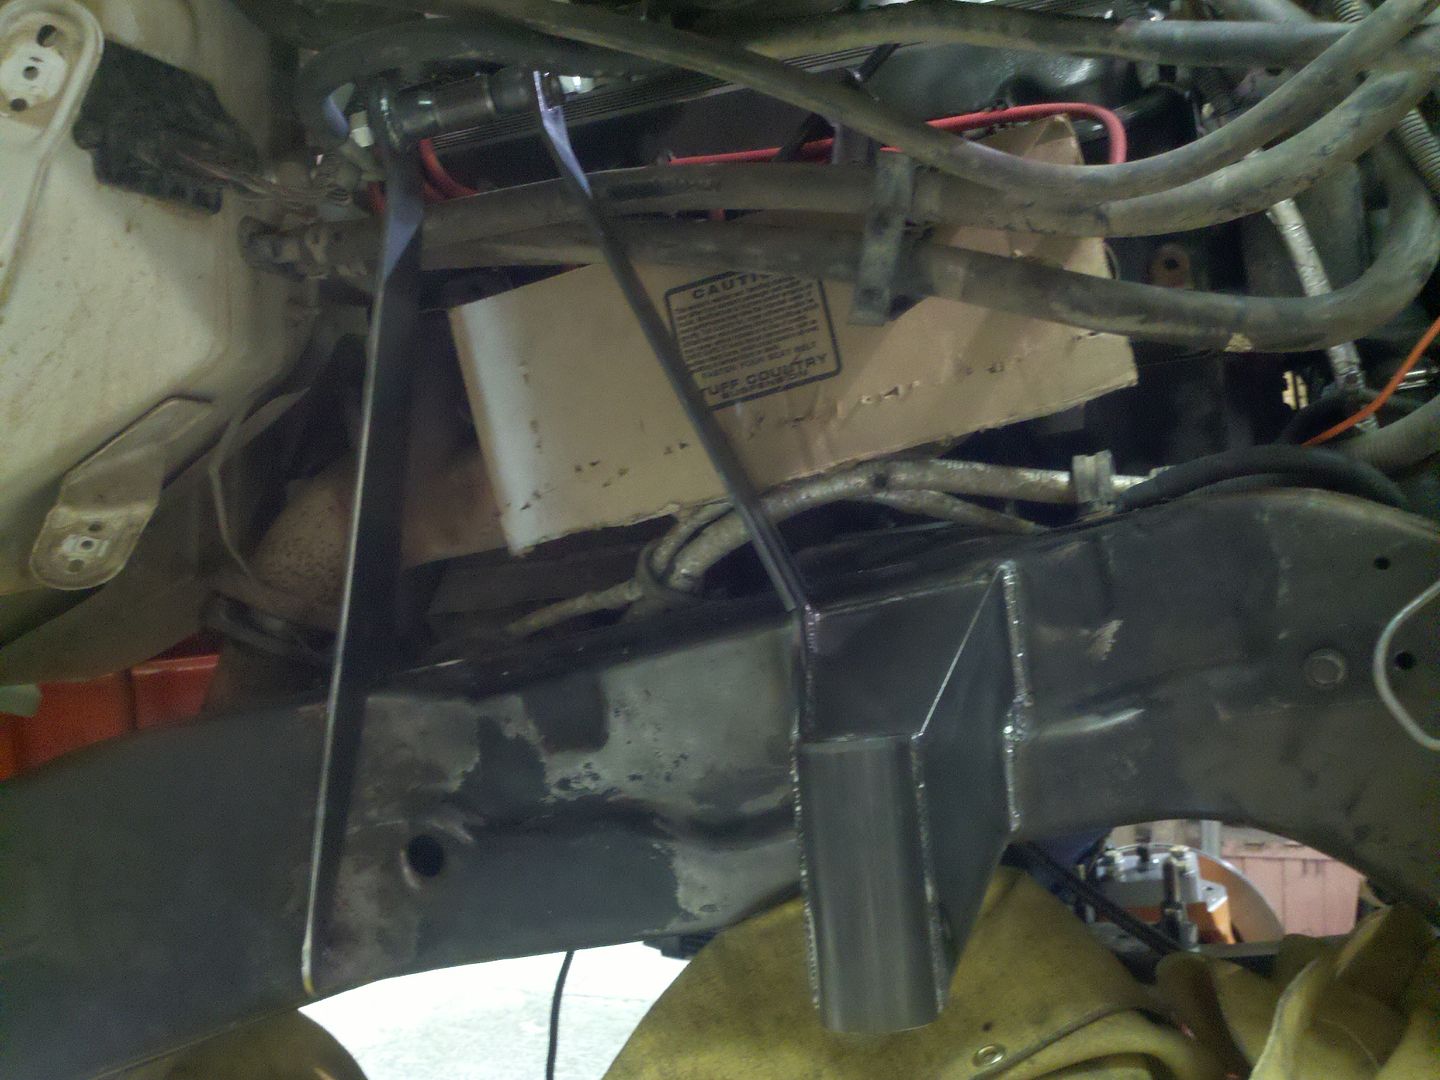
There are also stiffeners on the inside of the frame at each tube and the t-case crossmember is about 2 feet long all together which should help keep it all from wiggling too.
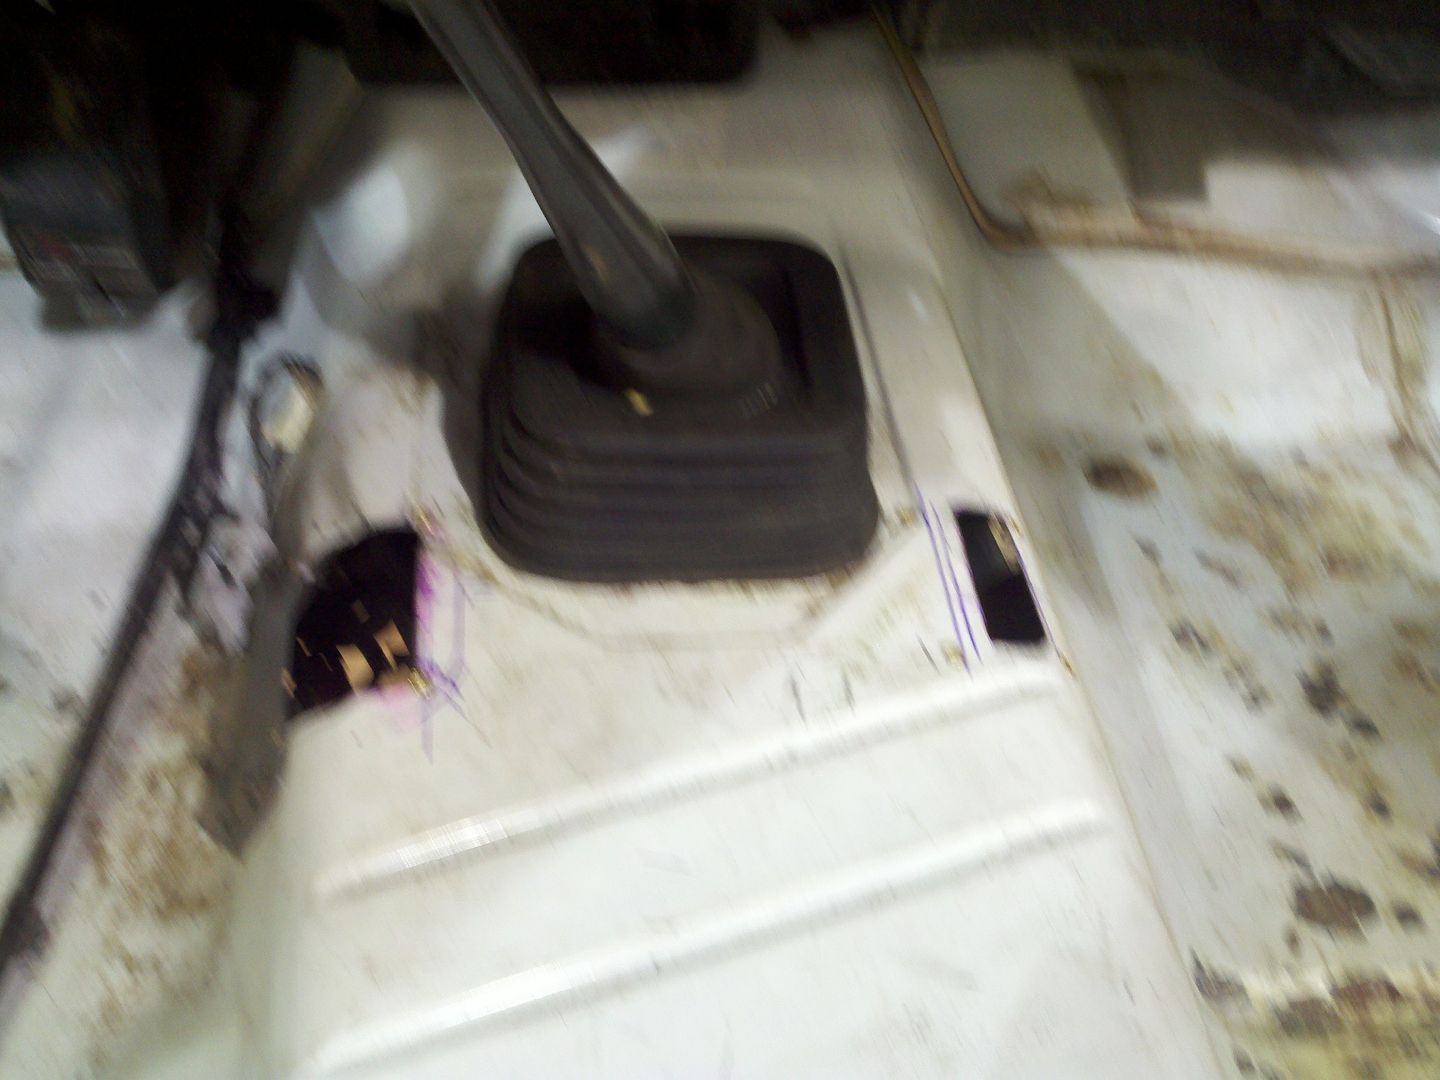
This was the most awesome trans fill job ever. I haven't messed with a manual that much and this might be their best feature.
Power steering cooler is mounted and plumbed so that system will be happy. All AN8 return lines with full flow fittings so it's about as happy as it can get.
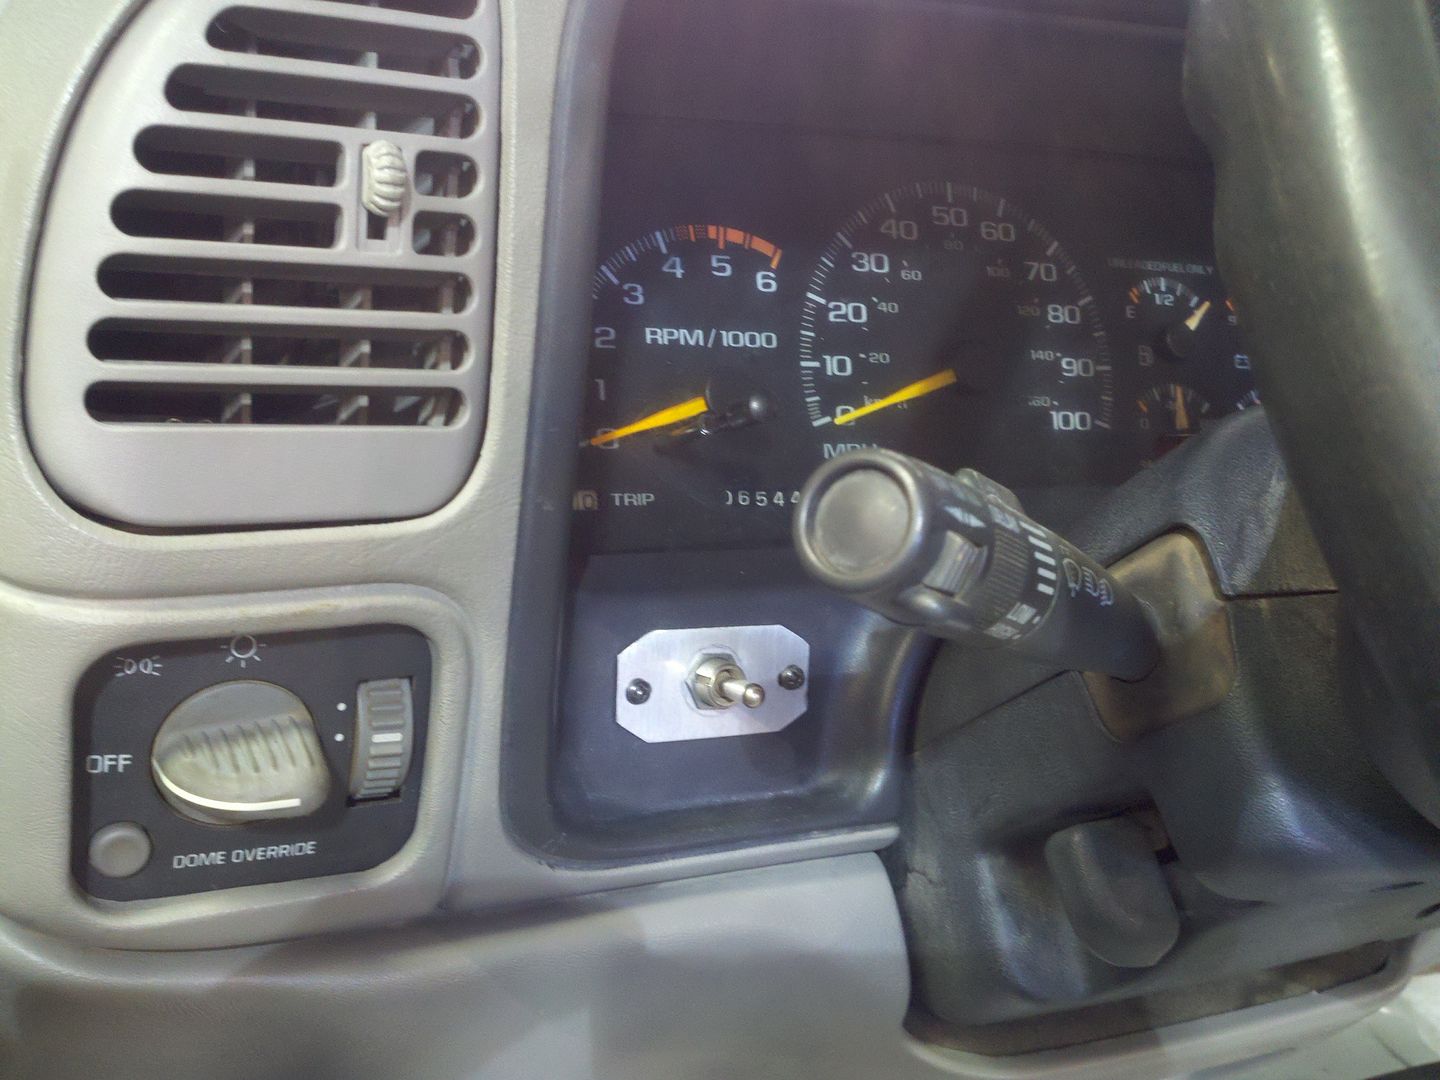
Alex Santiago came back over for a couple days and fit all the switches and wiring under the hood and in the dash. With a little trimming the switches fit right in the factory hole.
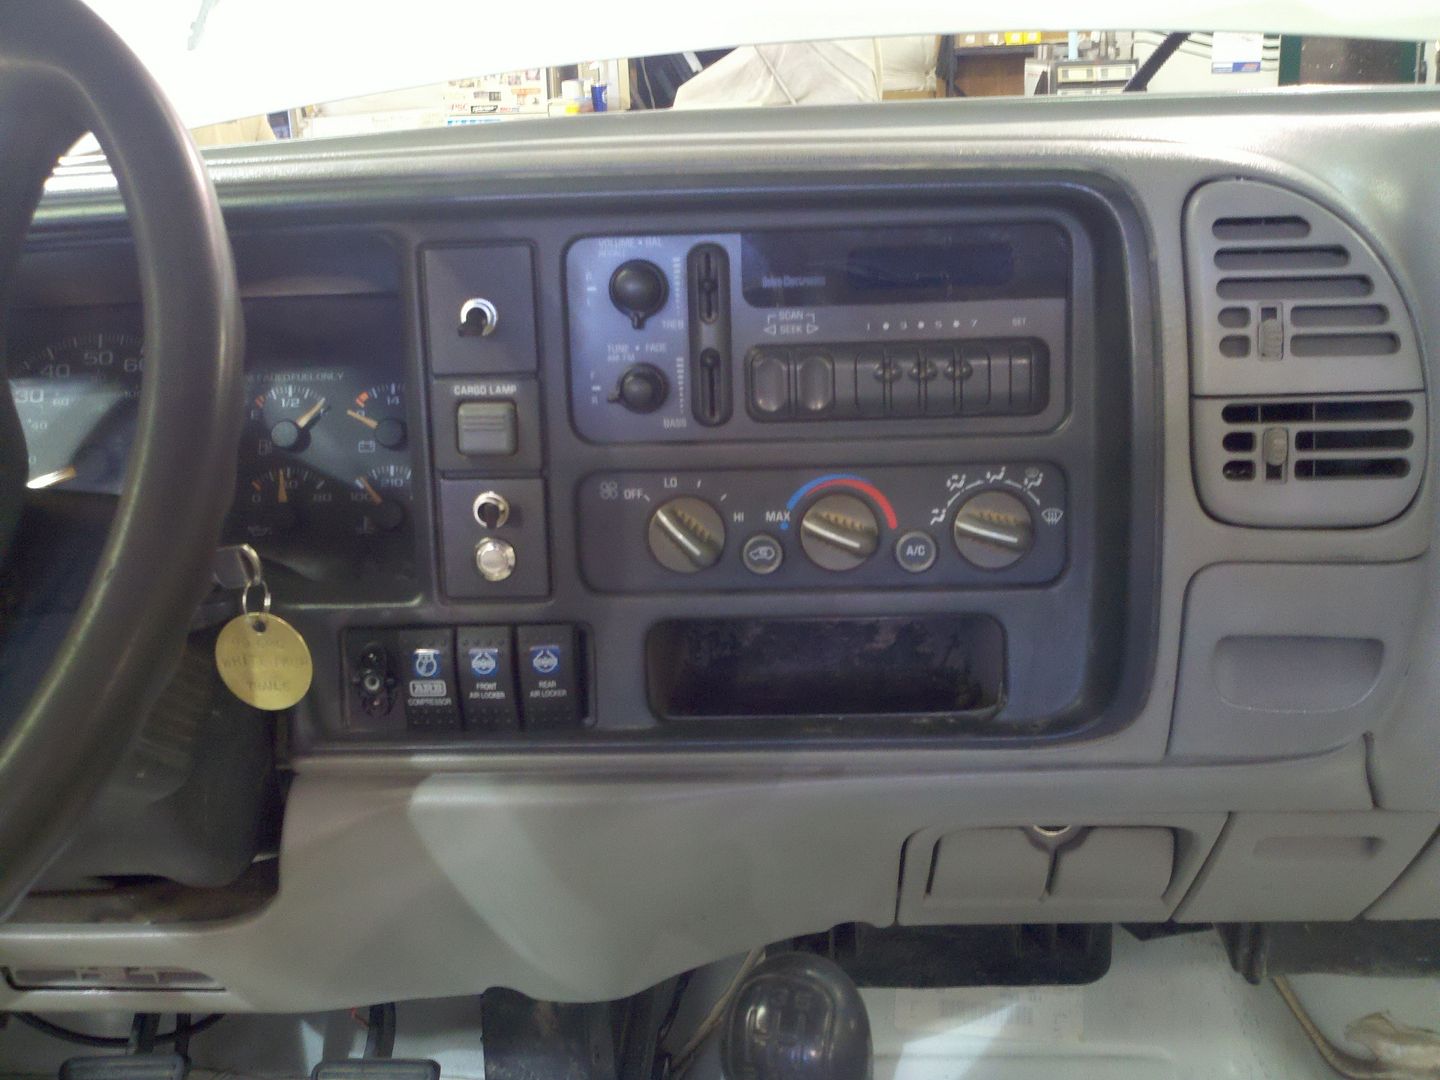
This side of the dash has the fan control switch for the extra cooling fan in front of the radiator. On-off-auto. The computer will turn it on at 206 now instead of 230 or whatever the factory setting is too.
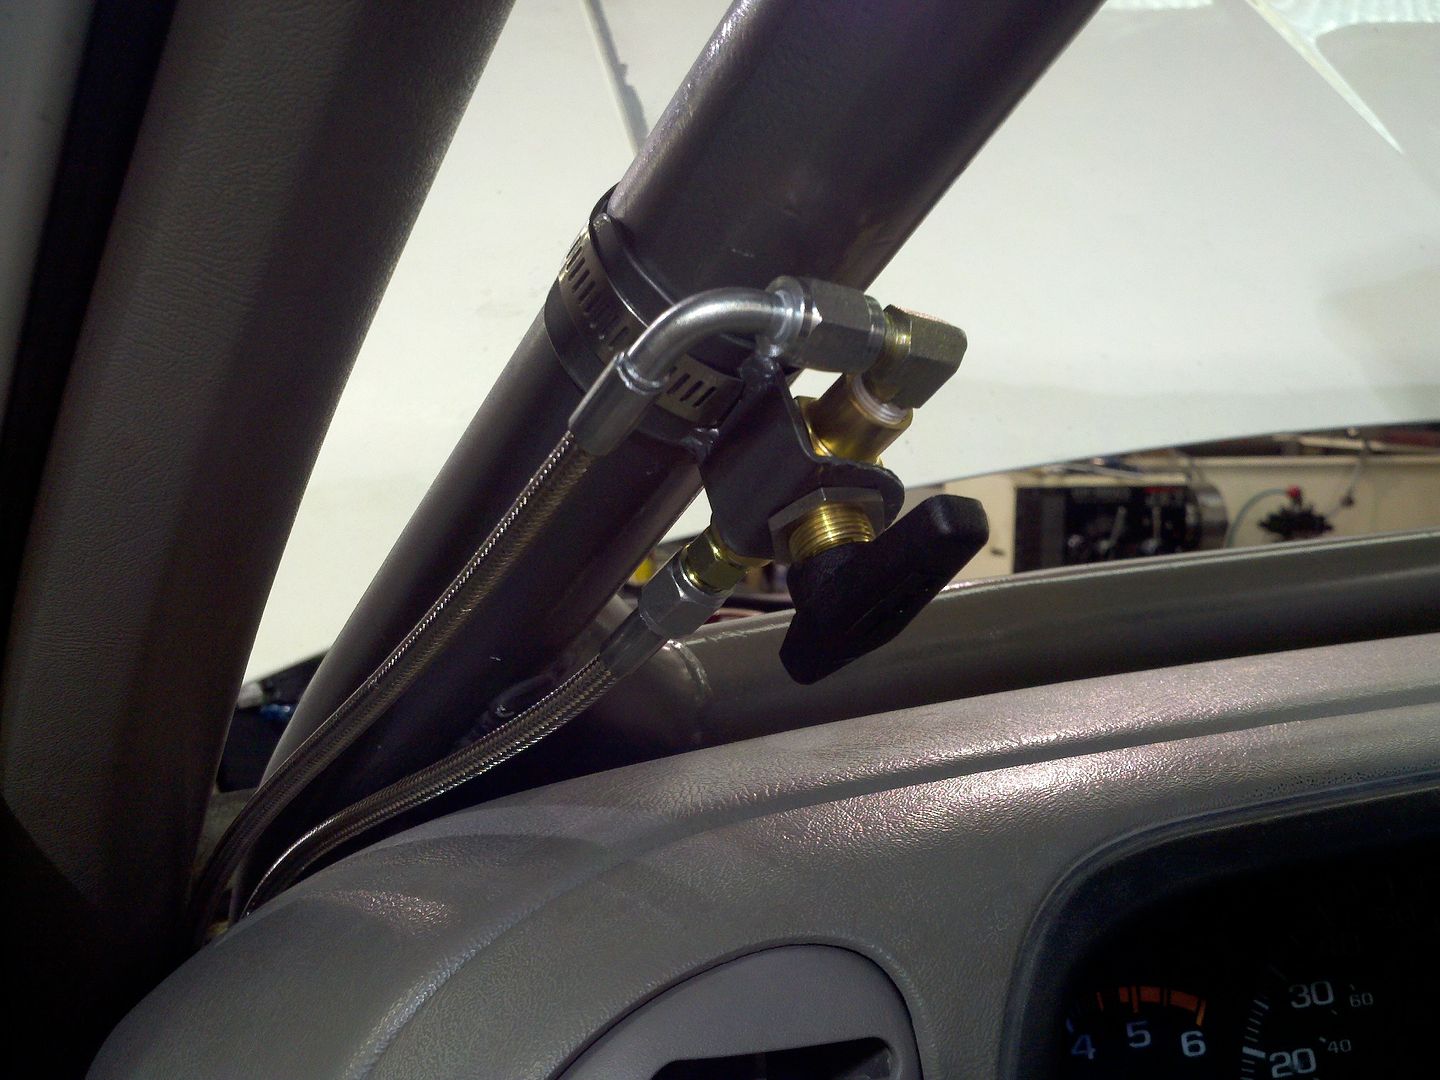
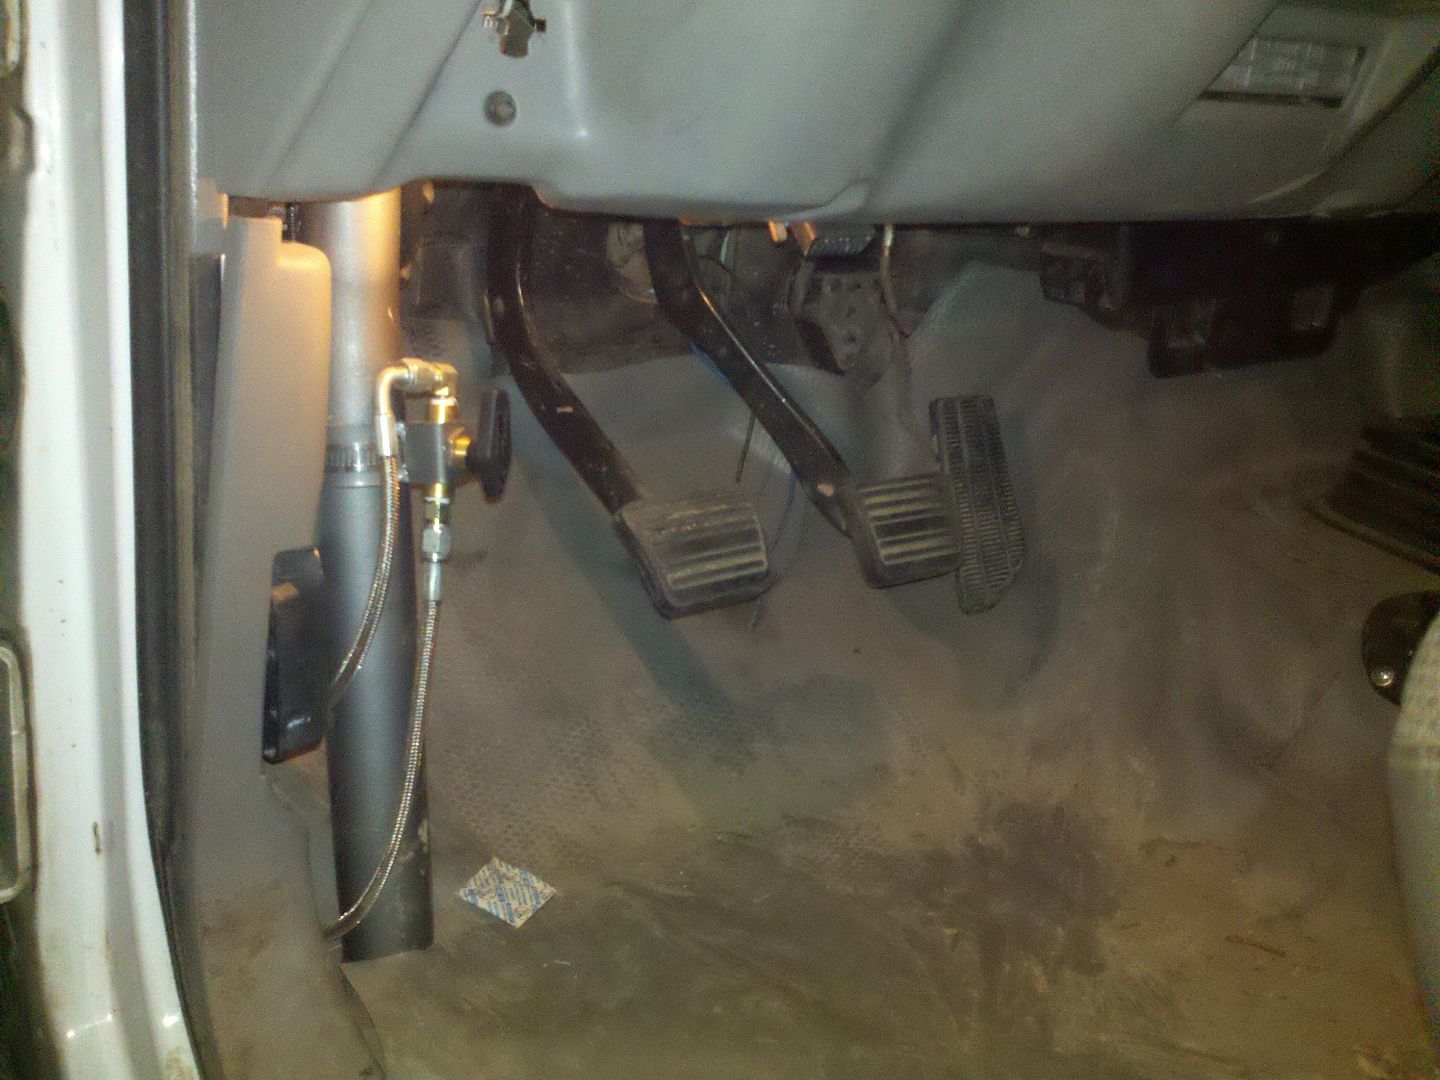
The parking brake is now gone since the discs are on so we put this line lock valve on the A-pillar for the rear circuit. Bleeding will likely be a pain.
Here's the photobucket link with all the pics, there are a few more in there that I haven't posted.
http://s1181.photobucket.com/albums/x439/ORD2/Offroad%20Design%20UAK2500/
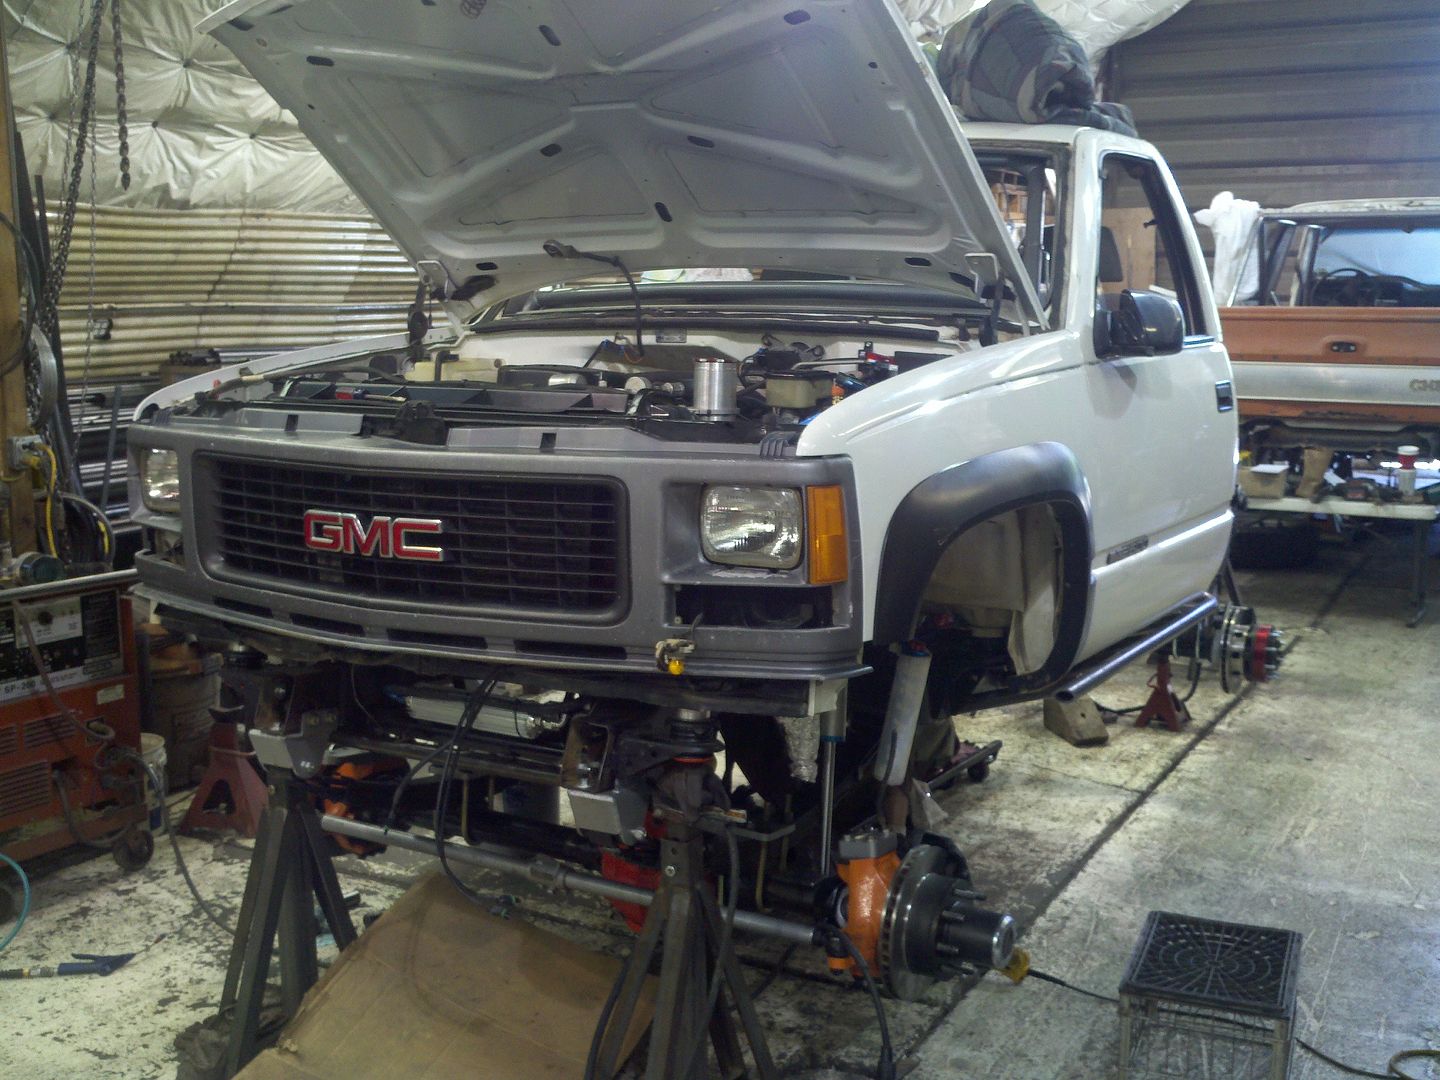
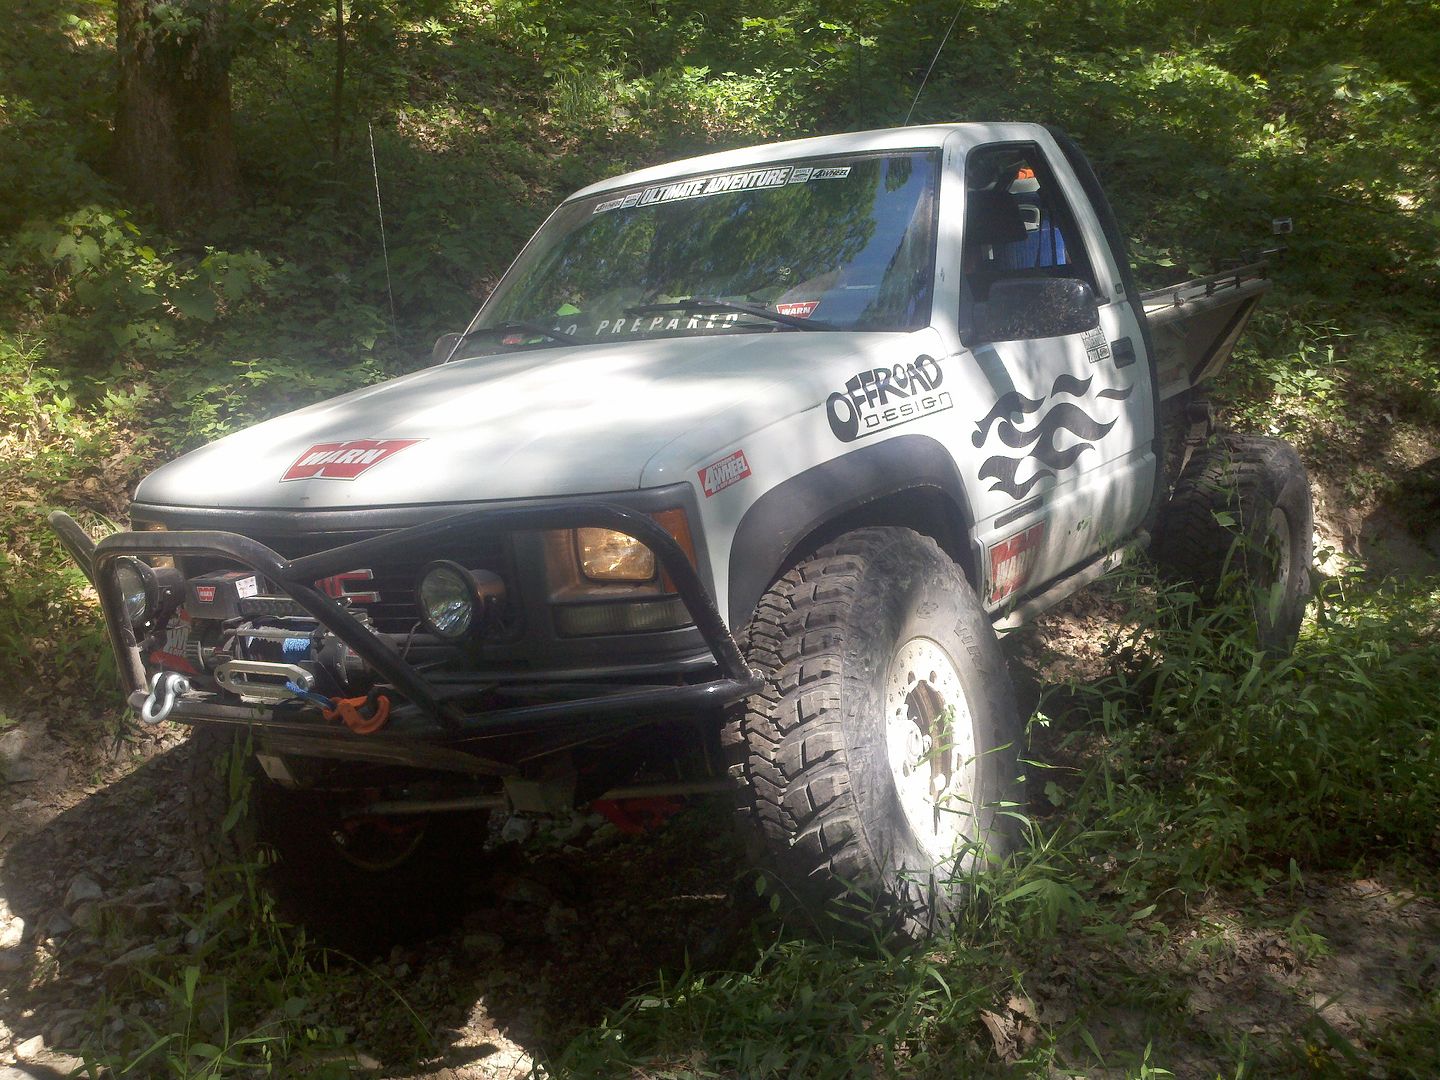
We hung the grille system back on it this morning so it looks a bit more like a truck now.
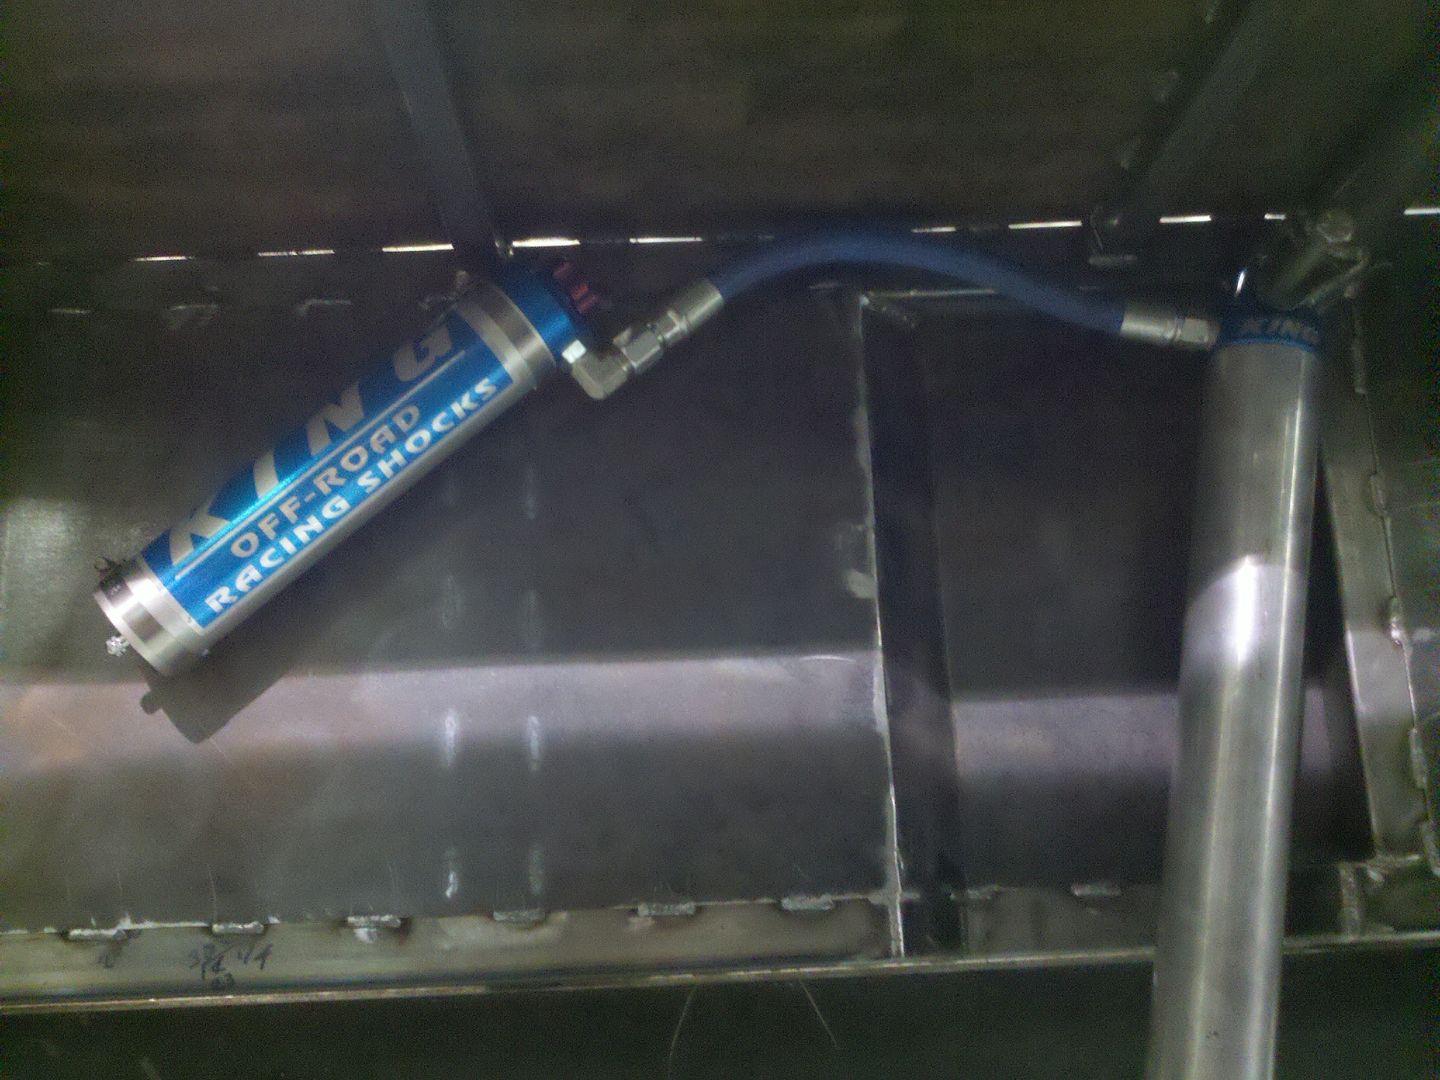
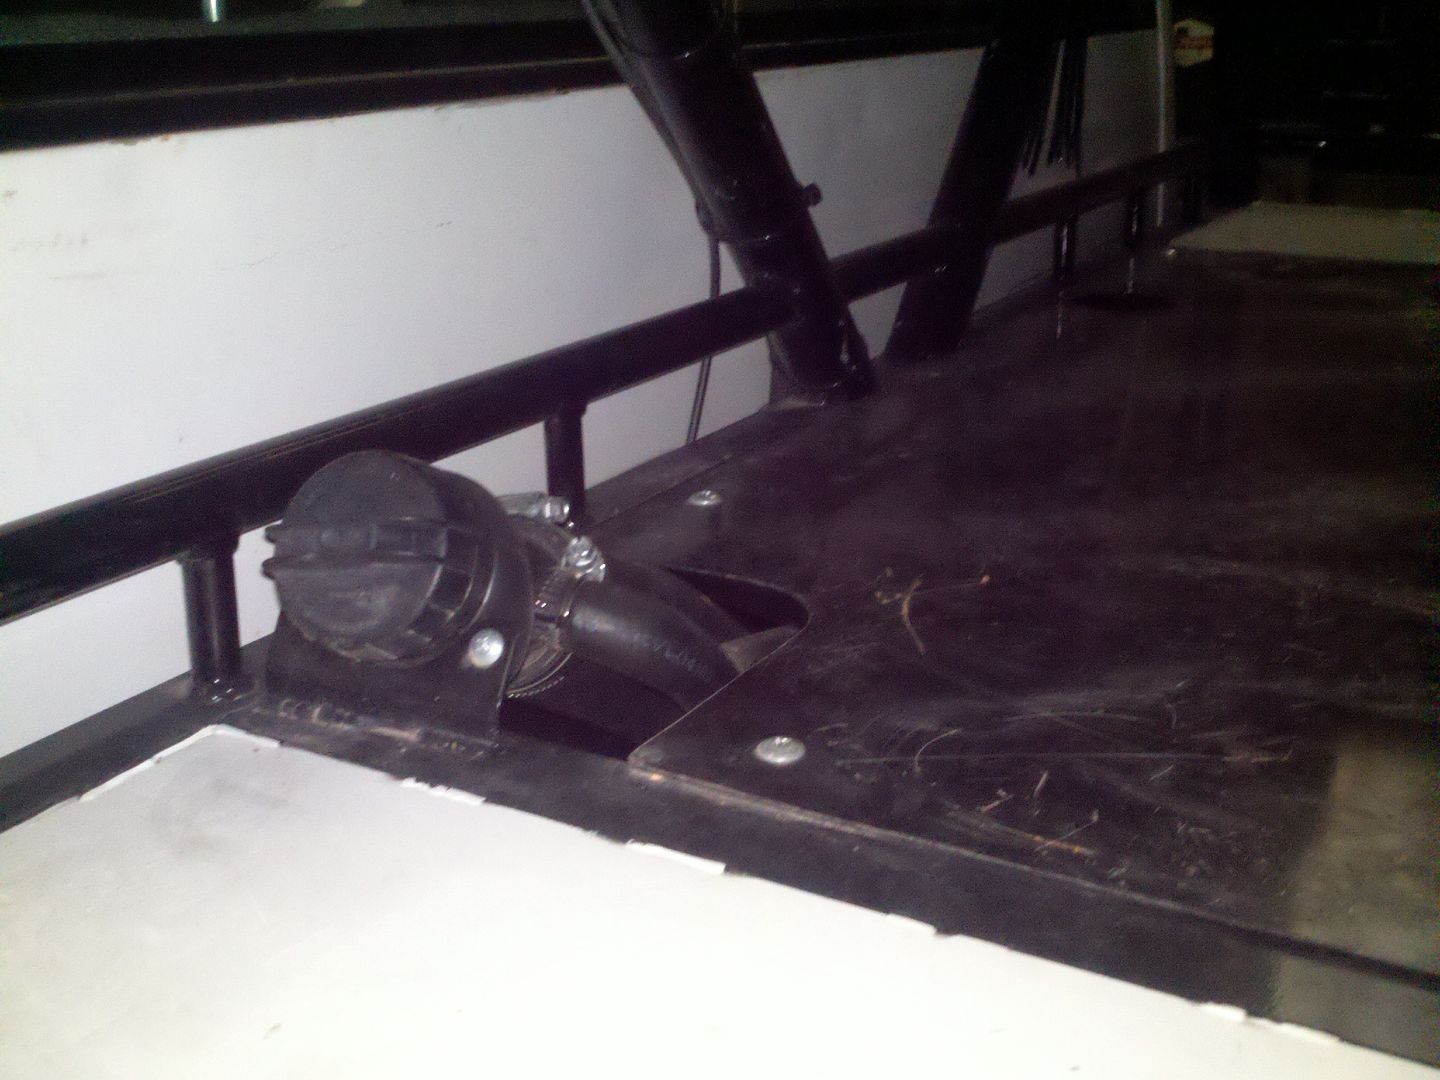
Shock mounts in progress and bump can mount:


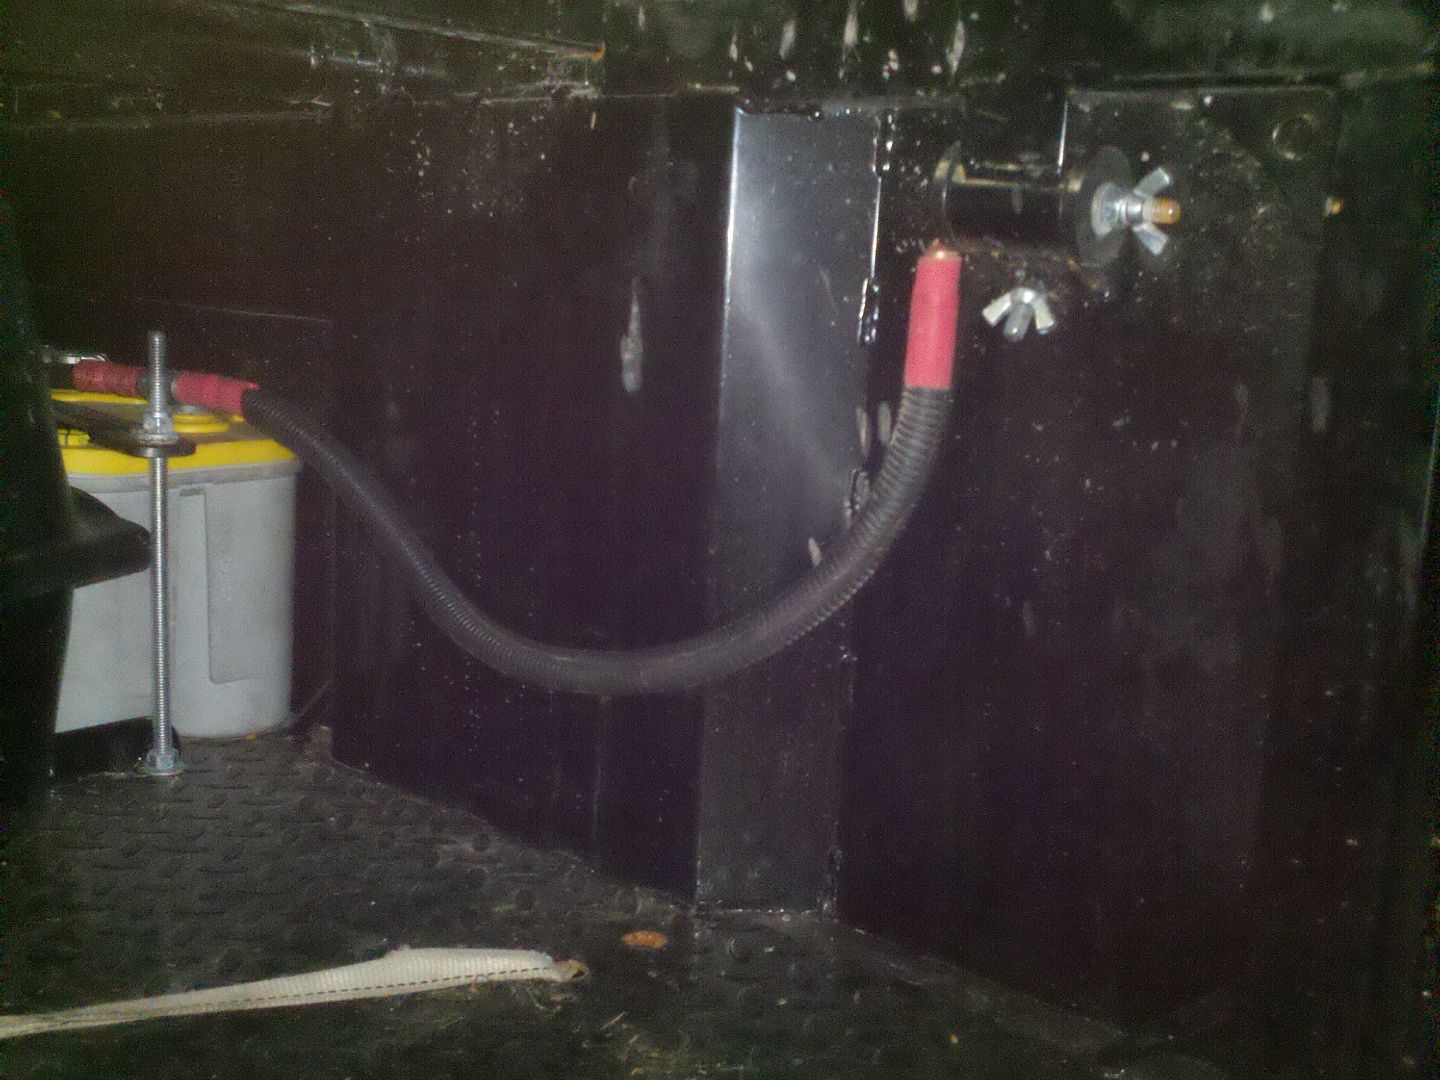
In the stock battery tray:
We ended up putting the ball valve for the rear brakes down near the factory ebrake location since it wouldn't bleed easily up high like we started. We might have been able to get it done but not in the time frame we had so i pulled it down. Luckily that was just that easy since we used flex lines. Glad I didn't hardline it up to the top of the dash.
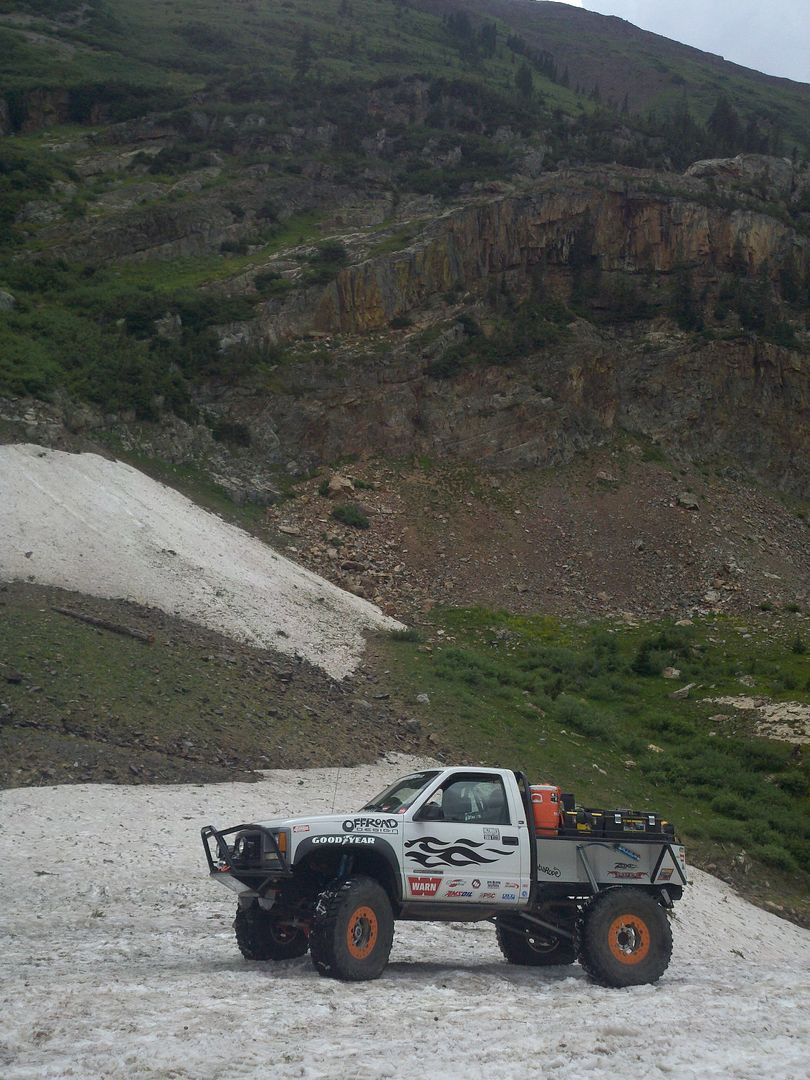
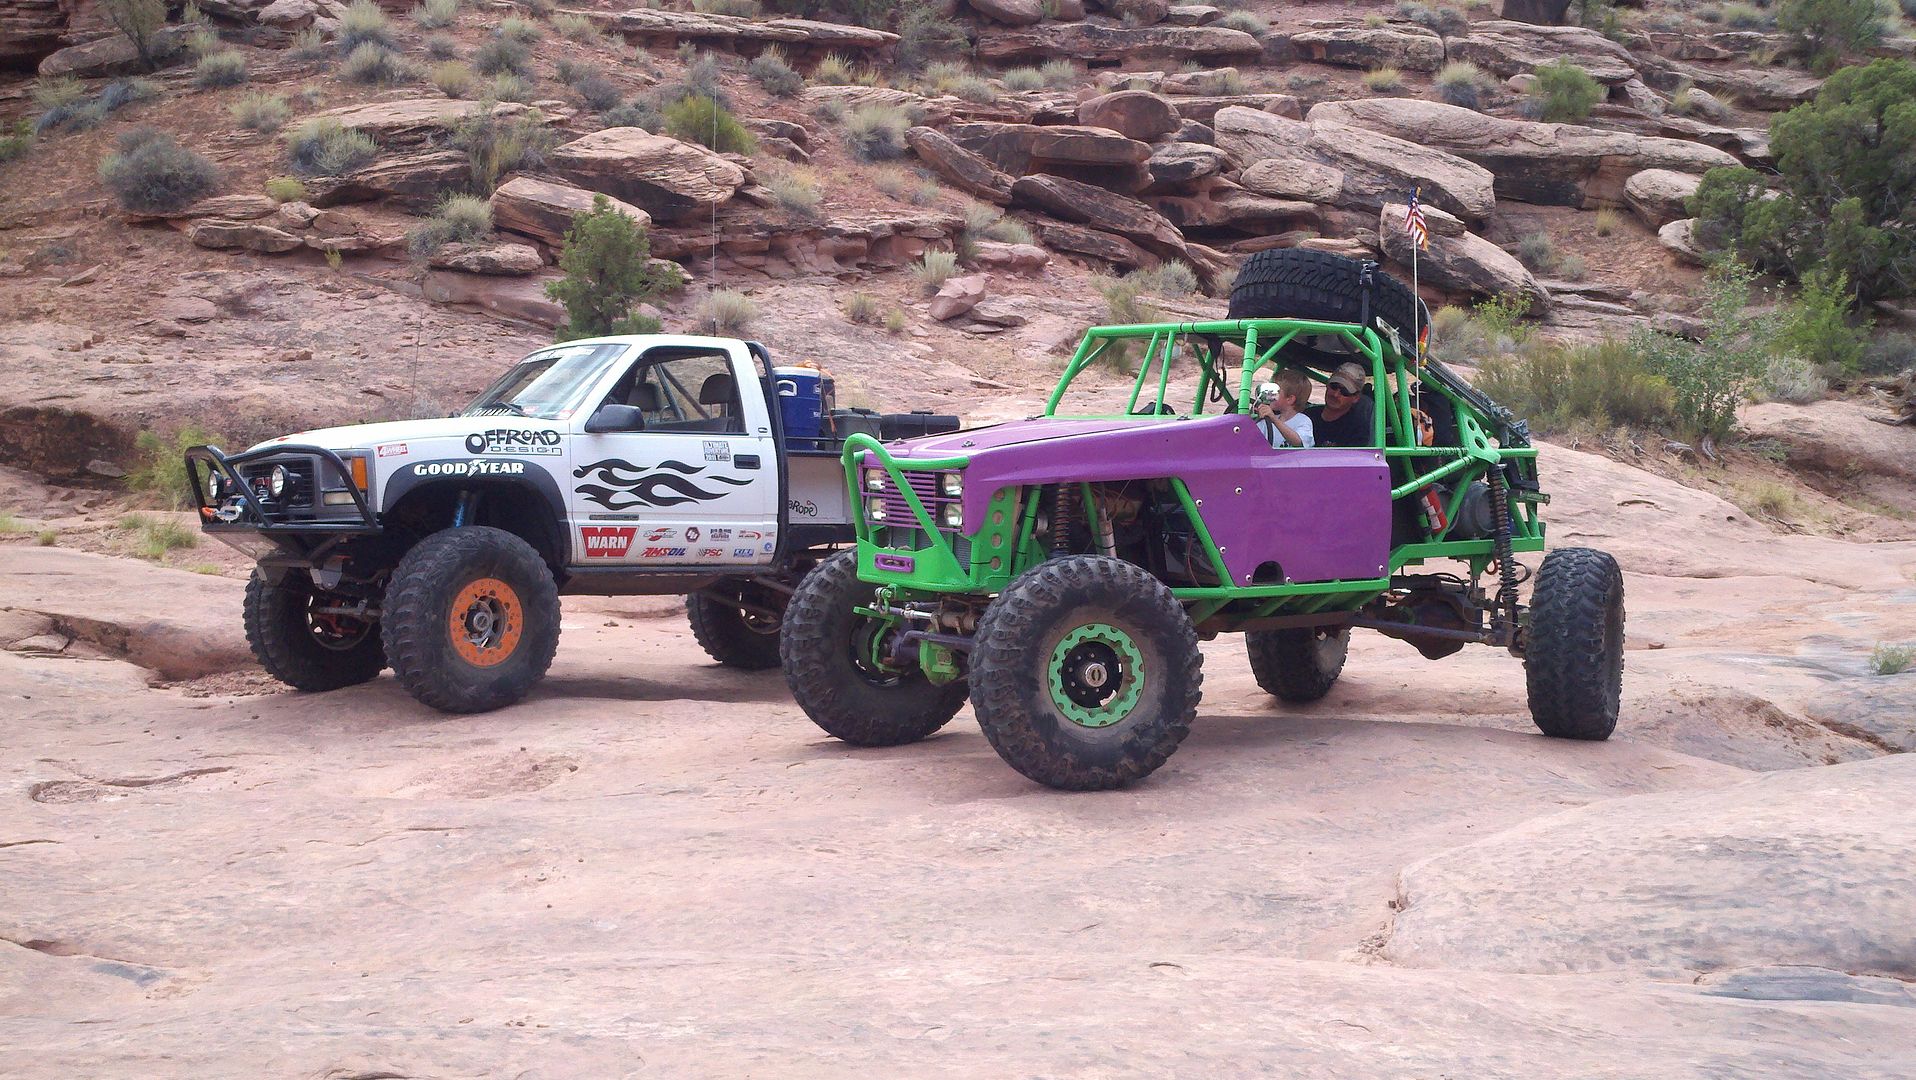
Bottom of the Punchbowl on Schofield:
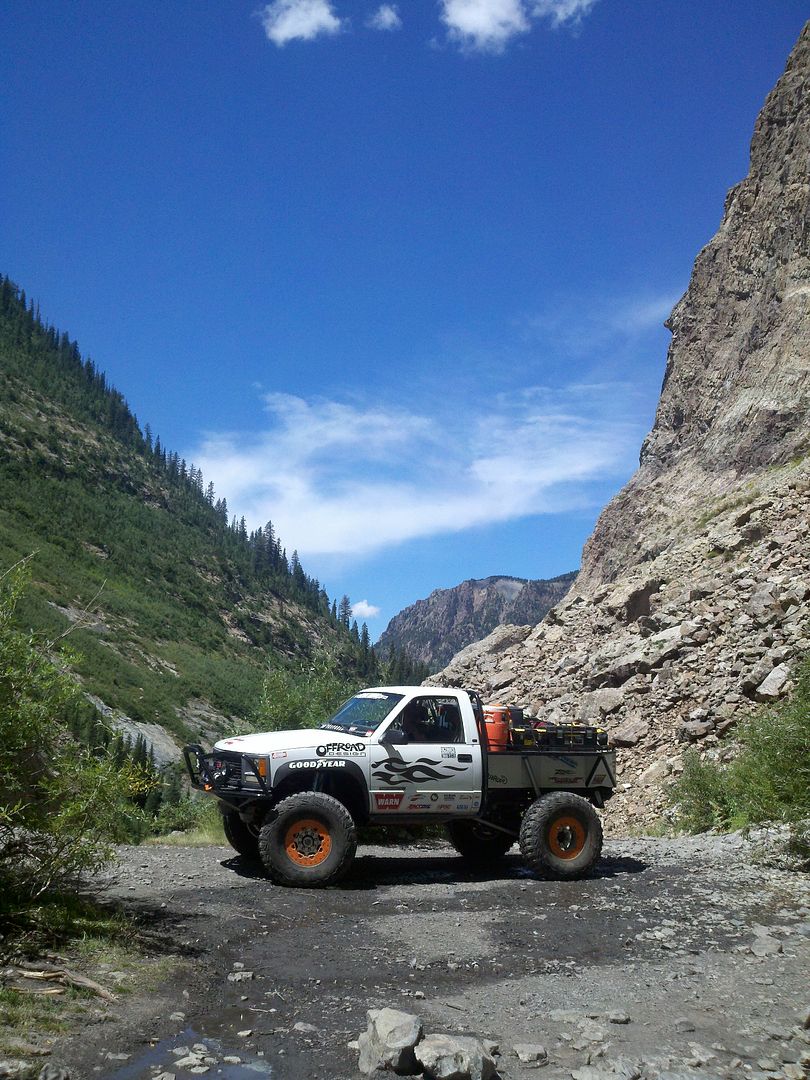
We ended the trip driving from Aspen to Rifle for my brother in law's birthday including a 80 mph rip down the interstate. 80+ is not great in the truck, you can feel there's a lot of drag and I can just about watch the gas gauge move. Overall milage has been really hard to check since with a 40 gal tank the use is always mixed but with a trail/road mix it's around 8 mpg and is running about 10 on the highway at interstate speeds, around 70.
On that trip the manual trans was good, no situations we didn't have the right gear to do stuff and it was kind of nice not ever thinking about the trans temp.
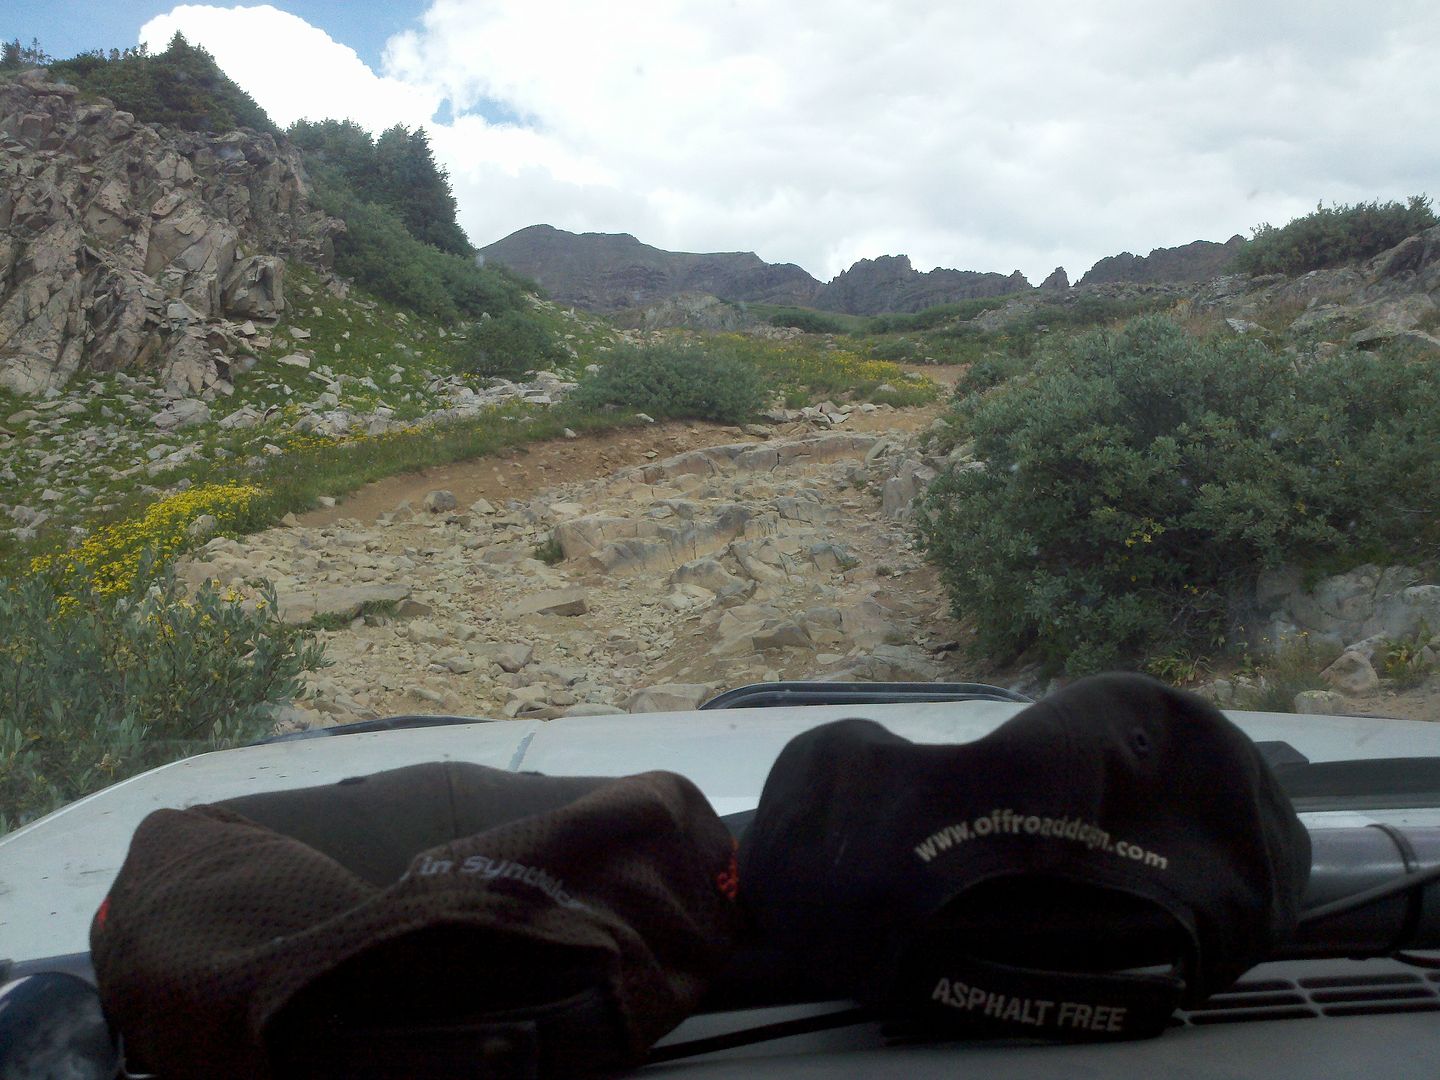
I guess the point of what's essentially a trail report on a build thread is the fact that the truck took us on what turned out to be a real vacation for me. It's comfortable, reliable, over capable, has plenty of room for our gear and took us into some amazing places not everyone gets to go with no stress at all. And it was ready to go with very little prep work, that's really important to me right now.
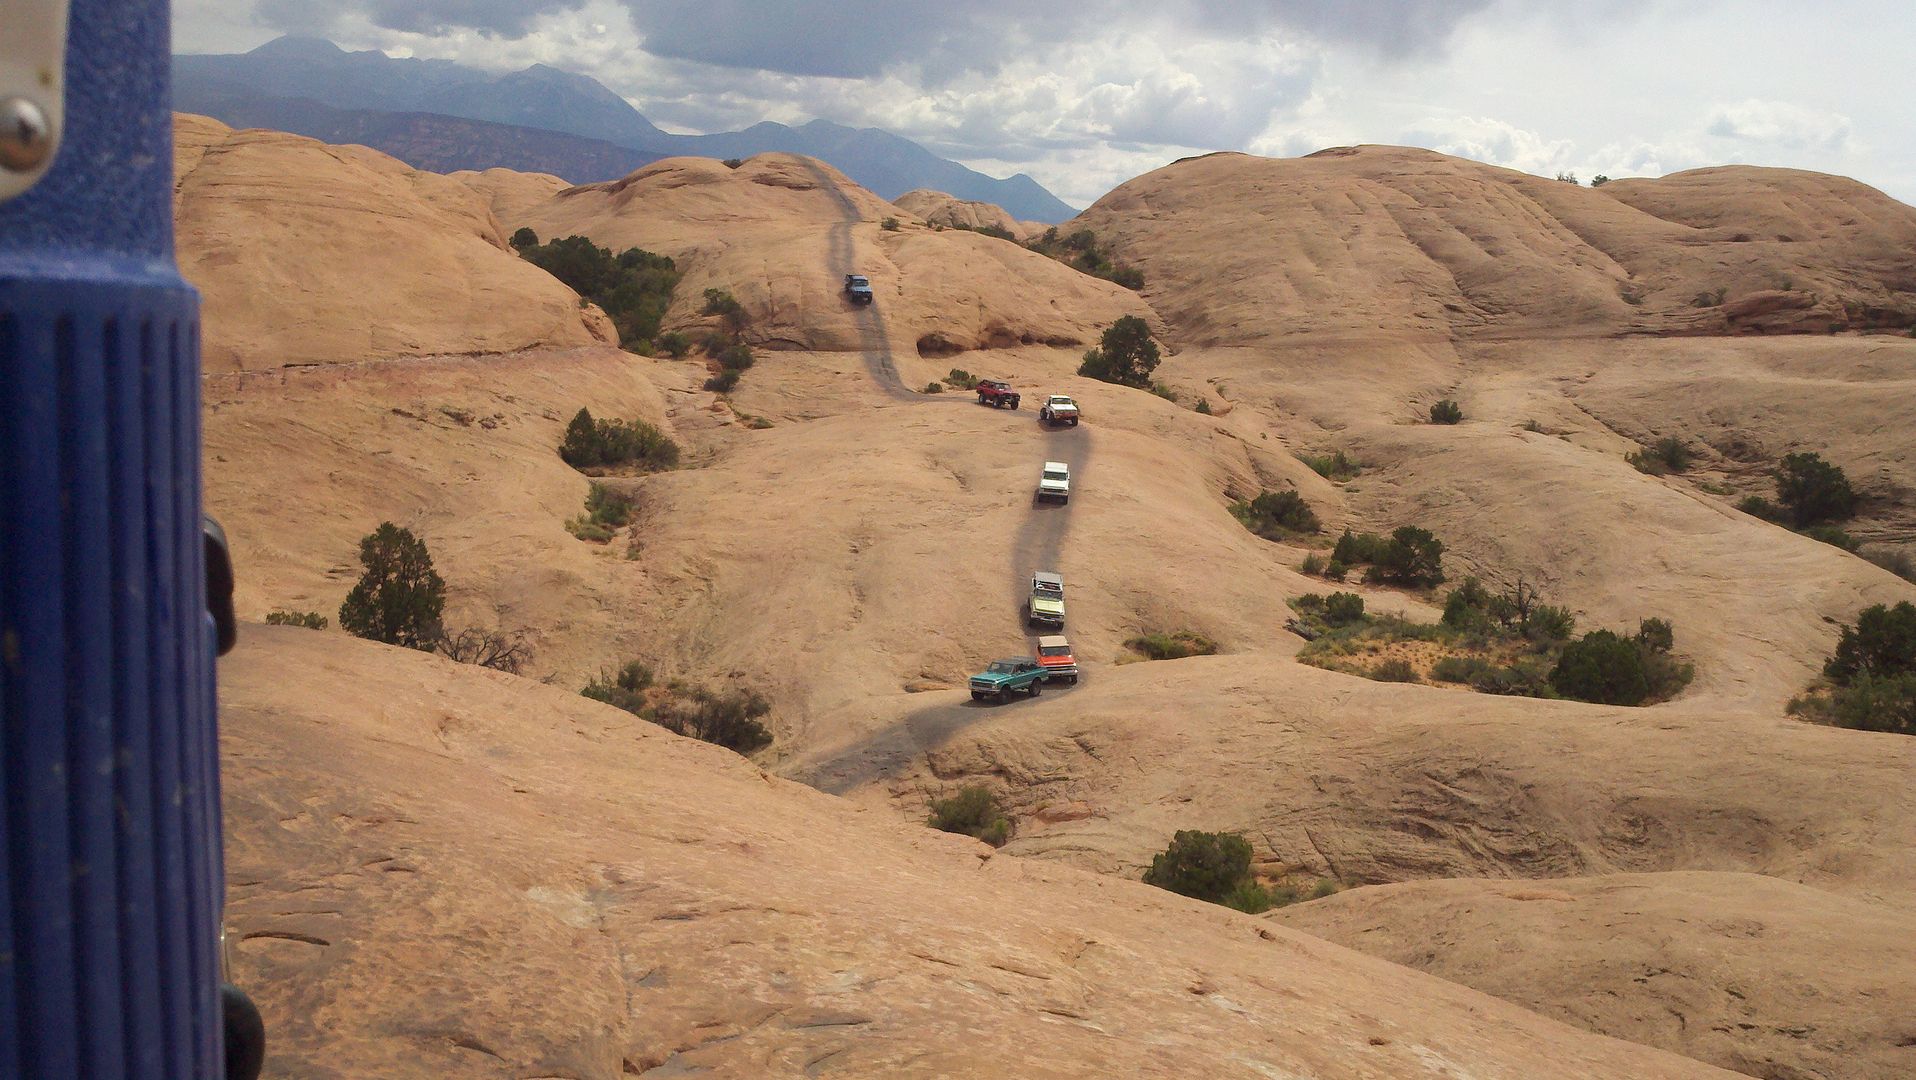
Hell's Revenge with a bunch of super nice K5s getting lost in the scenery:

It's also hard to transition smoothly from a slow crawl to a stop. With the auto that's just taking pressure off the gas and/or putting more on the brake. With the manual you may have to go from holding back with the brake while pushing on the gas to pushing the clutch with the left foot and grabbing the brake with the right and it's not going to be as smooth as is should be. When traction is at a premium that situation makes me nervous.
For this truck's purpose in life (a do it all exploring camping trail capable truck) the NV4500 is great. It really only gets uncomfortable in places that it probably should not be and to give the trans some credit, I'm still learning to play with it and there's room for me to close the gap to the auto's performance in the hardest spots. I just don't think it will ever be as good which I'm not the first to find and probably won't be the last. I remember when Pat Gremillion finally got rid of his NP435 in his bronco after a backward roll while he was trying to get it into reverse and missed. That's been a while.
I drove the truck from our shop to Moab and back and it was really pretty pleasant. The cab has some wind noise to work on from the B pillar area but otherwise it's pretty comfy. That became a bigger deal on the way back since I drove home after running pritchett which meant a 10:30pm departure from Moab and about a 2:30 arrival at home after stopping to take 2 naps. Driving an uncomfortable truck would have been worse than that trip already was.