Re-loaded "Our 4x4s" from the old website: Wally

Below is the build thread on Wally from our old website!
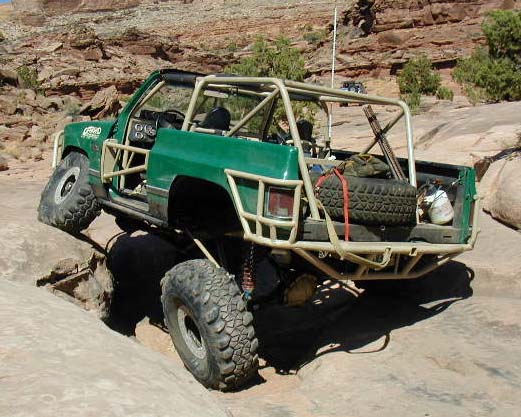
Wally
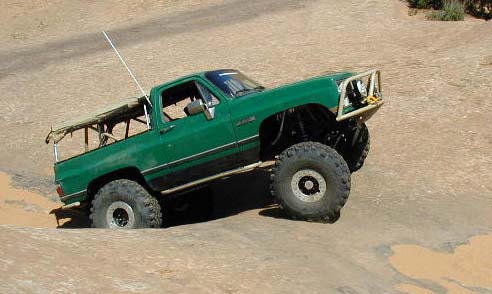
Wally, our K5, morphed again. This time in response to a bent and twisted front axle housing, a desire for better side clearance, a bunch of bent up metal and of course a desire to improve performance.

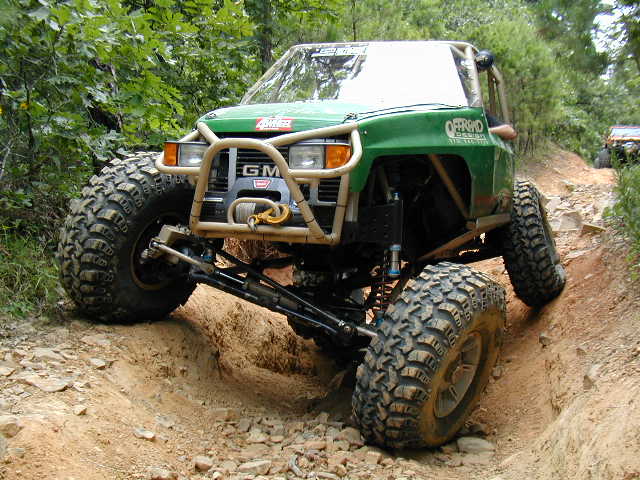
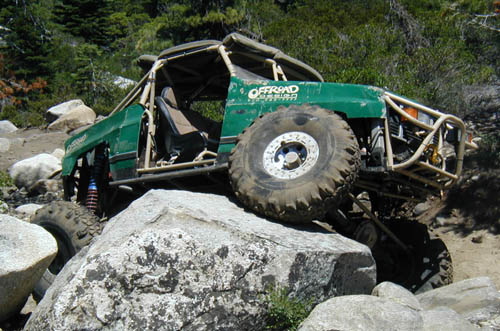
Here it is on the trail in Poteau:
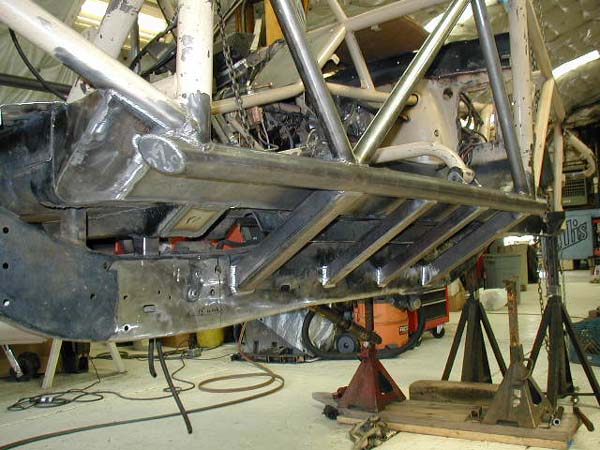
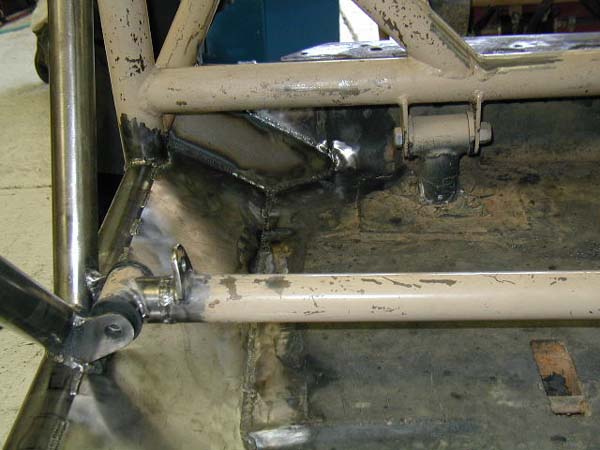
Here are some shop pics of the recent changes. Here you can see the stripped chassis with the new tube work in the previously open door areas and the raised nose.

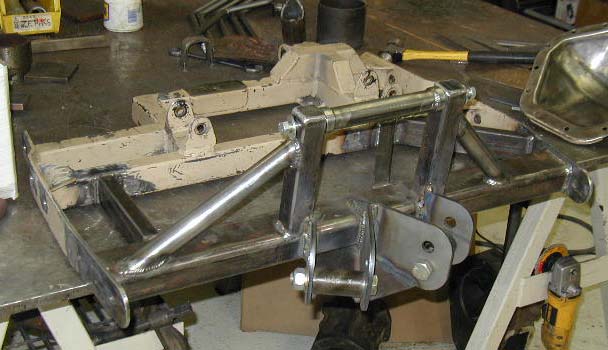
This is the repaired t-case crossmember with the rear suspension mounting brackets. It was bent up to the point the crossmember was hitting the 205 so now it's beefed up and trussed to prevent that.
These show the new "boatside" job on the rocker area. Up to this point, the nerf bars were in the same location as they had been with the full body, now they fit the rest of the truggy much better.
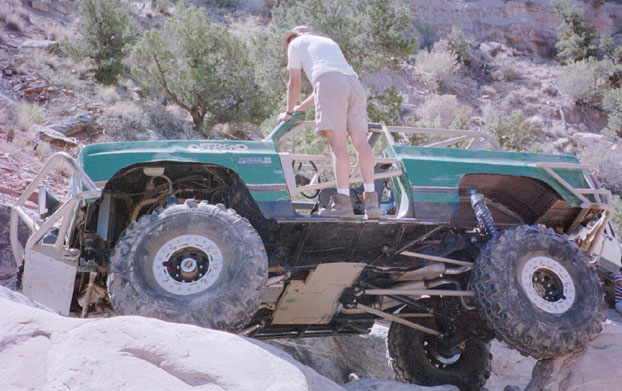
Here are a couple of pics of the configuration before summer '05. After the rolls in Farmington we ran the truck a couple more times and then started on the rebuild. The front was converted to a full tube structure and the original body panels were beat to fit. The factory core support that was used in the original taper job was pretty mangled so custom radiator and cooler mounts were built into the new tube structure. The winch was also integrated on a new lighter weight mount and some headlight/blinker housings were added so we would at least have DOT legal headlights and signals. These pics are all from our Rubicon trip the first of July '03.
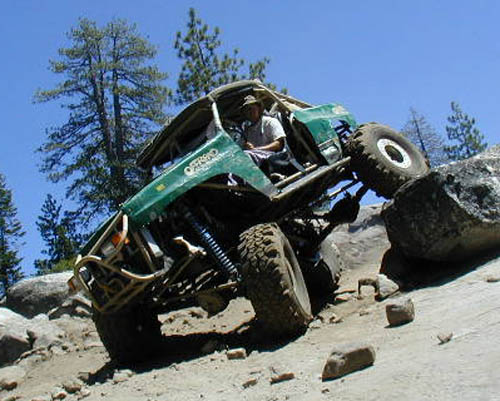
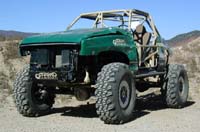
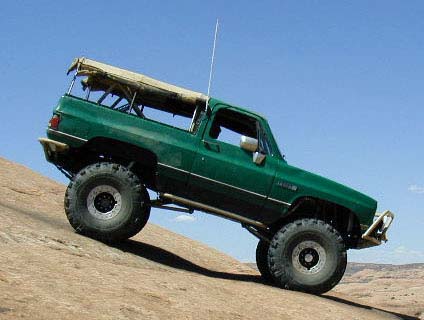
As for performance, the truck is a whole new beast since the body was removed. It still weighs in around 5200# but is about 1000# lighter, somewhere around a foot narrower and the ends taper in from there. We used to ask if we could fit on trails, at this point, we don't bother. All restrictions have been removed. There's still room to carry the kids in the back (luckily they're still small) and/or enough gear to spend a long day on the trail. It's a very fun truck to drive.
The shot below is the only photo we have of the truck after the original taper job. It really was a clean looking vehicle for about 2 days. Some advice: take pics at every oportunity if you care to remember what your rig looked like, it may not stay nice very long. If anyone has pics they took at the Supercrawl check in that they would like to share, we'd sure like to see them.
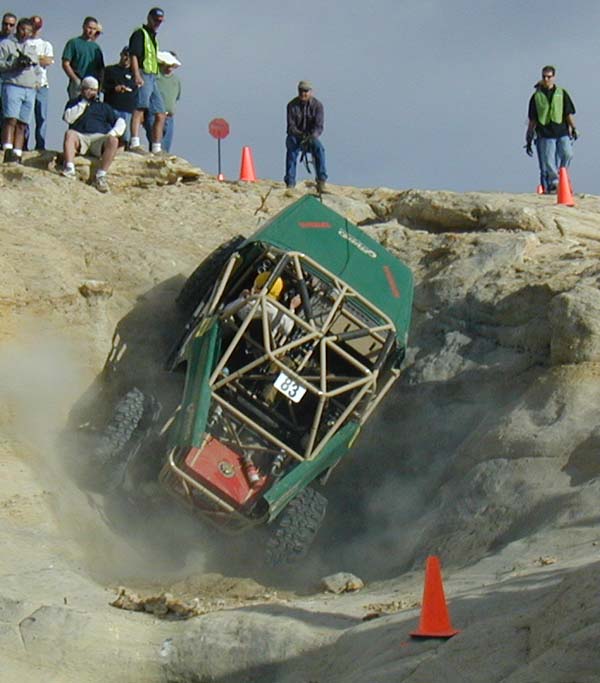
New Additon as of 10/8/02, we tubed out the rear of the K5, mounted a fuel cell, changed the cage design, tapered the nose, and mounted bed skins in the rear. Then took it to the UROC Supercrawl and rolled it. Oops.
New addition as of 8/24/02, we linked up the rear suspension and put the coils over the shocks. We also went with triple rate springs all around. We'll be adding some shop pics of the system but here are some action shots from Upper Helldorado and Pritchett Canyon in Moab.
You can see the lower arms for the triangle for the lateral location and the upper arms run parallel to the frame. The lower arms also start above the axle tube in the rear for maximum ground clearance and to keep the arms flat for best torque control and to minimize axle steer under articulation. Here's a shot of the mock up in the shop:
Here's the info on the rest of the truck and the older leaf spring rear suspension that we ran from June'01 to Aug. '02.
This page contains a lot of pretty large pictures. This means there's lots of cool details but it takes a long time to load over a phone line. Have patience, it will be worth it.
After attending and competing (as a spotter) in Fourwheeler's Top Truck Challenge in 2000, we were hooked and basically decided to build our shop K5 into a serious competitor for the title of "TOP TRUCK". After competing in TTC2000, we knew that a truck built to do well in this competition would be a good vehicle for just about any type of off road use, so we didn't feel we would be too specialized for real world use after the event.
We had a few criteria that we felt were important after watching and competing in TTC. We really felt that there was no way to win without a 40" or bigger tire, wanted big block power just to make sure we could spin the tires and knew that it would take a well engineered, built and maintained rig to do well. Our components were chosen from the ground up specifically to do this job.
15-42-16.5 TSL Swampers were the choice as the best balance of a truly huge tire without a lot of width or added rotating mass. The TTC rocks are big and the mud is deep and the only way to get true ground clearance is with big tires. We grooved them to get more biting edges and increase the flex in the carcass of the tire for better grip. The wheel choice came down to the last minute, but Trail Ready came through with a set of prototype 16.5" beadlock wheels that worked out really well. We were able to use 5" of backspacing on the wheels to keep the track width reasonable, and keep the majority of the tire in the fender without having to run flares. The steering also works well with the tires centered over the knuckle. The tires pretty much set how the drivetrain was built due to the torque and power required to make them work.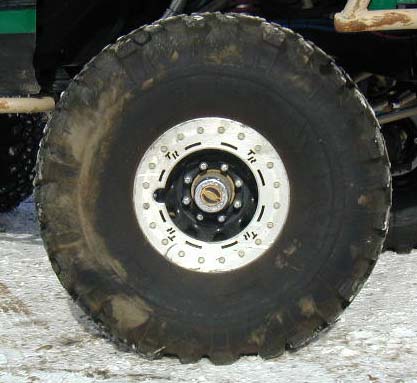
We knew that stout axles were a must (that's pretty much a no-brainer) so the 14 bolt full floater went back into the rear, and a D60 was built for the front. The Corp 14 bolt full floater had already been in the truck for several years and had just lost it's place to a lighter axle when we were running smaller tires, so it was ready to bolt it. We had disc brakes and a Detroit locker installed already, so we changed the gears to 5.13's and shaved the diff to get it ready to thrash. Here are some shots of the 14 bolt shaved and the custom cover we built for it.
.
We air-arc'd (electric gouging process) the lip off and ground the rest smooth. This was determined to be the best clearance gain for the time invested. More could be had by actually cutting out the bottom of the housing and plating it in, but the time involved vs. extra clearance gained wasn't nearly as good as just removing the lip. Plus the external grinding could be done with the gears installed in a driveway.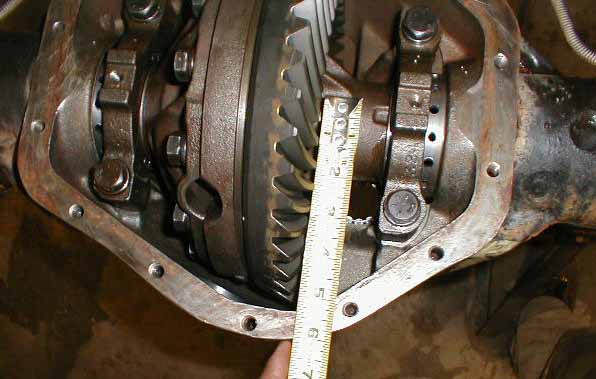
We plated the factory cover with 1/4 and 3/16" plate to rock proof it. You can also see our dual braided lines dropping down to the axle. One line controls each brake via a cutting brake valve.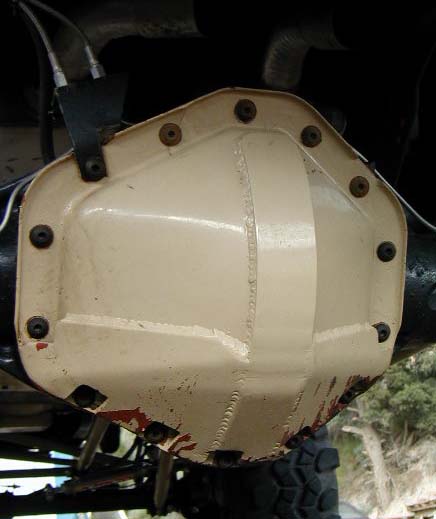
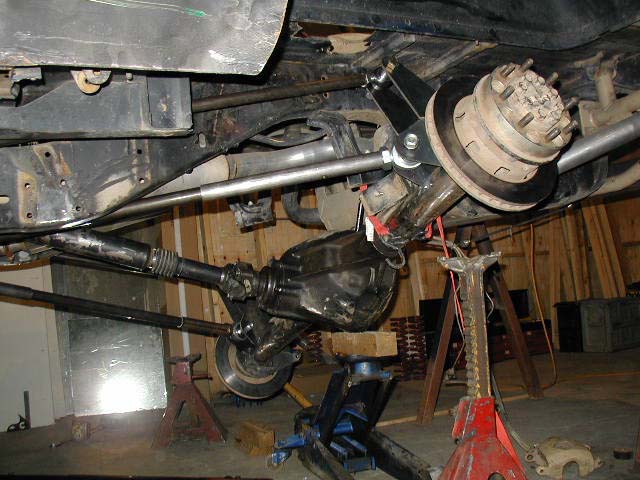
We knew we needed a Dana 60 front axle but the final form took a little while to materialize. We eventually came to the conclusion that it would be reasonably economical to use a Tera60R diff housing and build it to use all GM axles and outer parts. Even though the diff is on the left side, it uses GM inner shafts and outer hubs, etc so it's easy to find parts. The high pinion was necessary to keep the driveshaft angles good through the entire suspension travel we had planned. By starting with a brand new housing and tubes we were able to point the pinion right at the driveshaft like it needed to be, and rotate the knuckles to retain perfect steering castor. The Tera60R diff was filled with reverse cut 5.13 gears which gives a nice strength bonus to the gearset. An ARB air locker was the choice for the front due to previous good luck with them and the fact that the truck handles really well with the front unlocked but needs full spool traction in some of the terrain we play in. 35 spline outer shafts were added along with a drive flange in place of the locking hub to make sure we didn't break parts.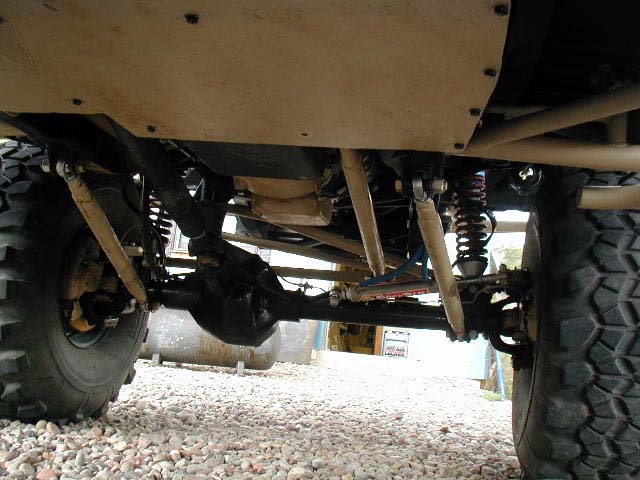
We knew our Doubler kit was ideal to handle the tires and the torque necessary to drive them, so that was set up next. A unique Doubler was designed using the GM NP203 rotated 90 degrees and a Ford 205 rotated flat. This let us use a driver's side front driveshaft for more clearance past the transmission and left nothing hanging below the frame rails. The 203 and 205 were both rebuilt and the 205 was modified to use a twin stick shifter enabling the front wheel drive only position. This helps tighten the turn radius in tough terrain. The front and rear use 32 spline output shafts with Tom Wood's Custom Driveshaft flanges for their 1350 high angularity CV driveshafts. Not much to see here of the Doubler, it's all kind of hidden which is exactly the point! You can see the top of the NP205 disappearing through the floorboard.![]()
The transmission choice was pretty tough. We've always run a TH700 in the truck with no problems, but with increased power and torque, a TH400 was strongly considered. An beefed up TH700 finally made the cut, mostly due to the availability of an overdrive, and the lower first gear. We have the ability to run a 37-38" radial tire at highway speeds, and have a deeper 1st gear for crawling. They say it's good for 700HP so I think we'll be OK. It's fitted with a manual valvebody to allow us to run in any gear any time we want, and about every conceivable beef up trick you can do to a TH700. We retained our marine type gate shifter since it works just like we want it.
The engine was a pretty simple choice.We felt that big block torque was necessary to spin the 42's in the acceleration and the mud and any other situation that needs pure power. The old 383 may have been OK with the added gearing of the Doubler, but we wanted every edge. There was a nicely built 468ci big block in our snow plow truck that dropped right into the K5. It had been assembled with 9.5:1 pistons, a balanced rotating assembly and some well ported factory heads. We did install an Edelbrock multi point EFI system, JBA headers and a new Comp cam, but overall it was a pretty easy swap compared to a ground up build. The Edelbrock EFI was chosen because it controls the fuel and the timing, is an efficient and powerful multipoint design, and is tunable using a small handheld computer furnished with the kit. No laptop is necessary to change any of the operating parameters so we can make it do anything we want at any time. The headers are JBA shorties designed for a late model Vortec truck and were basically chosen for ground clearance. Frame rail mods were required to make them fit but they allow everything to be tucked up and away from the big rocks.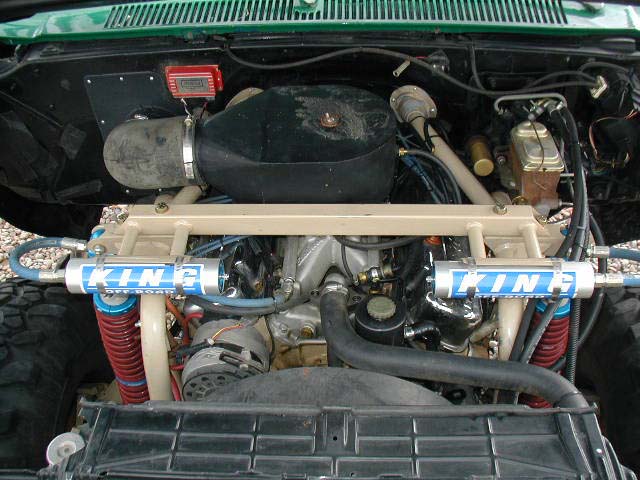
The airbox was custom built by a local sheet metal shop with a 5" diameter neck for the snorkel hose or for a conical air filter.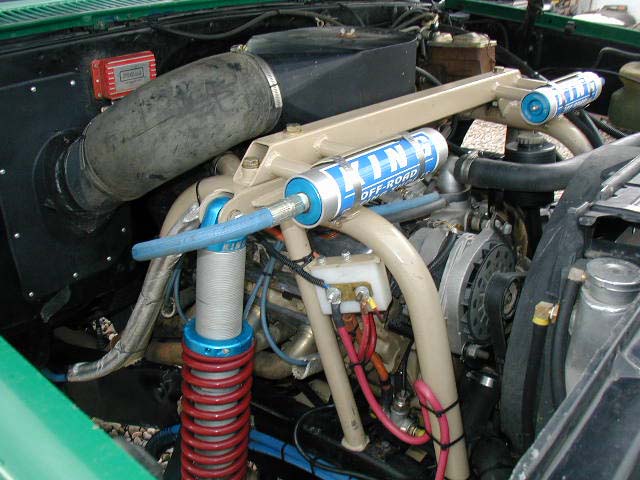
There's not a lot of room for the motor left here! Passenger side view above, Driver's Side of the motor is below. It's pretty easy to take the pictures since there are no inner fenders.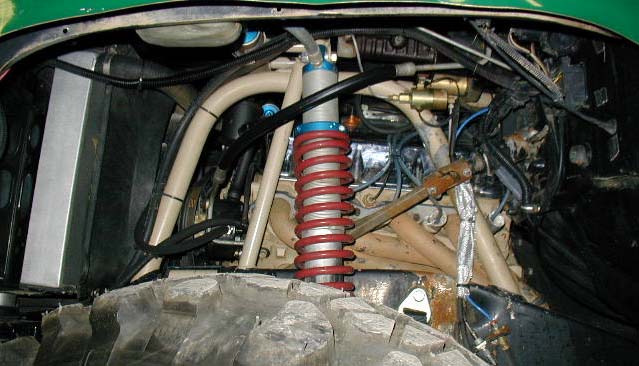
Driveshafts were a major criteria in the design of the supension and layout of the drivetrain. We knew that reliability is the A#1 priority so strength of the components and attention to the angularity throughout the travel were VERY important. We used Tom Wood's Custom Driveshafts' special 1350 high angle CV jointed shafts to make sure there were no problems. They're good to 30+ degrees of motion at the CV and we got 36 degrees with some custom handwork. Both diffs use 1350 yokes and ujoints also. We lucked out on the length of the driveshafts in that both front and rear can use the same length shaft. That's really convenient since it allows us to carry one spare, or interchange them if need be.
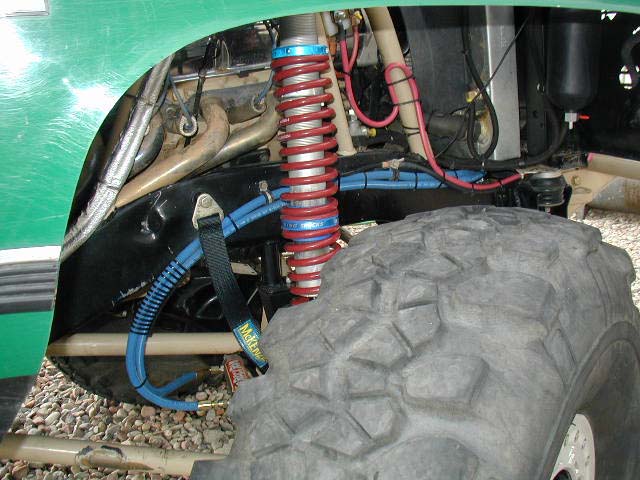
The suspension is where the true engineering came in. Our overall goal was 14-15" of vertical wheel travel, the best handling possible, quality fade free damping, and enough strength to live through some minor "crashes" while still staying tucked up enough to give the truck good overall ground clearance. We're not asking too much here are we?
Lift height is about 6" in the suspension and we also have a 1" body lift. It measures about 15" from the top of the front axle to the bottom of the frame and is pretty adjustable given the coilovers allow you to change ride height by several inches. We picked this supension height because it allowed the suspension room to work without the front diff hitting the motor while still keeping a pretty low center of gravity.
We boxed the frame from the front end to behind the transfer cases to add strength and bracing to take the new loads of the link and coil suspension. The roll cage has been frame mounted for several years and a few new points were added to make the frame as rigid as possible.
Link and coil suspension was chosen for the front to give the steering response, wheel travel, and articulation needed for all around use. Previous buildups using leaf springs with high quality shocks and various steering setups indicated that the level of performance we were after just wasn't there without the precise axle location of a linked up suspension. We did consider separate coils and shocks, but by the time you mount a 2.5" shock with a separate spring, it's easier and cheaper to just mount the coilover shock and be done. So King 2.5" coilovers got the nod. This picture shows the construction of the suspension and the installation of the AGR Rockram hydraulic assist cylinder. The ram is mounted behind the axle to keep it out of the way of the steering linkage and the rocks.
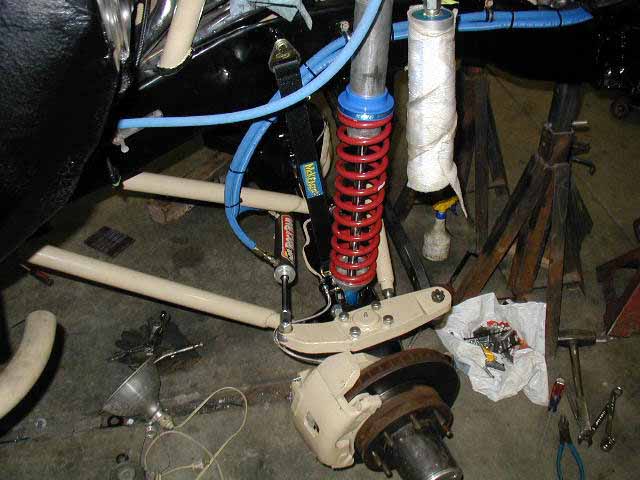
The photo below shows the routing of the brakeline, ARB Heavy Duty air line and the breather hose from the axle. We used a single flexible brakeline and a "T" at the axle instead of 2 drop lines.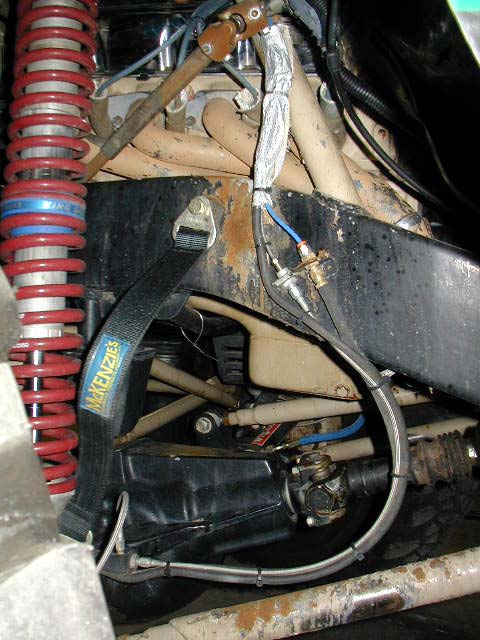
The steering system seems pretty complex, and it definitely more involved than a stock type or regular crossover setup. Steering systems really only need to achieve 1 goal, turn the tires to the stops all the time and not steer itself as the suspension moves. We used the AGR Rock Ram system to get the power to move the tires when it's bound up.
The linkage geometry came about for a couple of reasons. One is the new link suspension allowed enough articulation and steering to run the tire into the steering box on the outside of the frame rail. So the box had to move inside the frame somewhere and the easy place to snake the steering shaft to the box was with the box in the front right corner of the frame. This location also let us use an idler arm in the steering which made it easier to set up the angles to eliminate bump and roll steer. It's all very dense but works VERY well.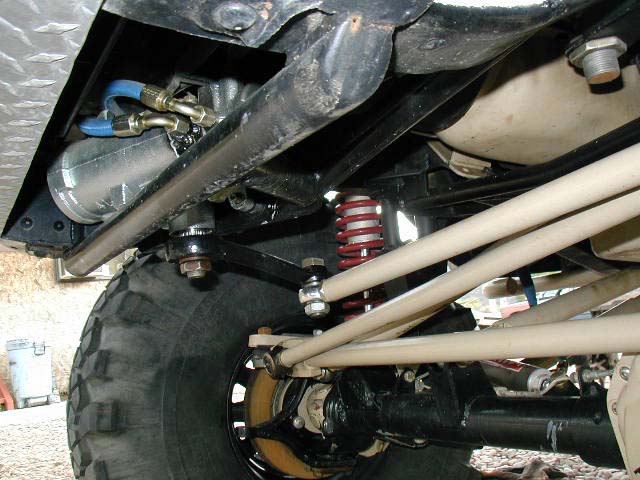
The above picture shows the steering box mount and linkage, the photo below shows the mounts for the panhard bar and the idler arm. Note the weld in frame repair kit from the previous steering system.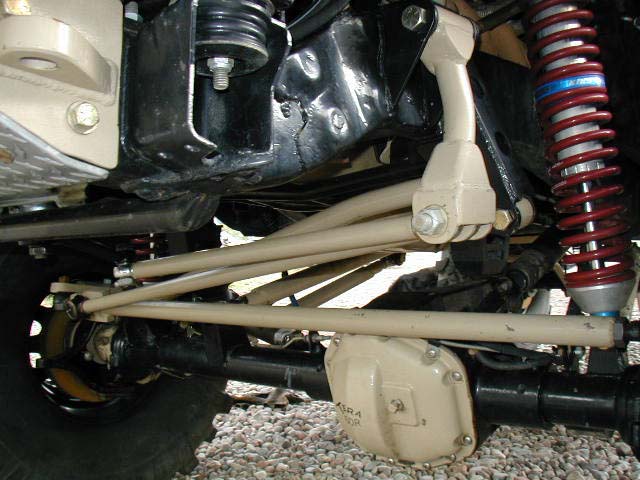
The rear retained leaf springs for simplicity but the springs were stretched to 63" and are a custom ORD pack. We moved the rear axle back 3" to increase departure angle and lengthen the wheelbase a little. The 2.5" King shocks were mounted to the ubolt plates and run through the floor to custom upper mounts. We haven't measured the rear wheel travel but it's pretty safe to say we got our 15" of vertical. Traction bars were added to keep the pinion in line since we now had the power and traction to really rip stuff up. The bars work well for keeping the driveshaft alive and don't compromise clearance by a lot but we are looking into ways to streamline the mounts.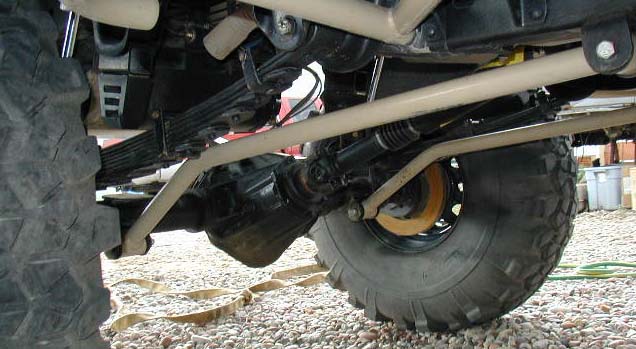
Here's the rear shackle, it was custom built longer and wider than stock to have a good arc of motion and still be stable. Our old shackle fllip bracket is still mounted backwards on the frame from the previous suspension buildup. 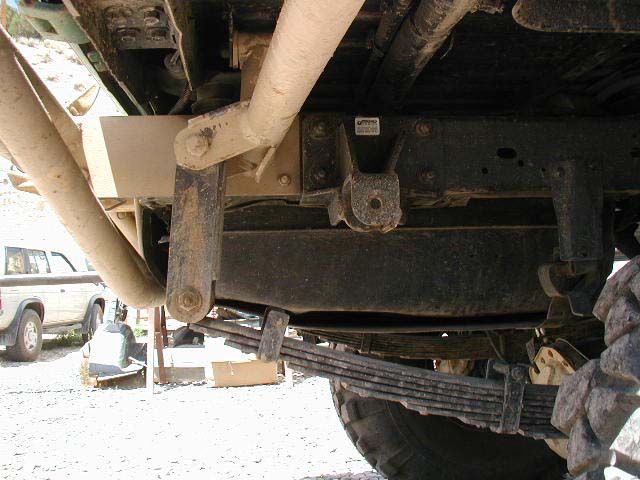
The truck ramp tested about 860 on a 30 degree test ramp at the event so we know the suspension will move!
The truck already had good bumpers and a nice cage, so the interior was classed up with some racing buckets and some additional cage bracing and that's about it. We did have to build a good sized tunnel in the floor to accommodate the transfer cases and the shifters were custom built to fit in with the cage. The door panels were also swapped out to match the overall tan and green color scheme. This shows the custom glovebox we built to have lockable storage. It also houses the computer, fuses, and relays for the EFI system to make them totally weatherproof. The snorkel is pretty obvious too.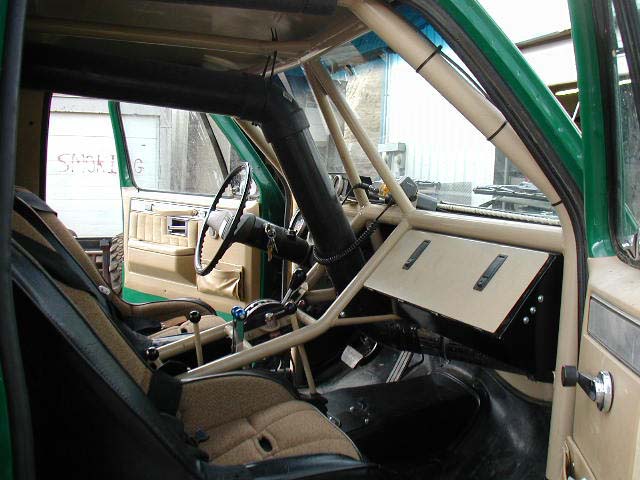
Below is the rear of the truck, shows the rear shock mounting hoops and rear cage.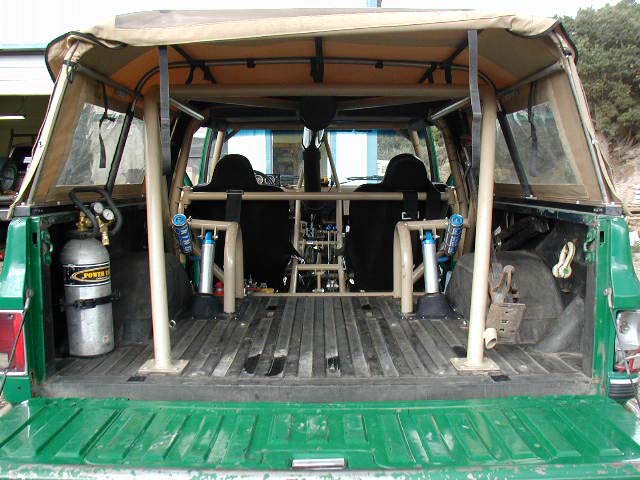
And here's the driver's side interior.
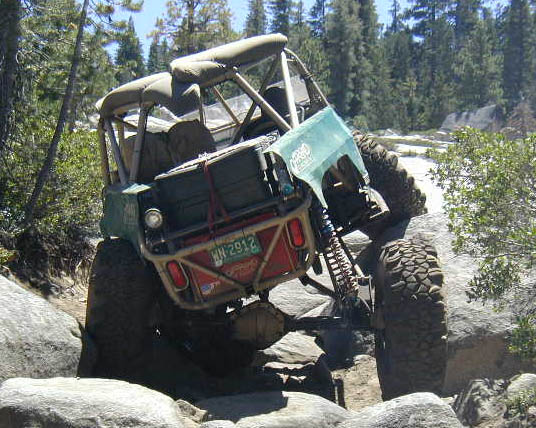
We stopped by Moab on the way back from TTC and took some pics to show the overall clearance under the truck.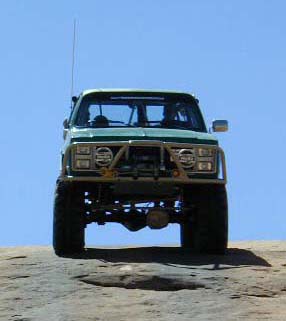
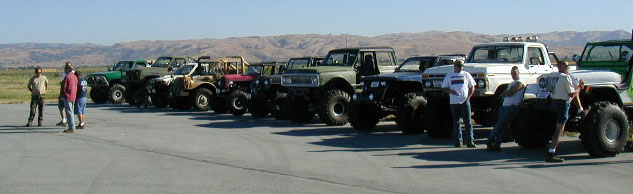
Here's the TTC lineup at the acceleration event: Never thought my K5 on 42's would seems so short.